
How to Make the Best Healthy Homemade Chicken Nuggets
There is a universal, undeniable appeal to a perfectly golden, crispy chicken nugget. For decades, they have been the ultimate comfort food, the hero of quick drive-thru dinners, and the one meal you can almost guarantee a picky eater will accept without a single complaint. However, relying on fast-food chains or bags of heavily processed frozen nuggets from the grocery store often means compromising on nutrition. When you look at the ingredient lists on commercial boxes, you will frequently find unnecessary fillers, artificial preservatives, refined seed oils, and an excess of sodium.
That is exactly why learning to make healthy homemade chicken nuggets is an absolute game-changer for your weekly kitchen routine. By taking control of the ingredients, you can recreate that nostalgic, crispy bite using one hundred percent real poultry, simple pantry spices, and a clever baking technique that delivers maximum crunch without the need for a deep fryer.
Making your own healthy nuggets from scratch does not require complicated culinary skills or specialty equipment. With a simple seasoned ground chicken mixture, a standard breading station, and a hot oven or air fryer, you can achieve a tender, juicy interior and a shatteringly crisp exterior. This method elevates the humble nugget from a quick convenience food to a wholesome, incredibly satisfying, protein-packed main course that adults will love just as much as the kids do.
What Are Healthy Chicken Nuggets?
When we talk about “healthy” chicken nuggets, we are primarily focusing on the quality of the ingredients and the cooking method. Traditional fast-food nuggets are typically made with a mixture of chicken rib meat, skin, and various binders, which are then battered and deep-fried in heavy oils. This results in a product that is high in saturated fat and sodium, and relatively low in high-quality protein.
Healthy homemade chicken nuggets flip that script entirely. First, they utilize lean ground chicken breast, ensuring you are getting high-quality, lean protein without the mystery meat or excess fat. Second, instead of being submerged in vats of hot oil, these nuggets are baked in a high-heat oven or cooked in an air fryer with just a light misting of olive oil or avocado oil.
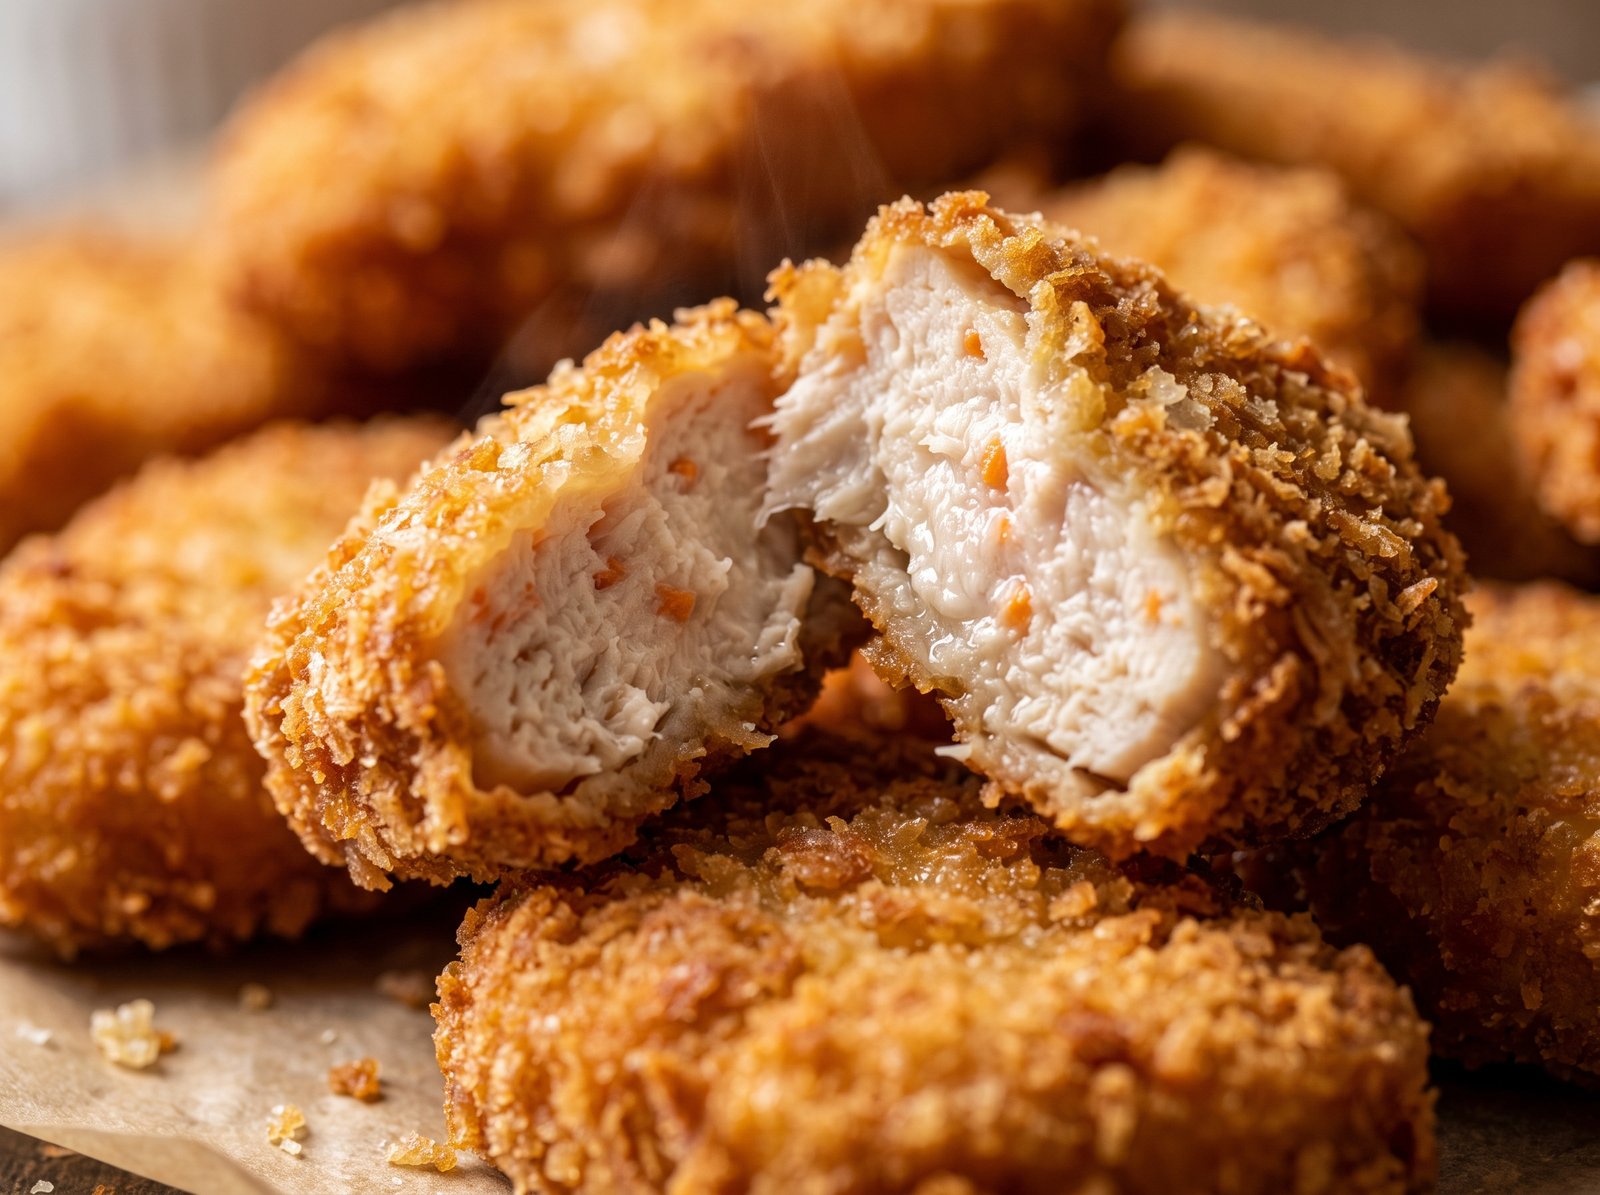
Furthermore, making them at home allows you to upgrade the breading. Instead of refined white flour and heavy batters, a healthy nugget relies on a light dusting of whole wheat or all-purpose flour, an egg wash, and a coating of crispy Panko breadcrumbs. You also have the magical opportunity to sneak hidden vegetables—like finely grated carrots or zucchini—directly into the chicken mixture. This not only boosts the nutritional profile with added vitamins and fiber but also helps keep the lean breast meat incredibly moist during the baking process.
Why You’ll Love This Recipe
Once you see how straightforward this process is, you will never want to go back to the boxed freezer aisle varieties. Here are a few reasons this recipe will quickly become a healthy staple in your household:
- Clean, Simple Ingredients: You know exactly what is going into your food. There are no artificial texturizers, modified food starches, or unpronounceable preservatives. It is just lean protein, fresh vegetables, egg, flour, and breadcrumbs.
- The Ultimate Meal Prep Solution: This recipe is incredibly freezer-friendly. You can double or triple the batch on a Sunday afternoon, flash-freeze them, and have healthy homemade convenience food ready to heat and serve on busy weeknights.
- Macro-Friendly and Nutritious: By utilizing lean chicken breast and baking instead of frying, these nuggets fit beautifully into a balanced diet. They provide a fantastic source of protein without the heavy caloric load of traditional fried foods.
- Perfectly Seasoned and Low Sodium: Commercial nuggets can be incredibly salty. Making them yourself allows you to control the sodium level entirely while enhancing the flavor with savory garlic, onion, and a hint of smoked paprika.
- Highly Customizable: From swapping the breadcrumbs for a gluten-free almond flour alternative to mixing different hidden vegetables into the meat, you have complete control over the final nutritional profile.
The Secret to the Best Texture: Hidden Veggies
Ground chicken breast is a fantastic, lean protein source, but because it contains very little fat, it is prone to drying out when exposed to the high heat of an oven. To combat this, we employ a brilliant culinary trick: sneaking vegetables into the meat mixture.
By finely grating a carrot or a small zucchini and folding it into the ground chicken, you introduce a natural source of moisture. As the nuggets bake, the water content from the vegetables releases slowly into the chicken, steaming it slightly from the inside out. This guarantees a tender, juicy nugget every single time.
Beyond the texture benefits, this is an effortless way to increase your family’s daily vegetable intake. If you have picky eaters at the table, make sure to peel the zucchini first so there are no visible green flecks, or use a carrot, which blends beautifully into the orange hue of the smoked paprika.
Ingredients
To achieve the best flavor, texture, and nutritional value, gather the following ingredients. The measurements provided will yield a perfect batch of juicy, crispy, good-for-you nuggets.
For the Chicken Mixture
- 1 pound (16 ounces) ground chicken breast: Lean ground chicken breast is the star here. You can also pulse whole boneless, skinless chicken breasts in a food processor until finely minced.
- 1/2 cup finely grated carrot or zucchini: This is our secret ingredient for moisture and nutrition. If using zucchini, squeeze the grated flesh tightly in a clean kitchen towel to remove the excess standing water before adding it to the meat.
- 1/2 teaspoon kosher salt: Essential for bringing out the natural flavor of the poultry without overloading the dish with sodium.
- 1 teaspoon garlic powder: Adds a savory, aromatic backbone.
- 1 teaspoon onion powder: Complements the garlic for a well-rounded savory profile.
- 1/2 teaspoon smoked paprika: Adds a beautiful subtle color and a faint hint of smokiness.
- 1/4 teaspoon black pepper: Freshly cracked is always best.
For the Breading Station
- 1/2 cup whole wheat flour or all-purpose flour: This acts as the initial primer, giving the egg something to cling to. Whole wheat adds a slight bump in fiber.
- 2 large eggs: Beaten well. This is the natural glue that holds the crispy exterior to the chicken.
- 1 1/2 cups Panko breadcrumbs: Panko is a Japanese-style breadcrumb that is lighter and flakier than standard breadcrumbs. It is the absolute secret to achieving a shatteringly crisp oven-baked crust. You can use whole wheat Panko if you can find it!
- 1/4 cup grated Parmesan cheese (optional): Blending this into the Panko adds a salty, umami-rich crunch, but it can be omitted if you are watching your dairy intake.
- 1/2 teaspoon kosher salt: To lightly season the breading layer so the crust isn’t bland.
- Olive oil spray or avocado oil spray: Crucial for getting the breadcrumbs to brown and crisp up nicely in the oven without deep-frying.
How to Make Healthy Chicken Nuggets
- Prep Time: 20 minutes
- Cook Time: 15 minutes
- Total Time: 35 minutes
- Servings: 4 (Yields about 20 to 24 nuggets depending on size)
Step-by-Step Instructions
Step 1: Preheat and Prepare the Baking Pan Preheat your oven to 400°F (200°C). Line a large rimmed baking sheet with parchment paper. For an even crispier bottom, place a wire baking rack over the baking sheet and spray it lightly with avocado or olive oil cooking spray. Elevating the nuggets allows the hot oven air to circulate completely around them, preventing a soggy bottom.
Step 2: Prepare the Chicken Mixture If using a zucchini, grate it on the finest holes of a box grater and squeeze out the excess water. If using a carrot, simply grate it finely. In a large mixing bowl, combine the ground chicken breast, the grated vegetable, 1/2 teaspoon kosher salt, garlic powder, onion powder, smoked paprika, and black pepper. Use your hands or a rubber spatula to mix the seasonings evenly throughout the meat. Be careful not to overwork the chicken, as excessive mixing can make the final texture dense.
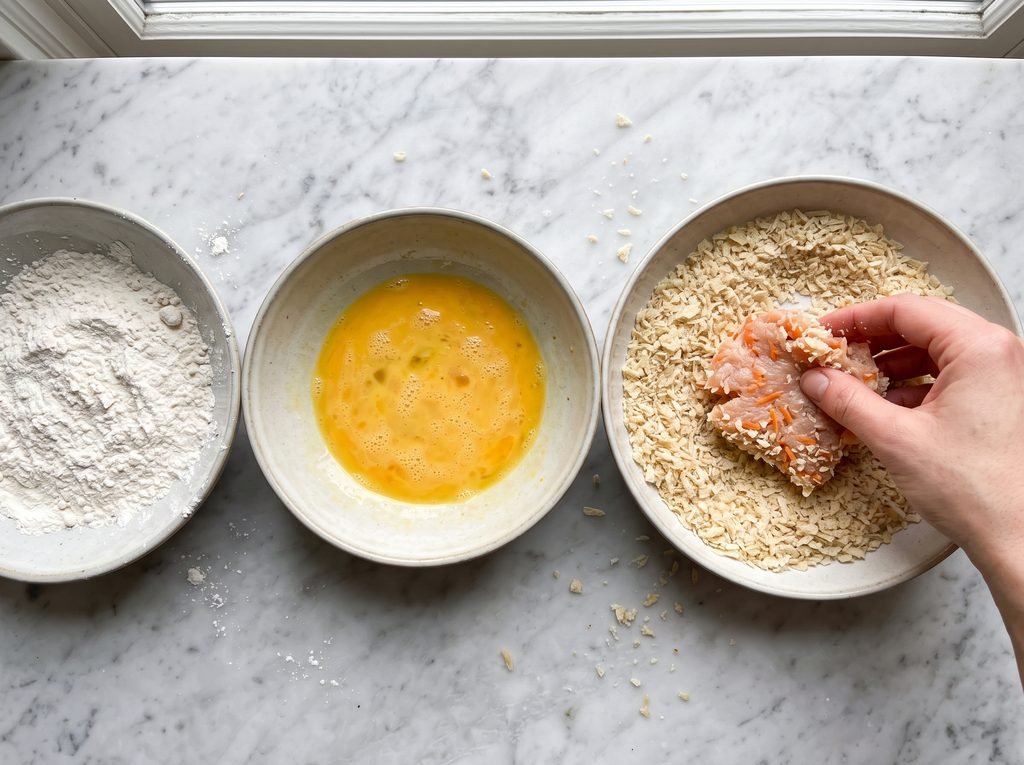
Step 3: Set Up the Breading Station You will need three shallow bowls or pie dishes for the standard breading procedure.
- Bowl 1: Add the whole wheat flour.
- Bowl 2: Crack the two eggs and whisk them vigorously with a fork until completely smooth and pale yellow.
- Bowl 3: Combine the Panko breadcrumbs, optional grated Parmesan cheese, and 1/2 teaspoon of kosher salt. Toss to combine.
Step 4: Shape the Nuggets Ground chicken can be quite sticky. To make shaping easier, keep a small bowl of cold water nearby and lightly wet your hands. Scoop up about one heaping tablespoon of the chicken mixture and roll it into a ball, then gently flatten it into a classic oval or teardrop nugget shape. Place the shaped nuggets onto a clean plate or a sheet of wax paper until all the meat is formed.
Step 5: Dredge and Coat Working with one nugget at a time, drop it into the flour (Bowl 1). Toss to coat it completely, then gently shake off any excess flour. Next, dip it into the beaten egg (Bowl 2), ensuring the entire surface is wet. Finally, place it into the Panko mixture (Bowl 3). Use your fingers to gently press the breadcrumbs into the chicken so they adhere well. Transfer the breaded nugget to your prepared wire rack or baking sheet. Repeat until all nuggets are coated.
Step 6: Bake to Golden Perfection Once all the nuggets are arranged on the baking sheet (ensure they have a little breathing room and are not touching), heavily mist the tops of them with your olive oil or avocado oil cooking spray. This simulates the effect of frying and helps the Panko turn a beautiful golden brown. Bake at 400°F (200°C) for 12 to 15 minutes. If you are not using a wire rack, carefully flip the nuggets halfway through the cooking time to ensure even browning on both sides. The nuggets are done when they are golden outside and the internal temperature reaches 165°F (74°C) on an instant-read meat thermometer.
Step 7: Cool and Serve Remove the baking sheet from the oven and let the nuggets rest for 3 to 5 minutes before serving. This brief resting period is crucial; it allows the internal juices to redistribute and helps the breading set firmly to the meat so it doesn’t fall off when you bite into it.
Helpful Tips for the Best Results
- The Wet Hand Trick: As mentioned in the instructions, lean ground chicken is notoriously sticky. Keep your hands slightly damp with cold water while rolling the meat. The moisture creates a barrier that prevents the proteins from clinging to your skin, allowing you to form perfectly smooth shapes without frustration.
- Do Not Skip the Flour Dredge: It is tempting to save a step and dip the wet chicken straight into the egg, but the flour layer is vital. Chicken naturally contains moisture. The flour absorbs that surface moisture and creates a dry primer, allowing the egg to grip the chicken tightly. Without the flour, the breading is highly likely to slide right off after baking.
- Use the “Dry Hand, Wet Hand” Method: When moving the chicken through the breading station, designate your left hand for the dry ingredients (flour and Panko) and your right hand for the wet ingredient (egg). This prevents your fingers from accumulating thick layers of breading and turning into doughy, messy clubs.
- Pre-Toast the Panko: If you want a deep, rich, restaurant-quality golden-brown color without adding extra oil, you can pre-toast your Panko. Simply spread the plain breadcrumbs in a dry skillet over medium heat for 3 to 5 minutes, tossing continuously until lightly browned, before setting up your breading station. Let them cool before adding the Parmesan and salt.
Alternative Cooking Methods: The Air Fryer
While the oven-baked method is fantastic for large batches, you can absolutely adapt this recipe for an air fryer. Air fryers are essentially powerful countertop convection ovens, making them perfect for this recipe. They yield an incredibly crunchy exterior in even less time, making them ideal for quick lunches or smaller family dinners.
Air Fryer Instructions:
- Preheat your air fryer to 380°F (193°C) for about 3 minutes.
- Spray the air fryer basket lightly with avocado oil cooking spray. Place the breaded nuggets in a single layer, ensuring they do not touch (depending on the size of your basket, you will likely need to work in batches).
- Mist the tops of the nuggets generously with cooking spray.
- Cook for 8 to 10 minutes, flipping halfway through. The forced hot air will make the Panko incredibly crunchy. Ensure they reach 165°F (74°C) internally.
Variations and Substitutions
This base recipe is highly adaptable. Here are a few ways to tweak it to fit different dietary needs or flavor cravings without sacrificing the “healthy” label:
- Gluten-Free Nuggets: Making this recipe completely gluten-free is incredibly easy. Swap the wheat flour for a 1-to-1 gluten-free baking blend or fine almond flour. Swap the traditional Panko for a certified gluten-free Panko breadcrumb (many major brands now offer this in the standard baking aisle).
- Dairy-Free Nuggets: To remove the dairy entirely, simply omit the Parmesan cheese from the breadcrumb mixture. You can add an extra pinch of salt and a teaspoon of nutritional yeast to the Panko to successfully replicate that savory, cheesy flavor profile.
- Spicy Chicken Nuggets: If you love the spicy nuggets from fast-food chains, you can easily replicate them at home. Add 1/2 teaspoon of cayenne pepper, 1/2 teaspoon of chili powder, and a dash of your favorite vinegar-based hot sauce directly into the ground chicken mixture. You can also add 1/4 teaspoon of cayenne to the flour dredge for an extra kick.
- Spinach and Feta Nuggets: For a sophisticated twist, skip the grated carrots and instead fold 1/2 cup of very finely chopped fresh spinach and 1/4 cup of crumbled feta cheese into the ground chicken before shaping.
- Egg-Free Breading: If you have an egg allergy in the house, you can replace the egg wash step with a mixture of milk (or unsweetened almond milk) and a tablespoon of Dijon mustard whisked together. It acts as a great binder for the breadcrumbs.
What to Serve With Healthy Nuggets
A great chicken nugget is only as good as the sauce you dip it into. While store-bought ketchup is a classic, it is often loaded with high-fructose corn syrup. Whipping up a quick, healthier homemade dipping sauce elevates the meal entirely.
Healthy Dipping Sauces
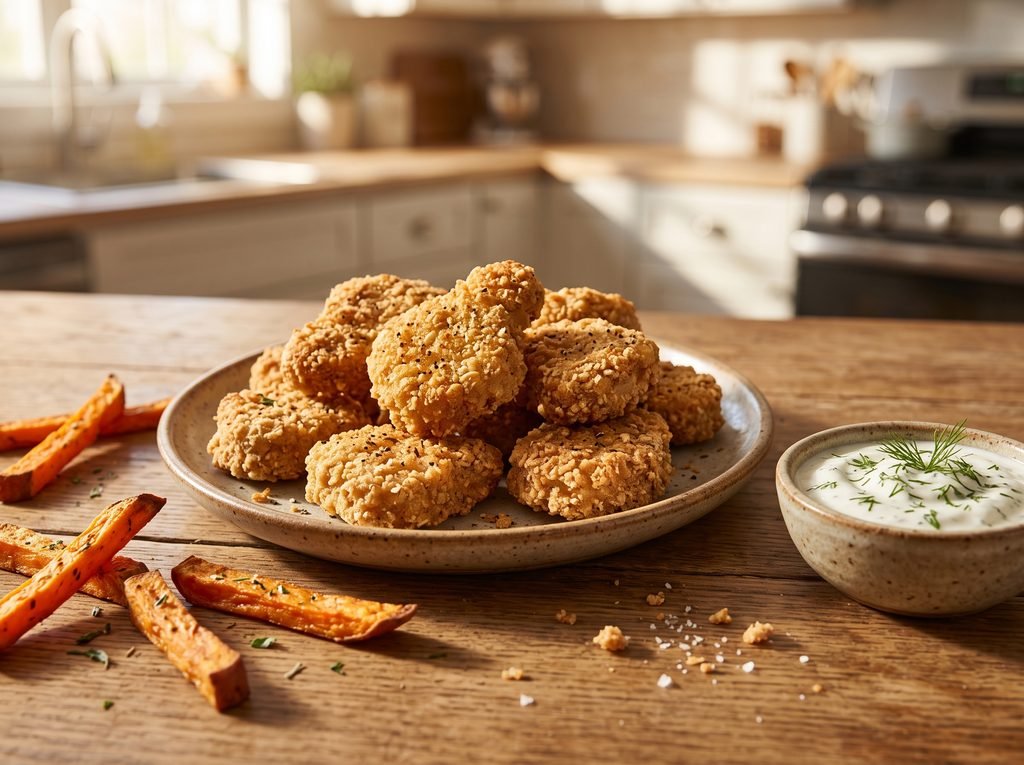
- Greek Yogurt Ranch: Skip the heavy mayonnaise. In a small bowl, whisk together 1/2 cup plain whole-milk Greek yogurt, 1/2 teaspoon garlic powder, 1/2 teaspoon onion powder, 1/2 teaspoon dried dill, a splash of lemon juice, and a pinch of salt. It is tangy, creamy, and packed with extra protein.
- Healthy Honey Mustard: Whisk together 1/4 cup plain Greek yogurt, 2 tablespoons Dijon mustard, 2 tablespoons real honey, and a splash of fresh lemon juice.
- Avocado Cilantro Dip: Blend half an avocado, a handful of fresh cilantro, a squeeze of lime juice, and a dollop of yogurt until smooth. It is packed with healthy fats and vibrant flavor.
Nutritious Side Dishes
To keep the entire plate balanced and nutritious, serve these nuggets alongside healthy side dishes.
- Baked Sweet Potato Fries: Slice sweet potatoes into matchsticks, toss with olive oil and a pinch of salt, and bake on a separate rack in the oven alongside the nuggets until tender and caramelized.
- Roasted Broccoli Florets: Toss fresh broccoli with olive oil, garlic powder, and a squeeze of lemon juice. Roast them for the last 15 minutes of the nuggets’ cooking time.
- Fresh Veggie Sticks: For a quick, no-cook side, serve raw carrot sticks, celery, and cucumber slices alongside the dipping sauces.
Storage, Freezing, and Reheating
One of the greatest benefits of this recipe is how remarkably well the nuggets hold up in the freezer. Building a stash of healthy homemade convenience food has never been easier, saving you from relying on the drive-thru on hectic evenings.
Storing Leftovers in the Refrigerator: Allow any leftover cooked nuggets to cool completely to room temperature. Place them in an airtight container lined with a dry paper towel (which helps absorb excess moisture and prevents sogginess). Store in the refrigerator for up to 4 days.
How to Flash Freeze for Meal Prep: You can freeze these nuggets either raw (breaded but uncooked) or fully cooked. To freeze, arrange the nuggets in a single layer on a parchment-lined baking sheet, making sure they are not touching. Place the entire baking sheet into the freezer for 1 to 2 hours until the nuggets are rock solid. This process is called “flash freezing,” and it prevents the nuggets from clumping together into one giant, inseparable block. Once frozen solid, transfer them to a heavy-duty freezer-safe zip-top bag, squeeze out the excess air, and label them with the date. They will keep beautifully in the freezer for up to 3 months.
Reheating Instructions: The most important rule of reheating any breaded food: Never use the microwave. A microwave creates steam from the inside out, which will instantly turn your beautifully crispy Panko crust into a soggy, chewy mess.
- From the Fridge: Preheat your oven or air fryer to 375°F (190°C). Heat the nuggets for 5 to 7 minutes until warmed through and the crust is re-crisped.
- From the Freezer (Fully Cooked): Bake at 400°F (200°C) for 12 to 15 minutes, or air fry at 380°F (193°C) for 10 to 12 minutes, straight from frozen.
- From the Freezer (Raw/Uncooked): Bake at 400°F (200°C) for 18 to 22 minutes, or until the internal temperature reaches a safe 165°F (74°C).
Frequently Asked Questions
Can I use whole chicken breasts instead of ground chicken? Yes, absolutely. If you prefer the distinct, firmer texture of whole chicken chunks, simply take boneless, skinless chicken breasts and cut them into 1-inch cubes. Toss the cubes with the spices (skip the grated vegetables, as whole breast meat won’t absorb them), and move straight to the breading station. The cooking time will remain relatively similar, but always use a meat thermometer to ensure they are cooked through.
Why did my breading get soggy on the bottom? Soggy bottoms happen when the moisture from the chicken gets trapped between the nugget and the baking sheet, essentially steaming the breadcrumbs. To prevent this, bake the nuggets on a wire rack set over the baking sheet. If you don’t have a wire rack, ensure you are flipping the nuggets halfway through the baking time so both sides get exposed to the dry, hot air of the oven.
Can I use almond flour instead of Panko breadcrumbs? Yes, almond flour is a great low-carb and gluten-free alternative. However, because almond flour does not have the flaky structure of Panko, your nuggets will not be quite as crunchy. They will have a softer, slightly nuttier crust, but they will still be absolutely delicious and very healthy.
Do I really need to use cooking spray? Yes, if you want a golden-brown crust. Because we are not deep-frying these nuggets, the breadcrumbs need a tiny amount of fat to help them brown and crisp in the dry heat of the oven. A light misting of olive oil or avocado oil spray adds a negligible amount of calories but makes a massive difference in the final texture and appearance.
Can I make the chicken mixture ahead of time? Yes. You can mix the ground chicken, spices, and grated vegetables, cover the bowl tightly with plastic wrap, and let it sit in the refrigerator for up to 24 hours before shaping and breading. This actually allows the flavors of the garlic and onion powder to meld beautifully with the meat, resulting in an even tastier nugget.
Are these nuggets keto-friendly? As written, they are not strictly keto because of the wheat flour and Panko breadcrumbs. To make them keto-friendly, swap the flour for coconut flour or almond flour, and swap the Panko for crushed pork rinds or a mixture of almond flour and extra Parmesan cheese.
How do I prevent the breading from falling off? Breading falls off when steam builds up between the meat and the crust. To prevent this, ensure your chicken is coated evenly in the flour. Shake off the excess flour before the egg wash, and ensure the egg coats the chicken completely. Finally, press the Panko firmly into the meat with your fingers. Letting the raw, breaded nuggets rest on the pan for 5 minutes before putting them in the oven also gives the egg time to set and adhere.
Can I use ground turkey instead? Yes! Lean ground turkey works perfectly as a 1-to-1 substitute for ground chicken in this recipe. Because ground turkey can also be quite lean, the hidden grated zucchini or carrots are especially helpful for maintaining moisture.
Final Thoughts
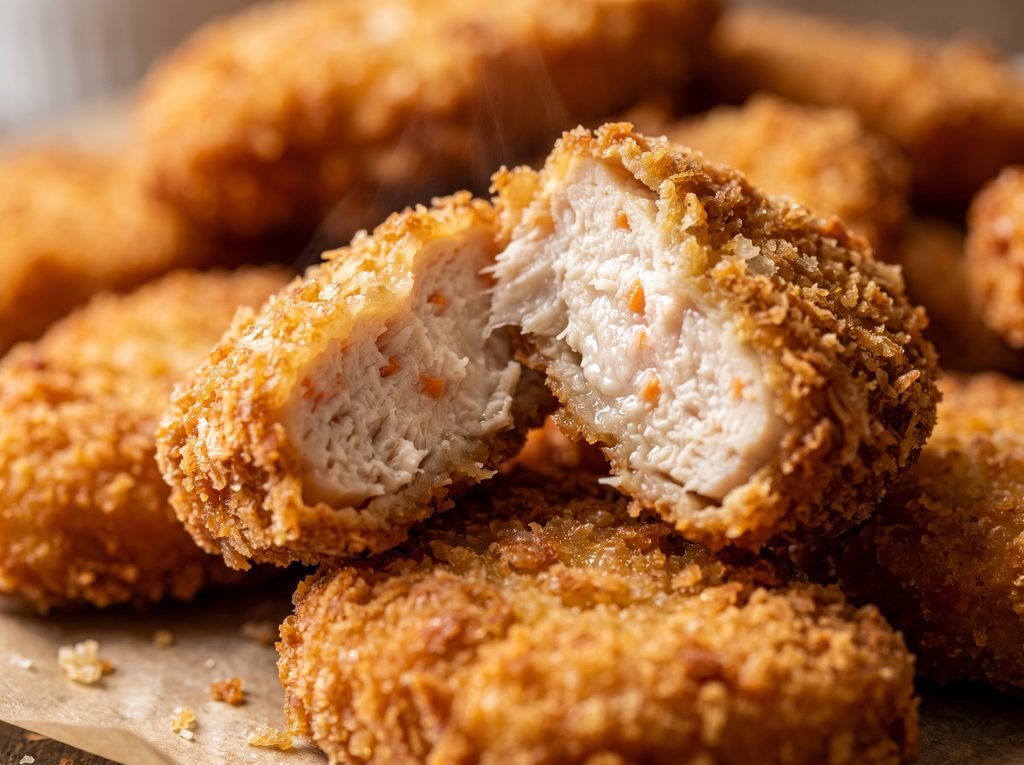
Mastering the art of the healthy homemade chicken nugget is a surprisingly simple culinary project that yields massive rewards for your overall diet and weeknight dinner routine. Once you experience the contrast between the juicy, savory interior and the shatteringly crisp Panko crust, it is hard to look at the processed frozen food aisle the same way.
By utilizing lean ground chicken, fresh hidden vegetables, standard pantry staples, and the heat of your oven or air fryer, you can recreate a beloved fast-food classic in the comfort of your own kitchen. Whether you are whipping up a quick, nutritious weeknight dinner for the family, preparing a protein-packed lunch, or intentionally stocking your freezer for future meals, this recipe delivers consistent, mouthwatering, guilt-free results every single time. Grab your ingredients, set up your breading station, and get ready to enjoy the best healthy chicken nuggets you have ever made.