

The Ultimate Halloween Cookies: A Foolproof Cut-Out Sugar Cookie Recipe
When the October air turns crisp and the leaves start to fall, there is nothing quite like spending a weekend afternoon baking. Creating a batch of spooky, festive, and delicious treats is a quintessential autumn tradition. Whether you are baking for a neighborhood costume party, putting together treat bags for your kids’ classmates, or simply looking for a fun family activity on a chilly Sunday, these classic Halloween cookies are the perfect project.
There is something undeniably magical about taking a simple ball of dough and transforming it into a platter of grinning jack-o’-lanterns, spooky white ghosts, and midnight-black bats. However, if you have ever pulled a tray of carefully cut pumpkin cookies out of the oven only to find they have spread into unrecognizable orange blobs, you know that baking cut-out cookies can sometimes be frustrating.
This guide provides the ultimate, foolproof recipe for Halloween sugar cookies that hold their shape perfectly while baking. They feature a tender, soft center with just the right amount of crispness on the edges. Paired with a simple, glossy royal icing that dries hard enough for easy stacking and gifting, these cookies will look like they came straight from a professional bakery. Let’s dive into the only Halloween cookie recipe you will ever need.

What Are Halloween Cookies?
At their core, classic Halloween cookies are sturdy, roll-out sugar cookies cut into festive shapes and decorated with colorful icing, sprinkles, or sanding sugar. While drop cookies like chocolate chip or snickerdoodles are delicious, they do not offer the structural integrity needed to create sharp, defined shapes like witches’ hats or haunted houses.
A proper cut-out sugar cookie acts as a blank, buttery canvas. The dough is specifically formulated with a careful ratio of butter, sugar, and flour to prevent spreading in the oven. The decorations typically involve royal icing—a mixture of powdered sugar and meringue powder that can be piped into intricate designs and floods smoothly to create a flawless, matte finish once dry.
Why You’ll Love This Recipe
Finding the perfect balance between a cookie that tastes amazing and a cookie that looks beautiful is the holy grail of holiday baking. Here is why this specific recipe will become your seasonal go-to:
- Zero Spread: The careful balance of leavening agents and the specific chilling method ensure your ghosts look like ghosts, not fluffy clouds.
- Incredible Bakery Flavor: A splash of high-quality vanilla combined with a secret dash of almond extract gives these cookies that nostalgic, professional bakery taste.
- Soft Yet Sturdy: They are soft to bite into, but sturdy enough to handle heavy icing, packing into lunchboxes, or stacking on a dessert table.
- Beginner-Friendly Icing: The included royal icing recipe uses meringue powder instead of raw egg whites, making it safe, stable, and incredibly easy to work with.
Recipe Details
- Prep Time: 30 minutes
- Chill Time: 1 hour
- Cook Time: 10 minutes
- Decorating Time: 1 hour
- Total Time: 2 hours 40 minutes
- Servings: 24 cookies (depending on cutter size)
Ingredients
To achieve the best texture and flavor, gather high-quality ingredients. Before you begin, make sure your butter and egg are at room temperature.
For the Cookie Dough:
- 1 cup (2 sticks / 8 ounces) unsalted butter: Must be softened to room temperature. Unsalted butter allows you to control the exact sodium level in the dough.
- 1 cup granulated sugar: Provides the perfect amount of sweetness and helps create crisp edges.
- 1 large egg: Room temperature. The egg provides moisture and structure to bind the dough together.
- 1 tablespoon pure vanilla extract: Do not skimp here; vanilla is a primary flavor profile.
- 1 teaspoon almond extract: The secret ingredient that gives the dough a distinct, elevated bakery flavor.
- 3 cups all-purpose flour: Plus a little extra for rolling out the dough. Spoon and level your flour to avoid packing it into the measuring cup, which leads to dry dough.
- 1/2 teaspoon baking powder: Just enough to give the cookies a slight lift without causing them to spread out of shape.
- 1/2 teaspoon kosher salt: Balances the sweetness of the sugar and the icing.
For the Easy Royal Icing:
- 4 cups powdered sugar (confectioners’ sugar): Sifted to ensure there are no lumps that could clog your piping tips.
- 3 tablespoons meringue powder: This is a dried egg white substitute found in the baking aisle. It makes the icing dry hard and shiny without the food safety risks of raw egg whites.
- 5 to 6 tablespoons warm water: Used to thin the icing to your desired consistency.
- Gel food coloring: Essential for deep Halloween colors (black, vibrant orange, neon green, and purple). Liquid food coloring will water down your icing too much.
How to Make Halloween Cookies
Follow these step-by-step instructions carefully, paying special attention to the chilling process, which is the secret to sharp, beautiful shapes.
Step 1: Cream the Butter and Sugar
In the bowl of a stand mixer fitted with the paddle attachment, or in a large bowl using a handheld electric mixer, beat the softened unsalted butter and granulated sugar together on medium-high speed. Beat for about 2 to 3 minutes until the mixture is light in color and fluffy in texture. Scrape down the sides and bottom of the bowl with a rubber spatula as needed.
Step 2: Add Wet Ingredients
Add the room-temperature egg, vanilla extract, and almond extract to the butter mixture. Beat on medium speed until everything is completely incorporated. The mixture might look slightly separated at this stage, which is perfectly normal.
Step 3: Whisk and Add the Dry Ingredients
In a separate medium bowl, whisk together the all-purpose flour, baking powder, and kosher salt. Turn your mixer to the lowest speed. Gradually add the dry flour mixture into the wet ingredients in three separate additions. Mix just until the flour is incorporated and the dough begins to pull away from the sides of the bowl. Do not overmix, or your cookies will become tough.
Step 4: Divide and Roll the Dough
Turn the dough out onto a clean work surface and divide it into two equal halves. Shape each half into a rough disc. Place one disc of dough between two large sheets of parchment paper. Use a rolling pin to roll the dough out to an even 1/4-inch thickness. Leaving the dough between the parchment paper, place it on a baking sheet. Repeat with the second half of the dough.
Step 5: Chill the Rolled Dough
Place the baking sheets with the rolled-out dough into the refrigerator to chill for at least 1 hour. Chilling the dough after it is rolled out is much easier than trying to roll out a hard, cold block of dough later.
Step 6: Cut Out the Halloween Shapes
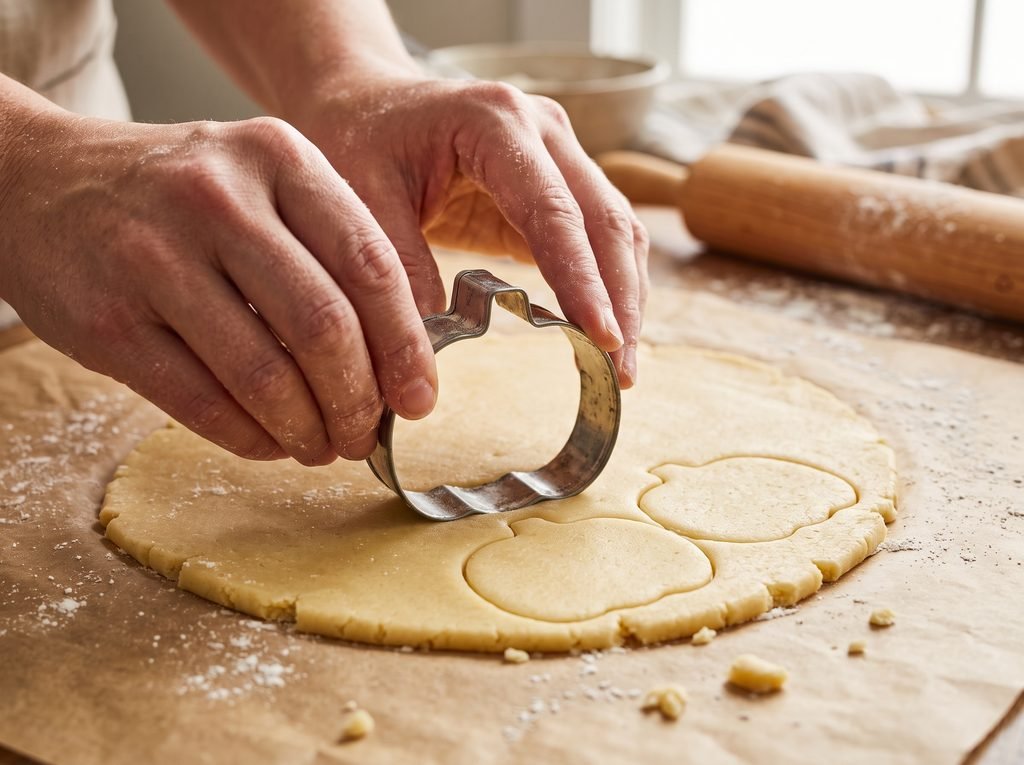
Once the dough is firm, remove one sheet from the refrigerator. Peel off the top layer of parchment paper. Use your favorite Halloween cookie cutters (pumpkins, bats, ghosts, witches’ hats) to cut out shapes. Press firmly, give a slight wiggle, and lift the cutter.
Step 7: Transfer and Chill Again (The Secret Step!)
Transfer the cut-out shapes to a parchment-lined baking sheet, spacing them about 1 inch apart. Gather the dough scraps, re-roll them between the parchment paper, and return them to the fridge to firm up before cutting more. Once your baking sheet is full of cut-out shapes, place the entire sheet into the freezer for 10 minutes right before baking. This flash-freeze sets the butter instantly, guaranteeing zero spread in the oven.
Step 8: Bake and Cool
Preheat your oven to 350°F (175°C). Bake the chilled cookies for 9 to 11 minutes. The exact time will depend on the size of your cutters. The cookies are done when the edges are just barely beginning to turn a light golden brown. Let the cookies sit on the hot baking sheet for 5 minutes before transferring them to a wire rack to cool completely. They must be 100% cool before you add any icing.
Step 9: Prepare the Royal Icing
While the cookies cool, prepare the icing. In a large bowl, whisk together the sifted powdered sugar and meringue powder. Add 5 tablespoons of warm water. Using a hand mixer on medium speed, beat the mixture for about 5 minutes until stiff peaks form.
Step 10: Color and Thin the Icing
Divide the stiff icing into separate small bowls based on how many colors you need. Add a drop or two of gel food coloring to each bowl and mix well. To achieve “flood consistency” (icing that settles smoothly on the cookie), add warm water to each bowl just 1/2 teaspoon at a time. Stir gently until the icing resembles the consistency of thick honey or shampoo. When you lift your spoon and let the icing drizzle back into the bowl, the drizzle should completely melt back into the surface within 15 seconds.
Step 11: Decorate
Transfer the thinned, colored icing into piping bags or squeeze bottles. Outline your cookie shapes first, leaving a tiny border near the edge, and then immediately fill (or “flood”) the center. Use a toothpick to drag the icing into corners and pop any tiny air bubbles. Allow the icing to set completely uncovered at room temperature for 12 to 24 hours before stacking or packaging.
Helpful Tips for the Best Results
Achieving bakery-level cookies at home requires a little bit of technique. Keep these expert tips in mind to ensure success every time:
- Measure Flour Correctly: The number one reason cookie dough becomes crumbly is too much flour. Always fluff your flour in the canister, spoon it lightly into your measuring cup, and level it off with the back of a butter knife.
- The 1/4-Inch Rule: Rolling the dough to exactly 1/4-inch thickness provides a hearty, substantial cookie that will not break easily when handled. You can purchase rolling pins with measured thickness rings on the ends to take the guesswork out of this step.
- Ditch the Liquid Food Coloring: When mixing dark Halloween colors like black, dark purple, and deep orange, liquid food coloring from the grocery store will add too much moisture and ruin your icing consistency. Invest in highly concentrated gel food coloring. To get a true black, start with a dark brown cocoa-powder base in the icing, then add black gel.
- Use Squeeze Bottles: While piping bags are traditional, clear plastic squeeze bottles are fantastic for flooding cookies, especially if you are baking with children. They are less messy and easier for small hands to control.
- Air-Drying is Crucial: Royal icing needs plenty of air circulation to dry hard and shiny. Do not cover the freshly decorated cookies with plastic wrap or put them in the fridge. Leave them out on the counter overnight.
Variations and Substitutions
Baking should be fun and customizable. If you want to switch things up from the classic vanilla sugar cookie, try these delicious variations:
- Dark Chocolate Halloween Cookies: For a deeply chocolate, brownie-like roll-out cookie, substitute 1/2 cup of the all-purpose flour for 1/2 cup of high-quality Dutch-processed cocoa powder. This dark dough looks incredible cut into bat and black cat shapes, and you can skip the black food coloring!
- Pumpkin Spice Sugar Cookies: Bring all the flavors of autumn into your dough. Add 1 teaspoon of ground cinnamon, 1/2 teaspoon of ground ginger, 1/4 teaspoon of ground nutmeg, and a pinch of ground cloves to your dry ingredients before mixing.
- Buttercream Frosting Option: If you prefer a softer frosting over royal icing, you can top these with an easy American buttercream. Just keep in mind that buttercream does not dry hard, so the cookies cannot be stacked on top of one another or placed into cellophane favor bags.
- Dairy-Free Adaptation: To make this recipe dairy-free, substitute the unsalted butter for a high-quality vegan butter block (not the spreadable kind in a tub). Keep the chill times exactly the same.
Hosting a Halloween Cookie Decorating Party
One of the best ways to enjoy this recipe is by hosting a cookie decorating party. It is a fantastic, interactive activity for both kids and adults.
To set up a successful party, bake all the cookies a day or two in advance. Set up “decorating stations” at a large table. Cover the table with a disposable plastic tablecloth or butcher paper for easy cleanup. Place the naked cookies on platters in the center.
Prepare the royal icing ahead of time, tint it into various festive colors, and fill several piping bags or squeeze bottles. Set out an array of small bowls filled with Halloween-themed sprinkles, candy eyeballs, crushed chocolate cookies (for “dirt”), and black sanding sugar. Encourage your guests to get creative! Have small bakery boxes on hand so everyone can safely transport their spooky masterpieces home.
What to Serve With It
Halloween cookies are incredibly sweet, so they pair best with beverages and sides that balance their sugary profile.
- Warm Autumn Drinks: Serve these cookies alongside a steaming mug of hot apple cider with cinnamon sticks, a classic hot chocolate, or an unsweetened cup of dark roast coffee or black tea.
- Savory Party Snacks: If you are serving these at a Halloween party, make sure to balance the dessert table with savory options. A salty charcuterie board, a hearty pumpkin chili, or a bowl of salty, buttered popcorn provides a much-needed break from the sugar.
- Spooky Punch: For a kid-friendly event, create a bubbling green punch using lime sherbet and ginger ale, creating a “witches brew” that looks great next to a platter of decorated treats.
Storage and Reheating
Proper storage is the key to keeping your baked goods fresh for as long as possible.
Storing Undecorated Cookies: Baked, bare cookies can be stored in an airtight container at room temperature for up to one week. You can also freeze baked, bare cookies in a freezer-safe zip-top bag for up to 3 months. Thaw them at room temperature for a few hours before icing.
Storing Decorated Cookies: Once the royal icing has dried completely (which usually takes 12 to 24 hours), the cookies can be stacked. Place a sheet of wax paper or parchment paper between each layer to prevent any accidental sticking or color bleeding. Store them in an airtight container at room temperature for up to two weeks. Do not refrigerate decorated cookies, as the humidity in the fridge can cause the icing to soften, weep, or become sticky.
Freezing Cookie Dough: Sugar cookie dough is wonderful for making ahead. Once you roll the dough out between the parchment paper (Step 4), you can wrap the flat dough tightly in plastic wrap and freeze it for up to 3 months. When you are ready to bake, let the dough thaw in the refrigerator overnight, then proceed with cutting and baking.
Frequently Asked Questions
Why did my Halloween cookies spread in the oven? Spreading is usually caused by the butter being too warm before baking, or by skipping the chilling process. Always flash-freeze your cut-out shapes for 10 minutes right before putting them into the hot oven. Overmixing the dough or measuring too little flour can also cause spreading.
Do I have to use royal icing? Not at all. While royal icing is best for intricate details and stacking, you can easily use store-bought frosting, homemade buttercream, or a simple glaze made from powdered sugar and milk.
Can I make the cookie dough in advance? Yes. You can make the dough, wrap it tightly in plastic wrap, and keep it in the refrigerator for up to 3 days before rolling, cutting, and baking. Let it sit on the counter for 10-15 minutes to soften slightly so it does not crack when you roll it.
What is the best food coloring to use for dark Halloween colors? Gel food coloring is an absolute must. Brands like Americolor or Wilton offer concentrated gels that give you pitch black or vibrant orange without adding excess liquid that would ruin the consistency of your icing.
How long does royal icing take to dry? The surface will begin to crust over in about 15 to 30 minutes, but it takes a full 12 to 24 hours for royal icing to dry completely hard all the way through. Drying time depends heavily on the humidity in your kitchen.
Can I use a hand mixer instead of a stand mixer? Yes, a handheld electric mixer works perfectly fine for both the cookie dough and the royal icing. Just be prepared to mix for a little bit longer, as hand mixers are generally less powerful than stand mixers.
Why is my cookie dough crumbly? Crumbly dough is almost always the result of too much flour. Remember to spoon your flour into the measuring cup and level it off. If your dough is slightly crumbly, you can usually bring it together by kneading it gently with your hands; the warmth of your hands will melt the butter just enough to bind the dough.
How thick should I roll sugar cookie dough? A 1/4-inch thickness is the golden rule for cut-out cookies. It provides enough thickness so the cookie doesn’t burn or snap in half when decorated, but is thin enough to bake evenly and remain slightly crisp on the edges.

Final Thoughts
Baking and decorating Halloween cookies is about so much more than just the final dessert; it is about embracing the season, getting creative in the kitchen, and making memories. While piping perfect spiderwebs and ghost faces can take a little bit of practice, this reliable, no-spread dough and simple royal icing recipe will give you the perfect foundation for success.
Do not stress if your first few pumpkins look a little lopsided or your icing is not perfectly smooth. The most important part of holiday baking is the fun you have along the way. Gather your cookie cutters, turn on a spooky playlist, and enjoy bringing a little bit of sweet magic into your kitchen this October!