
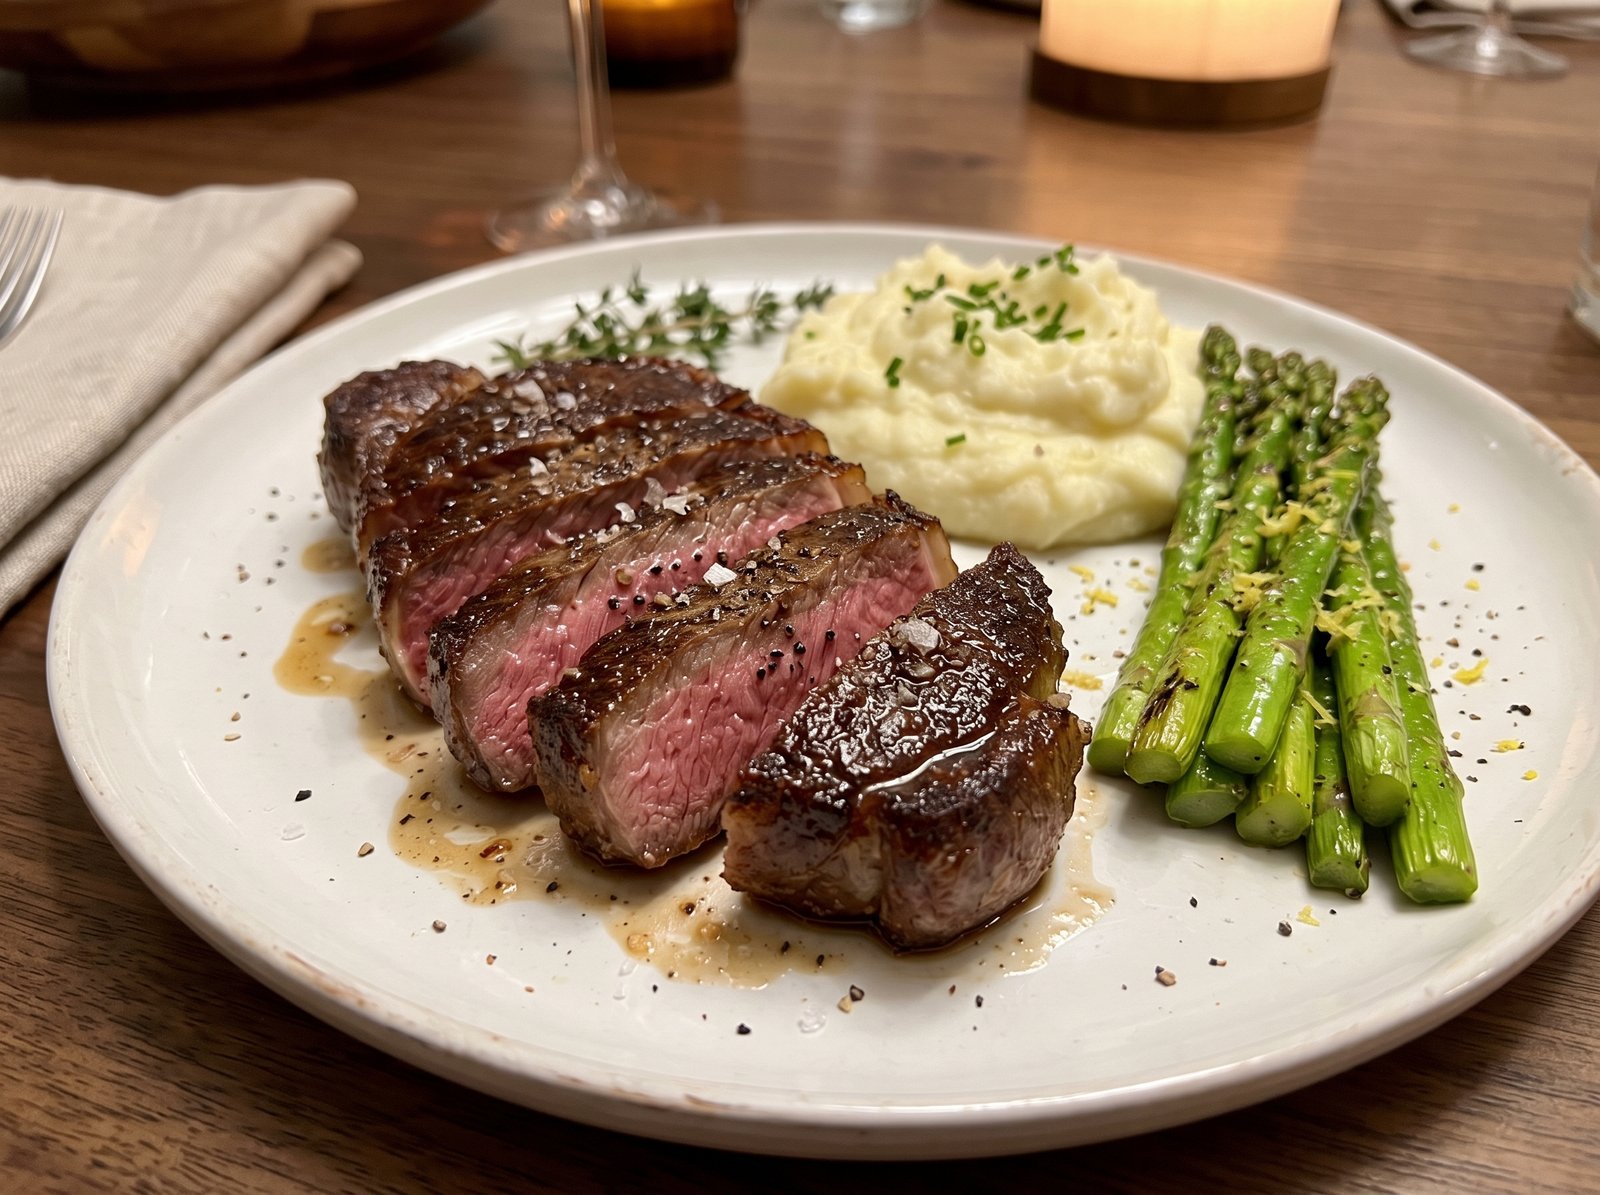
The Ultimate Pan-Seared Garlic Butter Steak Recipe
There is something undeniably magical about a perfectly cooked steak. For many home cooks, achieving that steakhouse-quality sear—complete with a deeply caramelized crust and a tender, juicy, edge-to-edge pink center—feels like an elusive skill reserved for professional chefs. But the truth is, making an incredible steak at home is not about culinary magic or expensive commercial equipment. It is entirely about mastering a few fundamental techniques, understanding your heat, and utilizing a handful of high-quality ingredients.
This pan-seared steak recipe is designed to demystify the cooking process and give you the confidence to cook premium cuts of beef right in your own kitchen. By using a heavy cast iron skillet, employing a simple dry-brining technique, and finishing the meat with a rich, aromatic garlic and herb butter baste, you will elevate a raw piece of beef into a stunning, restaurant-caliber meal.
Whether you are preparing a romantic dinner for two, celebrating a special holiday, or simply treating yourself to a luxurious weekend dinner, this comprehensive guide will walk you through every single step. From selecting the ideal cut at the butcher counter to slicing it properly for serving, you are about to learn how to make the best steak of your life.
What Is Pan-Seared Steak?
Pan-searing is a stovetop cooking method that uses high direct heat to quickly cook the exterior of a piece of meat. When you place a steak into a smoking-hot skillet, an incredible scientific process called the Maillard reaction occurs. This reaction between amino acids and reducing sugars creates the deeply savory, browned crust that gives great steak its signature flavor and appealing texture.
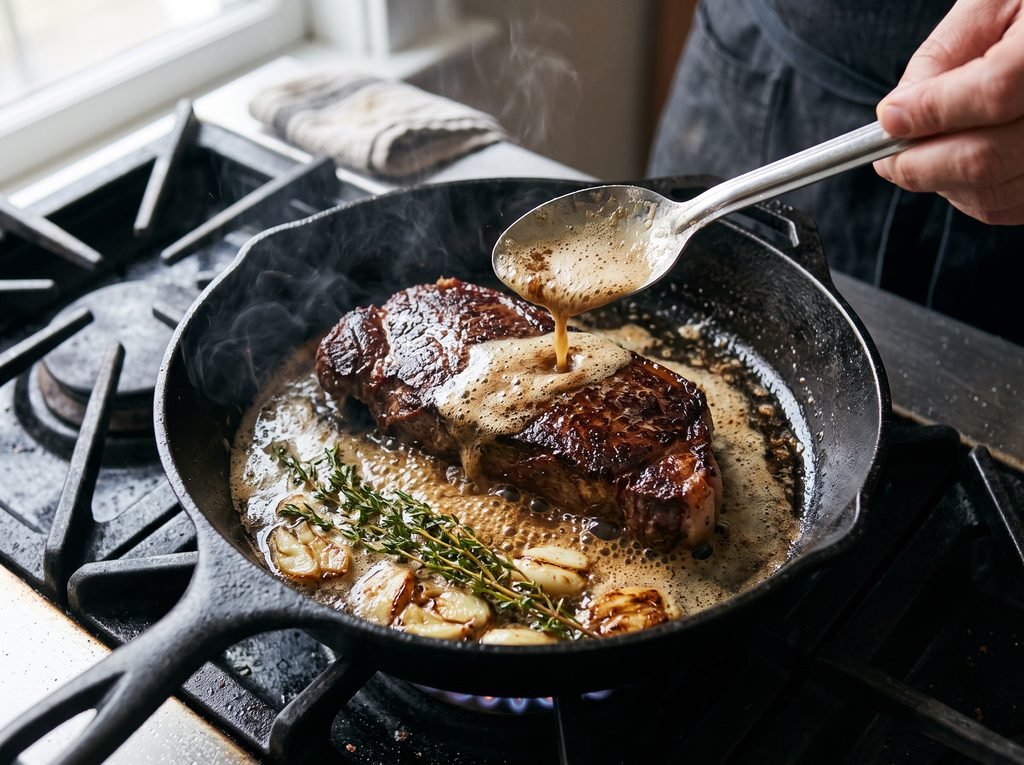
Unlike grilling, which allows the rendering beef fat to drip away through the grates, pan-searing traps all of those incredible flavor compounds in the skillet. This provides the perfect opportunity to introduce a basting technique known in French kitchens as arroser. By adding butter, fresh garlic, and woody herbs to the hot pan during the final minutes of cooking, you can repeatedly spoon the foaming, infused butter over the steak. This technique continuously glazes the meat, building a complex, rich crust while gently finishing the interior to your exact desired temperature.
Why You’ll Love This Recipe
- Restaurant Quality at Home: You no longer need to spend a small fortune at a high-end steakhouse to enjoy a premium dinner. This method produces results that rival the best restaurants.
- Incredibly Fast: While the resting and prep take a little patience, the actual active cooking time is completely finished in under 15 minutes.
- Accessible Ingredients: You do not need a pantry full of specialty items. With just salt, pepper, oil, butter, garlic, and fresh herbs, you can create a masterpiece.
- Year-Round Convenience: Because this recipe relies entirely on the stovetop, you do not have to worry about the weather outside. It is just as easy to make in the middle of a snowy winter as it is on a warm summer evening.
- Scalable and Adaptable: Once you understand the core technique of searing and basting, you can apply it to almost any thick cut of beef, from a tender filet mignon to a robust, beefy New York strip.
The Essential Equipment You Need
Before you purchase your meat, ensure your kitchen is equipped with the right tools. Proper equipment makes a monumental difference when cooking steak indoors.
A Heavy Cast Iron Skillet: This is non-negotiable for the perfect crust. Cast iron is exceptionally dense and retains heat brilliantly. When you place a cold, heavy piece of meat into the pan, a standard aluminum or non-stick skillet will instantly drop in temperature, causing the meat to steam rather than sear. Cast iron holds its heat, ensuring a hard, immediate sear. Carbon steel skillets or high-quality heavy-bottomed stainless steel pans are excellent alternatives. Avoid non-stick pans entirely, as their chemical coatings cannot safely withstand the high temperatures required for this recipe.
An Instant-Read Meat Thermometer: If there is one secret weapon every home cook needs, it is a fast, accurate digital meat thermometer. Relying on the “poke test” or guessing based on time will lead to overcooked, dry meat or undercooked, raw centers. A thermometer completely eliminates the guesswork, allowing you to pull the meat from the heat at the precise degree of doneness.
Long Metal Tongs: You will need sturdy tongs to safely flip the steak, hold it on its side to render the fat cap, and maneuver the hot meat out of the skillet.
A Metal Spoon: A standard, large dining spoon or a dedicated basting spoon is necessary for scooping up the hot, foaming butter and cascading it over the beef.
Choosing the Right Cut of Beef
Not all steaks are created equal, and for a pan-searing and butter-basting method, you want a cut that is naturally tender, well-marbled, and cut thick. Look for steaks that are at least 1 ½ to 2 inches (about 4 to 5 cm) thick. Thin steaks will cook through to the center before a proper crust can form.
Ribeye Steak
Often considered the king of steaks, the ribeye boasts extensive intramuscular fat (marbling). As the steak cooks, this fat melts and renders down, naturally basting the meat from the inside out. It offers the most robust, deeply beefy flavor and incredibly juicy texture. If you want a truly decadent experience, a thick-cut, bone-in or boneless ribeye is the ultimate choice.
New York Strip Steak
If you prefer a steak that balances tenderness with a tight, meaty texture, the New York strip is exceptional. It features a pronounced fat cap along one side that you can render down in the hot skillet, creating a delicious beef tallow to cook the steak in. It is slightly leaner than a ribeye but still delivers massive flavor.
Filet Mignon (Tenderloin)
The filet mignon is prized for its butter-soft texture. It is the most tender cut on the cow, but because it is very lean, it lacks the aggressive beefy flavor of a ribeye or strip. Pan-searing and butter-basting a filet is the absolute best way to cook it, as the rich garlic and herb butter compensates for the lack of natural beef fat.
A Note on USDA Beef Grading
When shopping at an American grocery store or butcher, pay attention to the grade.
- USDA Prime: The highest grade, featuring abundant marbling. It is more expensive but guarantees a tender, juicy result.
- USDA Choice: A fantastic middle-ground. High-quality Choice steaks often have excellent marbling and represent the best value for everyday cooking.
- USDA Select: Leaner meat that can dry out quickly. If using Select, be very careful not to overcook it past medium-rare.
The Science of the Perfect Crust: Moisture is the Enemy
The biggest mistake home cooks make is taking a steak out of a vacuum-sealed package, tossing it immediately into a pan, and hoping for a crust. Water is the enemy of a good sear. If the surface of the meat is wet, the heat of the pan must first boil away that water before the temperature can climb high enough to trigger the Maillard browning reaction.
The Dry Brine Method
To guarantee a magnificent crust, you should dry-brine your meat. This simply means aggressively salting the steak and leaving it uncovered in the refrigerator.
Ideally, salt your steak with kosher salt 12 to 24 hours before cooking. Place it on a wire rack set over a baking sheet. Initially, the salt will draw moisture out of the meat. However, if given enough time, that salty liquid will be reabsorbed back into the muscle fibers, deeply seasoning the steak down to the center and breaking down tough proteins to make it more tender. Simultaneously, the constant airflow of the refrigerator will completely dry out the exterior surface of the beef, leaving it looking dark and slightly leathery. This dry surface will sear instantly the moment it touches the hot cast iron.
If you do not have 24 hours, even leaving the salted steak uncovered in the fridge for 45 minutes will make a noticeable difference. If you are extremely short on time and cooking immediately, aggressively pat the meat entirely dry with paper towels right before seasoning and searing.
Ingredients You Will Need
- Steak: 2 thick-cut steaks (Ribeye or New York Strip), approximately 1 ½ inches thick, weighing about 1 pound (16 oz) each.
- Kosher Salt: 1 ½ to 2 teaspoons. Kosher salt is essential. Its wide, coarse flakes cling to the meat and dissolve perfectly. If using standard fine table salt, cut the amount in half to avoid making the meat overly salty.
- Black Pepper: 1 teaspoon of freshly cracked black pepper. Pre-ground pepper in a tin lacks the pungent, floral oils of whole peppercorns.
- High Smoke-Point Oil: 2 tablespoons. Avocado oil, grapeseed oil, canola oil, or vegetable oil are perfect. Do not use extra virgin olive oil or standard butter for the initial sear, as they will burn, smoke aggressively, and impart a bitter, acrid flavor to the meat.
- Unsalted Butter: 3 to 4 tablespoons. Unsalted is crucial because the steak is already heavily seasoned; salted butter will make the final dish overwhelmingly salty.
- Fresh Garlic: 3 to 4 whole cloves, lightly smashed with the back of a knife. Leave the skins on to prevent the garlic from burning too quickly in the hot butter.
- Fresh Herbs: 2 to 3 sprigs of fresh rosemary and 3 to 4 sprigs of fresh thyme. Dried herbs will burn and turn to ash in the pan; you must use fresh woody herbs.
Steak Temperature Guide: When to Pull Your Meat
Because the exterior of the steak will be searing hot, the internal temperature of the meat will continue to rise by 5°F to 8°F even after you remove it from the skillet. This is called “carryover cooking.” To achieve your desired doneness, you must pull the steak from the pan before it reaches the target temperature.
Insert your instant-read thermometer horizontally into the thickest part of the steak, ensuring you do not touch any bone or thick pockets of unrendered fat.
- Rare (Cool red center): Pull from pan at 120°F. Final resting temperature: 125°F (52°C).
- Medium-Rare (Warm red center): Pull from pan at 130°F. Final resting temperature: 135°F (57°C). (Highly recommended for most cuts).
- Medium (Warm pink center): Pull from pan at 140°F. Final resting temperature: 145°F (63°C).
- Medium-Well (Slightly pink center): Pull from pan at 150°F. Final resting temperature: 155°F (68°C).
- Well-Done (No pink, fully cooked): Pull from pan at 160°F. Final resting temperature: 165°F+ (74°C+).
How to Make the Perfect Pan-Seared Steak (Step-by-Step)
Prep Time: 10 minutes (plus dry-brining time) Cook Time: 10 minutes Resting Time: 10 minutes Total Time: 30 minutes Servings: 2 generously sized portions
Step 1: Prep and Dry Brine
If you have the time, pat the steaks completely dry with paper towels. Season generously on all sides (including the edges) with kosher salt. Place the steaks on a wire rack set over a baking sheet and refrigerate uncovered for 12 to 24 hours. When ready to cook, remove the steaks from the fridge and let them sit at room temperature for 30 to 45 minutes to take the chill off. Season generously with freshly cracked black pepper right before cooking.
Step 2: Preheat the Skillet
Turn on your kitchen exhaust fan or open a nearby window—searing steak properly will produce some smoke. Place a large cast iron skillet over medium-high to high heat and let it warm up completely for about 3 to 5 minutes. The pan must be aggressively hot.
Step 3: Add Oil and Sear
Add the high smoke-point oil to the pan. It should shimmer immediately and begin to produce faint wisps of smoke. Carefully lay the steaks in the pan, placing them down away from your body to prevent hot oil from splashing toward you. You should hear a loud, aggressive sizzle instantly. If you don’t, your pan isn’t hot enough.
Step 4: Render the Fat (For Strip Steaks)
Let the steaks sear undisturbed for about 2 to 3 minutes to build a dark brown crust. Flip the steaks. If you are cooking a New York strip with a thick fat cap on one side, use your tongs to stand the steaks up on their sides, pressing the fat directly into the hot pan for about 1 minute until it renders down and turns crispy.
Step 5: Begin the Butter Baste
Once you have flipped the steaks and seared the second side for about 2 minutes, reduce the heat to medium-low. Push the steaks to one side of the skillet. On the empty side of the pan, drop in the unsalted butter, smashed garlic cloves, fresh rosemary, and fresh thyme.
Step 6: Arroser (The Basting Process)
As the butter melts and begins to foam and bubble, tilt the skillet slightly toward you so the hot butter pools at the bottom. Using a large spoon, continuously scoop the foaming, herb-infused butter and pour it rapidly over the top of the steaks. Do this for 1 to 2 minutes. The hot butter will cook the steak from the top down, infusing the meat with garlic and herb flavors while deepening the crust.
Step 7: Check the Temperature
Check the internal temperature of the thickest part of the steak using your instant-read digital thermometer. For a perfect medium-rare, you are looking for a reading of 130°F. If it needs more time, continue basting gently until the target temperature is reached.
Step 8: Rest the Meat (Crucial Step!)
As soon as the steaks hit their target pull temperature, immediately transfer them to a clean wooden cutting board. Pour the remaining garlic-herb butter from the pan over the top of the resting steaks. Do not cut into the meat. Let the steaks rest completely undisturbed for 5 to 10 minutes. During this time, the muscle fibers relax and the intense heat pushes the juices back toward the center of the meat. If you cut the steak too early, the juices will bleed out all over your cutting board, leaving the meat dry.
Step 9: Slice and Serve
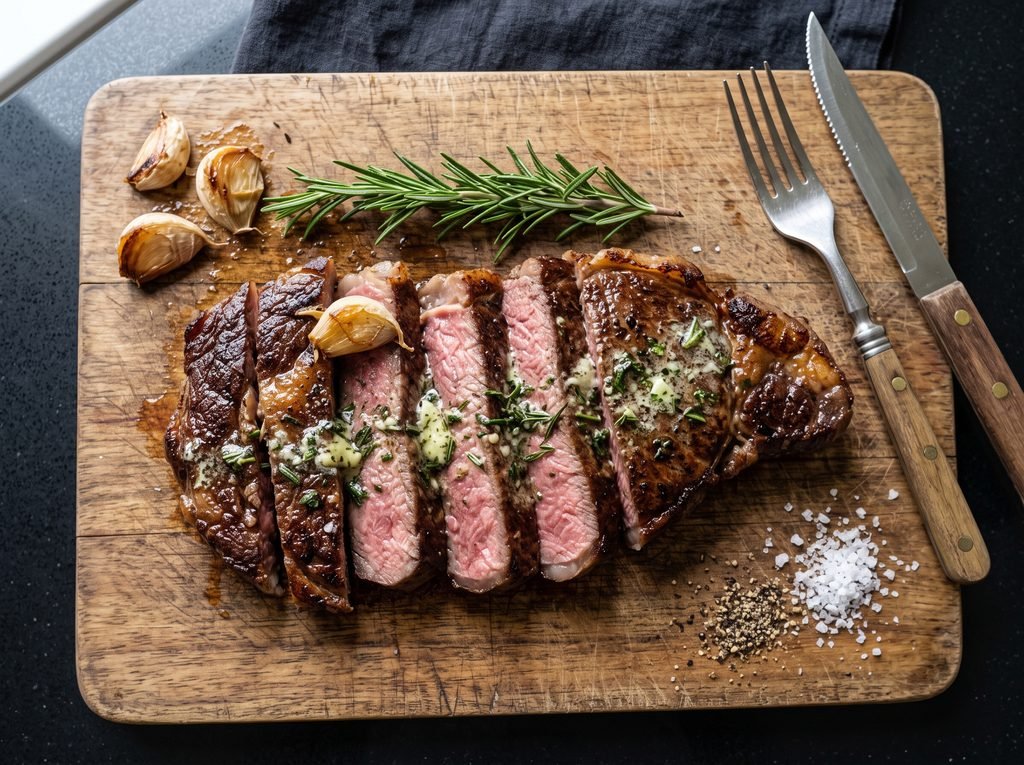
After the resting period, identify the direction of the muscle fibers (the grain) running through the meat. Use a sharp carving knife to slice the steak perpendicular to the grain into thin strips. Slicing against the grain ensures maximum tenderness. Serve immediately.
Helpful Tips for the Best Results
- Manage Your Heat During Basting: When you add the butter, you must lower the heat. Butter contains milk solids that will burn and turn bitter if exposed to the screaming-high heat used for the initial sear. You want the butter to foam and turn a nutty, golden brown (beurre noisette), but you do not want it to turn black.
- Do Not Overcrowd the Pan: If your cast iron skillet is too small to comfortably fit two large steaks with at least an inch of space between them, cook them one at a time. Cramming too much cold meat into a pan will plummet the temperature, causing the meat to steam in its own juices.
- Use Finishing Salt: For an authentic steakhouse touch, sprinkle a tiny pinch of flaky sea salt (like Maldon) over the top of the sliced steak right before serving. The delicate, crunchy salt flakes provide an incredible textural contrast to the tender meat.
Delicious Variations and Substitutions
While the classic garlic and rosemary butter baste is legendary, you can easily customize the flavor profile of your pan-seared steak.
- Compound Butters: Instead of basting, you can sear the steak in just oil, and upon moving it to the cutting board to rest, immediately top it with a large slice of homemade compound butter. Try mixing softened butter with crumbled blue cheese, minced shallots, and chives, or roasted jalapeños and cilantro.
- Sauce au Poivre (Peppercorn Sauce): After removing the cooked steaks from the skillet, leave the beef drippings in the pan. Sauté finely minced shallots, deglaze the pan with a splash of Cognac or brandy, and whisk in heavy cream, beef broth, and a generous handful of cracked green or black peppercorns. Simmer until thick, and pour over the steak.
- Chimichurri: For a bright, acidic contrast to the rich, fatty beef, serve your seared steak with a traditional Argentine chimichurri made from finely chopped fresh parsley, oregano, garlic, red wine vinegar, olive oil, and red pepper flakes.
- The Reverse Sear: If you are cooking exceptionally thick steaks (over 2.5 inches), consider the reverse sear method. Slowly roast the seasoned steak in a low 250°F (120°C) oven until it reaches 115°F, then transfer it to a screaming hot cast iron skillet for a quick, 1-minute-per-side sear to finish.
What to Serve With Pan-Seared Steak
A majestic steak deserves side dishes that complement its richness without overpowering its flavor.
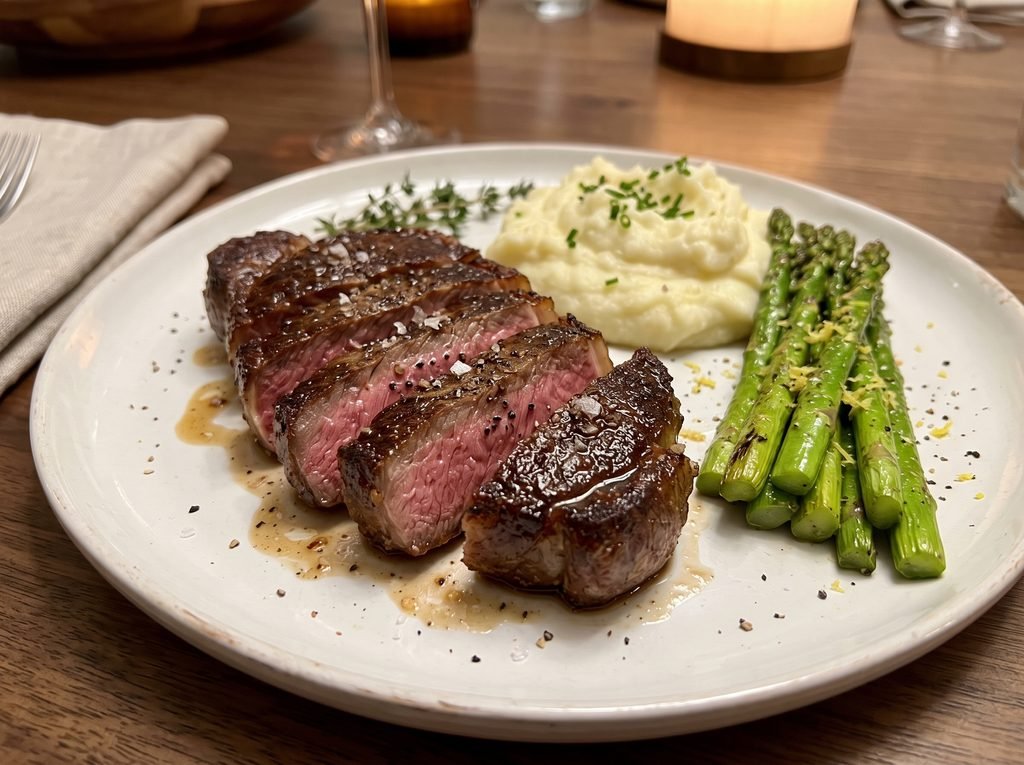
- Classic Potatoes: You cannot go wrong with starchy, comforting potatoes. Creamy, butter-whipped mashed potatoes or crispy, oven-roasted baby potatoes with rosemary are perfect vehicles for soaking up the extra pan juices.
- Green Vegetables: To cut through the heavy fat of the beef, serve a vibrant green vegetable. Blistered green beans with toasted almonds, grilled asparagus spears with a squeeze of fresh lemon juice, or rich creamed spinach are steakhouse staples.
- Mushrooms and Onions: Sautéed button or cremini mushrooms cooked down in butter, soy sauce, and a splash of Worcestershire sauce make an earthy, deeply savory topping. Caramelized onions are also a fantastic, sweet addition.
- Beverage Pairings: A bold, dry red wine with adequate tannins helps cleanse the palate between bites of rich, fatty beef. Look for a robust Cabernet Sauvignon, a peppery Syrah, or a fruit-forward Malbec.
Storage and Reheating Instructions
Leftover high-quality steak is a luxury, but reheating it improperly can quickly turn it into shoe leather.
Storage: Allow leftover steak to cool to room temperature, then place it in an airtight container. It will stay fresh in the refrigerator for 3 to 4 days.
Reheating: Never microwave leftover steak; it will cook the meat well-done and turn it rubbery. The best way to reheat steak is gently in the oven. Place the leftover steak on a wire rack over a baking sheet and warm it in a low oven set to 250°F (120°C) for about 10 to 15 minutes, just until the center is warmed through. Alternatively, slice the cold steak thinly and serve it cold over a crisp salad or tucked into a crusty baguette with horseradish mayonnaise for an incredible steak sandwich.
Frequently Asked Questions
Why is my steak tough and chewy? Tough steak usually results from either purchasing a poor, lean cut of meat with heavy connective tissue, or overcooking it. Slicing the meat with the grain instead of against the grain can also make even a perfectly cooked steak feel chewy. Always cut across the muscle fibers to shorten them.
Can I cook a steak straight from the fridge? You can, but it is not ideal. A cold steak will drop the temperature of your skillet drastically, compromising the sear. Furthermore, the exterior will overcook while the cold interior struggles to come up to temperature. Letting it rest on the counter for 30-45 minutes yields a much more even cook.
Do I really need a cast iron skillet? While you do not strictly need cast iron, it is highly recommended. Heavy stainless steel or carbon steel pans work well. However, you should completely avoid lightweight non-stick pans. They cannot reach the required heat safely and will not develop a proper crust.
What is the best oil for searing steak indoors? You need an oil with a high smoke point (above 400°F). Avocado oil, grapeseed oil, canola oil, and light vegetable oil are excellent choices. Olive oil and butter have low smoke points and will burn, smoking up your kitchen and tasting bitter.
Is it safe to eat medium-rare steak? Yes. Unlike ground beef, where bacteria on the surface are mixed into the center of the meat during the grinding process, intact whole muscle cuts of beef only have bacteria on the exterior surface. Searing the outside of the steak rapidly destroys this surface bacteria, making a rare or medium-rare interior safe to consume.
Should I cover the pan while the steak cooks? No. Covering the skillet traps steam. Steam introduces moisture to the environment, which will completely ruin the crispy crust you are trying to build. Always sear steak in an uncovered pan.
Final Thoughts
Mastering the pan-seared garlic butter steak is a milestone for any home cook. It proves that you do not need highly specialized culinary training or professional restaurant equipment to produce food that is genuinely spectacular. By respecting the ingredients, managing your heat, utilizing the power of a cast iron skillet, and relying on an instant-read thermometer, you have complete control over the final outcome.
Take the time to dry-brine your meat, don’t rush the initial sear, and thoroughly enjoy the aromatic process of butter basting. Once you slice into that perfectly pink, juicy center and taste the deeply caramelized crust, this will quickly become your go-to method for cooking beef. Enjoy the process, trust your thermometer, and get ready to serve the best steak you have ever made.