
Best Ever Homemade Chocolate Chip Scones Recipe
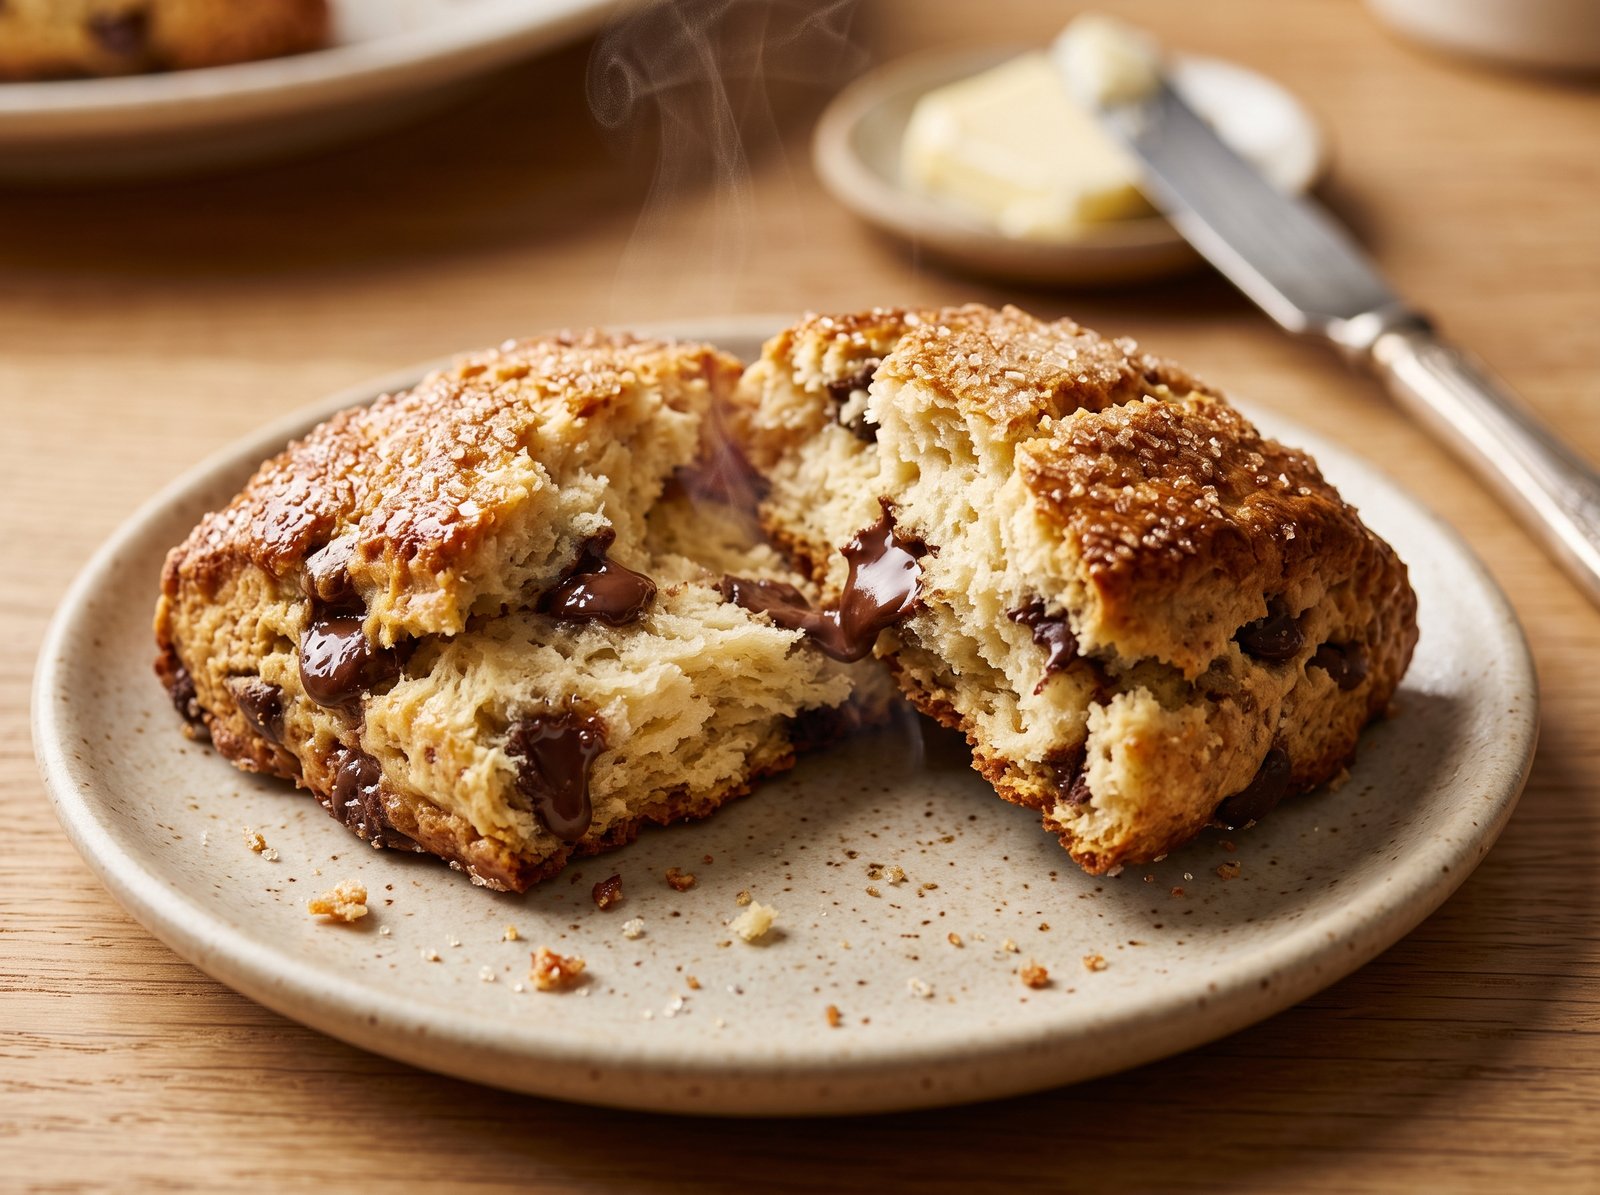
There is a persistent myth in the baking world that scones are inherently dry, crumbly, and meant only to be choked down with massive quantities of hot tea. If you have ever bitten into a dense, chalky puck posing as a pastry, you know exactly what I mean. But true, bakery-style scones are an entirely different experience. They should feature a crisp, golden-brown exterior that shatters delicately when you bite into it, revealing a soft, tender, and incredibly flaky interior. Add a generous handful of semi-sweet chocolate chips, and you have a breakfast pastry that rivals any high-end bakery offering.
This chocolate chip scones recipe is designed to banish the dry-scone stereotype forever. By utilizing specific techniques—like keeping the butter ice-cold, using heavy cream for richness, and applying a simple folding method to create distinct, buttery layers—you can achieve professional-level results right in your own kitchen. Whether you are baking a special weekend breakfast, hosting a brunch, or simply craving a comforting afternoon treat to pair with your coffee, these scones are guaranteed to become a permanent fixture in your baking repertoire.
What Is a Chocolate Chip Scone?
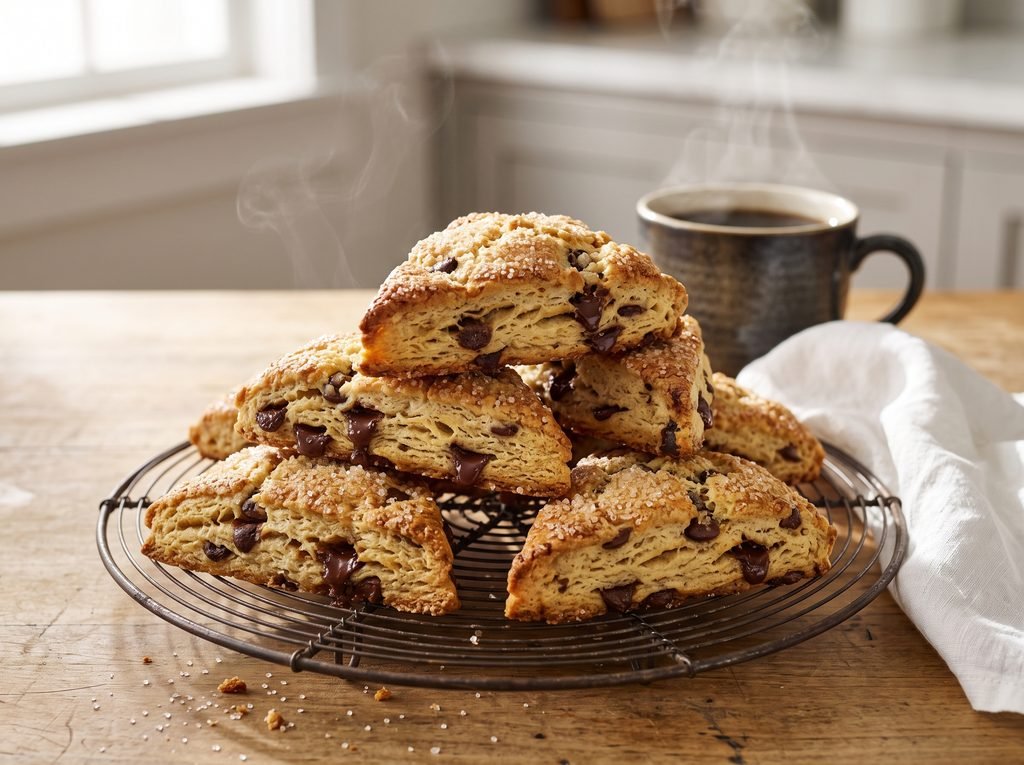
To understand how to make the perfect scone, it helps to understand what a scone actually is. Originating in the United Kingdom, traditional British scones are lightly sweetened, biscuit-like cakes meant to be split open and slathered with clotted cream and jam. They are typically plain or dotted with currants and are often made with milk rather than heavy cream.
The American-style scone, however, has evolved into a slightly different category of pastry. American scones are generally richer, sweeter, and larger. They rely heavily on butter and heavy cream or buttermilk to create a tender, cake-like crumb. Instead of relying on spreads for flavor, American scones are famous for their robust mix-ins—everything from fresh berries and toasted nuts to, of course, chocolate chips.
A chocolate chip scone bridges the gap between a breakfast biscuit and a dessert pastry. It utilizes the fundamental technique of “cutting in” cold fat to a flour mixture, which creates pockets of steam during baking. This steam forces the dough upward, resulting in the signature flaky layers. The addition of chocolate chips introduces pockets of melted, gooey sweetness that perfectly contrast the buttery, slightly salty dough.
Why You’ll Love This Recipe
There are countless scone recipes out there, but this one stands out for several very specific reasons:
- Unmatched Texture: Thanks to a quick dough-folding technique (similar to rough puff pastry), these scones boast incredible, sky-high layers. They are crisp on the outside and remarkably tender on the inside.
- No Fancy Equipment Required: You do not need a stand mixer or a food processor to make this recipe. A box grater, a mixing bowl, and your hands are all you need to bring this dough together.
- Perfectly Balanced Flavor: While the chocolate chips add sweetness, the dough itself is only lightly sweetened and carries a hint of vanilla and salt. This balance ensures the pastry never tastes cloying.
- Freezer-Friendly: Perhaps the best feature of this recipe is how beautifully the unbaked dough freezes. You can keep a stash of shaped scones in your freezer and bake them fresh one at a time whenever the craving strikes.
- Quick to Assemble: Despite the impressive results, the actual hands-on preparation time is impressively short. You can have these mixed, shaped, and ready for the oven in under 20 minutes.
The Anatomy of a Perfect Scone
Before diving into the ingredients, it is crucial to understand the two golden rules of scone making: temperature and handling.
1. Cold is King: Every element of your dough should be as cold as possible. When cold pieces of butter enter a hot oven, the water inside the butter evaporates, creating steam. This steam pushes the layers of flour apart, creating flakiness. If your butter warms up and melts into the flour before baking, you will end up with a flat, dense, muffin-like texture instead of a flaky pastry.
2. Minimal Handling: Scones fall into the category of “quick breads,” meaning they rely on chemical leaveners (baking powder) rather than yeast for their rise. Because of this, you want to avoid developing gluten. Gluten, the protein network formed when flour mixes with liquid, is great for chewy pizza dough but terrible for tender scones. The less you touch, knead, and mix the dough, the softer your final product will be.
Ingredients
The beauty of homemade chocolate chip scones lies in their simplicity. Because the ingredient list is short, the quality and type of each ingredient heavily impact the final result.
- All-Purpose Flour: You will need 2 cups (250g) of all-purpose flour. It provides the perfect amount of structure without making the scones tough. Be sure to measure your flour using the “spoon and level” method (spooning the flour into the measuring cup and leveling it off with a knife) or, ideally, weigh it using a digital kitchen scale. Scooping directly from the bag packs the flour tightly, leading to dry scones.
- Granulated Sugar: Just 1/3 cup (65g) of sugar is all you need. This lightly sweetens the dough, encourages browning on the crust, and tenderizes the crumb without competing with the chocolate.
- Baking Powder: You need a full 1 tablespoon of baking powder. This might seem like a lot, but it is necessary to provide the powerful lift required to puff up this heavy, buttery dough. Ensure your baking powder is fresh; expired baking powder is the number one cause of flat scones.
- Salt: 1/2 teaspoon of fine sea salt or kosher salt enhances the flavors of the butter and vanilla, while balancing the sweetness of the chocolate.
- Unsalted Butter: You need 1/2 cup (1 stick / 115g) of unsalted butter. It must be frozen solid. Using frozen butter allows you to grate it easily, creating perfectly uniform shards of fat that distribute evenly through the flour.
- Heavy Cream: 3/4 cup (180ml) of cold heavy cream is the liquid binder. The high fat content in heavy cream yields an incredibly tender, rich crumb. You will also need an extra tablespoon or two for brushing the tops of the scones before baking.
- Vanilla Extract: 2 teaspoons of pure vanilla extract adds a lovely, bakery-style aroma and depth of flavor.
- Chocolate Chips: 1 cup (170g) of semi-sweet chocolate chips is the perfect amount. Semi-sweet chocolate provides a great flavor contrast, but you can easily use dark chocolate chunks, milk chocolate, or even mini chocolate chips depending on your preference.
- Coarse Sugar (Optional): Turbinado sugar or coarse sparkling sugar sprinkled on top before baking adds a beautiful, professional-looking crunch to the exterior.
How to Make Chocolate Chip Scones
Follow these step-by-step instructions carefully. The technique is just as important as the ingredients.
Prep Time: 20 minutes Chill Time: 15 minutes Cook Time: 20 minutes Total Time: 55 minutes Servings: 8 scones
Step 1: Freeze the Butter and Prep the Oven At least an hour before you begin baking, place your stick of butter in the freezer. When you are ready to start, preheat your oven to 400°F (200°C). Line a large baking sheet with parchment paper or a silicone baking mat and set it aside.
Step 2: Whisk the Dry Ingredients In a large mixing bowl, combine the 2 cups (250g) of all-purpose flour, 1/3 cup (65g) of granulated sugar, 1 tablespoon of baking powder, and 1/2 teaspoon of salt. Whisk these together until they are completely combined and aerated.
Step 3: Grate the Butter Take your frozen stick of butter out of the freezer. Using the large holes of a standard box grater, grate the butter directly into the bowl with the dry ingredients. (Tip: Leave the wrapper on the bottom half of the butter stick so you have something to hold onto without your warm fingers melting the butter).
Step 4: Toss to Coat Using a pastry blender or your fingertips, gently toss the grated butter into the flour mixture. You want every single piece of butter to be coated in flour. Do not squeeze or mash the butter; just toss it lightly until the mixture resembles coarse, pea-sized crumbs.
Step 5: Add the Chocolate Chips Pour the 1 cup (170g) of semi-sweet chocolate chips into the butter and flour mixture. Toss gently to distribute the chips evenly throughout the dry ingredients. Doing this now ensures the chips are coated in flour, which prevents them from sinking to the bottom of the scones during baking.
Step 6: Combine the Wet Ingredients In a small liquid measuring cup, whisk together the 3/4 cup (180ml) of cold heavy cream and the 2 teaspoons of vanilla extract.
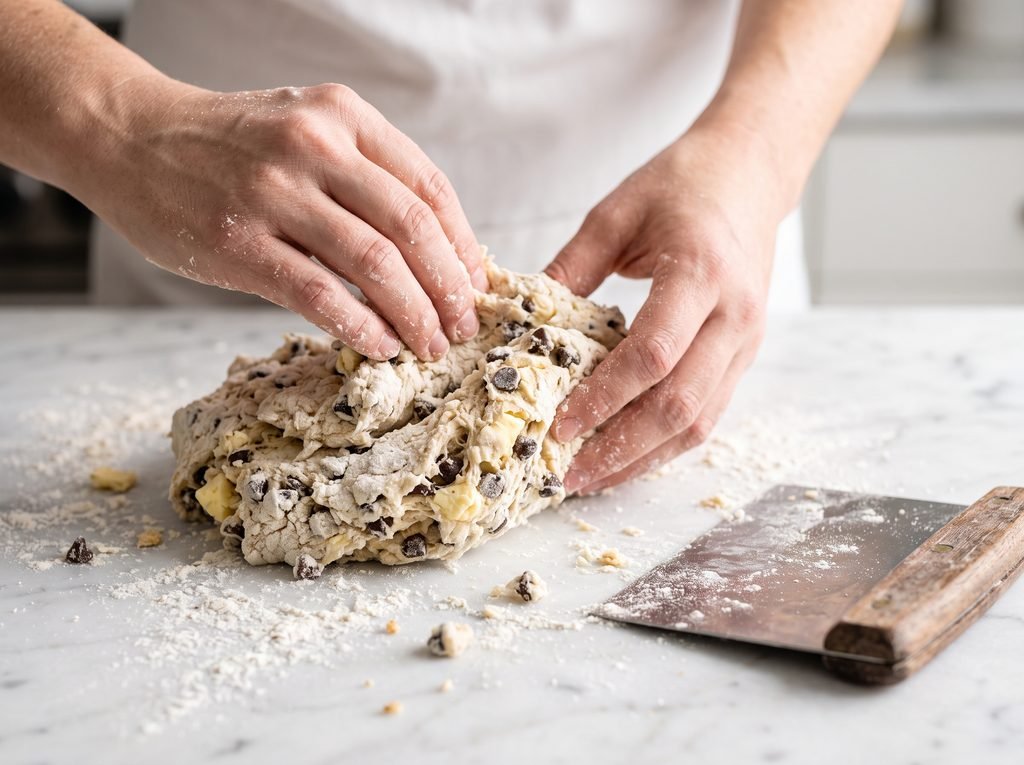
Step 7: Bring the Dough Together Create a small well in the center of your dry ingredients. Pour the cold cream mixture into the well. Using a fork or a rubber spatula, gently fold the mixture together. Stop mixing as soon as the liquid is absorbed. The dough will look very shaggy, dry in spots, and crumbly—this is exactly how it should look. Do not overmix.
Step 8: Knead and Laminate (The Folding Technique) Turn the shaggy dough and all the loose flour bits out onto a clean, lightly floured work surface. With floured hands, gently press the dough together into a rough rectangle. Now, fold the dough in half over itself (like closing a book). Gently press it down into a rectangle again. Turn the dough 90 degrees, and fold it in half one more time. Gather any loose crumbs and press them into the dough. This quick folding process (lamination) creates those distinct, flaky layers.
Step 9: Shape and Cut Gently pat the folded dough into a neat circle that is about 8 inches in diameter and about 1 to 1.5 inches thick. Using a sharp chef’s knife or a bench scraper, press straight down to cut the circle into 8 equal wedges (like a pizza). Do not use a sawing motion with your knife, as this seals the edges of the dough and prevents the scones from rising properly.
Step 10: Chill the Dough Transfer the 8 wedges to your prepared baking sheet, spacing them a few inches apart. Place the entire baking sheet in the refrigerator for 15 minutes (or the freezer for 5–10 minutes). This step is non-negotiable! Chilling relaxes the gluten and ensures the butter is completely cold before hitting the hot oven, preventing the scones from spreading into flat puddles.
Step 11: Brush and Garnish Remove the baking sheet from the fridge. Lightly brush the tops of the scones with an extra tablespoon or two of heavy cream. Be careful not to let the cream drip down the sides, as this can inhibit the rise. Generously sprinkle the tops with coarse turbinado sugar.
Step 12: Bake Bake at 400°F (200°C) for 18 to 22 minutes. You are looking for tops that are a beautiful golden brown, and edges that look crisp and set.
Step 13: Cool Remove from the oven and allow the scones to cool on the baking sheet for 5 minutes before transferring them to a wire rack to cool slightly. Serve warm.
Helpful Tips for the Best Results
Even with a foolproof recipe, a few professional tips can elevate your baking from good to exceptional. Keep these guidelines in mind:
- Use a Bench Scraper: A metal bench scraper is a scone-maker’s best friend. It helps you fold the dough, gather loose crumbs, and cut the wedges cleanly without transferring the heat from your hands to the butter.
- Check Your Oven Temperature: Ovens are notoriously inaccurate. If your oven runs cool, the butter will melt before the scones have a chance to rise, resulting in flat, greasy pastries. Use an inexpensive oven thermometer to ensure you are actually baking at 400°F (200°C).
- Do Not Twist the Cutter: If you ever decide to make round scones instead of wedges using a biscuit cutter, press the cutter straight down and pull it straight up. Twisting the cutter seals the edges of the dough and blocks the layers from rising.
- Embrace the Shaggy Dough: The biggest mistake beginners make is adding more liquid because the dough looks too crumbly in the bowl. Trust the process. As you turn it out and fold it, the moisture will hydrate the flour. If you add more cream, your dough will become sticky, tough, and heavy.
Variations and Substitutions
Once you master this master base dough, the possibilities for flavor variations are virtually endless.
- Espresso Chocolate Chip: Add 1 to 2 tablespoons of instant espresso powder to the dry ingredients. The coffee flavor beautifully enhances the chocolate and gives you a wonderful morning caffeine kick.
- Orange Chocolate: Add the zest of one large, fresh orange to the sugar, rubbing it together with your fingers until fragrant before mixing in the flour. The citrus oils pair phenomenally with semi-sweet or dark chocolate.
- White Chocolate Macadamia: Swap out the semi-sweet chocolate chips for an equal amount of high-quality white chocolate chips and toasted, roughly chopped macadamia nuts.
- Brown Butter Scones: If you want a deep, nutty, caramel flavor, you can brown the butter ahead of time. However, you MUST pour the browned butter into a container and freeze it until it is completely solid again before grating it into the flour.
- Heavy Cream Substitutes: If you do not have heavy cream, you can use full-fat buttermilk. Buttermilk will yield a slightly tangier scone with a slightly softer crust. Do not use skim milk, 2% milk, or almond milk; they do not have enough fat to tenderize the dough properly, leading to dry results.
What to Serve With It
Scones are wonderfully versatile. Because these chocolate chip scones are already rich and sweet, they do not strictly require any accompaniments. Eaten warm, right off the cooling rack with the chocolate still gooey, they are perfect on their own.
However, if you want to elevate the experience—especially for a brunch spread—consider serving them alongside:
- A pot of freshly brewed French press coffee or robust Earl Grey tea.
- Softened, high-quality salted butter. The salt beautifully cuts the sweetness of the chocolate.
- A dollop of slightly sweetened, lightly whipped cream or traditional British clotted cream.
- A side of fresh raspberries or sliced strawberries to add a bright, acidic contrast to the rich pastry.
Storage and Reheating
Proper storage is the key to maintaining that fresh-baked texture. Scones are notoriously prone to drying out if left exposed to the air.
Room Temperature Storage: Allow the baked scones to cool completely to room temperature. Once cool, place them in an airtight container or a large zip-top bag. They will keep at room temperature for up to 2 days.
Reheating Baked Scones: To revive a room-temperature scone and bring back its crisp exterior, place it on a baking sheet in a 300°F (150°C) oven for 5 to 8 minutes until warmed through. Alternatively, microwave a scone for 15 seconds, though this will make the scone softer rather than crispy.
Freezing Unbaked Dough (Highly Recommended): The absolute best way to ensure you always have fresh scones is to freeze the unbaked dough. Follow the recipe right up through cutting the dough into wedges. Place the unbaked wedges on a baking sheet and freeze until completely solid (about 2 hours). Transfer the frozen wedges to a freezer-safe bag, pressing out as much air as possible. They will keep in the freezer for up to 3 months. When you are ready to bake, place the frozen scones on a baking sheet, brush with heavy cream, and bake directly from frozen at 400°F (200°C). You will just need to add 2 to 4 minutes to the original baking time.
Freezing Baked Scones: You can also freeze fully baked scones. Let them cool completely, then wrap each scone tightly in plastic wrap and place them in a freezer bag. Freeze for up to 2 months. Thaw at room temperature for a few hours, then refresh in a 300°F (150°C) oven for 5 minutes.
Frequently Asked Questions
Can I make these scones gluten-free? Yes, you can adapt this recipe for a gluten-free diet. Substitute the all-purpose flour with a high-quality gluten-free 1-to-1 baking blend that contains xanthan gum. Keep in mind that gluten-free flours absorb liquid differently, so your scones may be slightly more crumbly, but the flavor will still be excellent.
Why did my scones spread out and go flat? This is almost always a temperature issue. If your butter was too warm when you mixed the dough, or if your kitchen was very hot, the butter melts into the flour rather than creating steam pockets. Chilling the dough for 15 minutes before baking is the best way to prevent flat scones. Additionally, verify that your baking powder is not expired.
Can I use a food processor to cut the butter? Yes, you can use a food processor. Pulse the dry ingredients together, then add cold, cubed butter (rather than grated). Pulse 5 or 6 times in short bursts until the butter is pea-sized. Transfer the mixture to a bowl before adding the chocolate chips and heavy cream. Do not add the cream into the food processor, or you will overwork the dough and create tough scones.
Do I have to use heavy cream? Heavy cream is strongly recommended because its high fat content creates the most tender, luxurious crumb. If you are in a pinch, full-fat buttermilk is an excellent alternative. Half-and-half can work, but the scones will be slightly less rich. Avoid using regular milk or water.
Why are my scones tough and chewy? Tough scones are the result of overworking the dough. When flour mixes with liquid, gluten begins to form. The more you knead or stir, the stronger the gluten network becomes, resulting in a bread-like, chewy texture. Mix the wet and dry ingredients just until they come together, and handle the dough as little as possible.
Can I make the dough the night before? Yes. You can prepare the dough, cut it into wedges, place them on a baking sheet, cover them tightly with plastic wrap, and leave them in the refrigerator overnight. In the morning, simply brush them with cream, sprinkle with sugar, and bake. You may need to add 1-2 extra minutes to the baking time since the dough will be very thoroughly chilled.
Final Thoughts
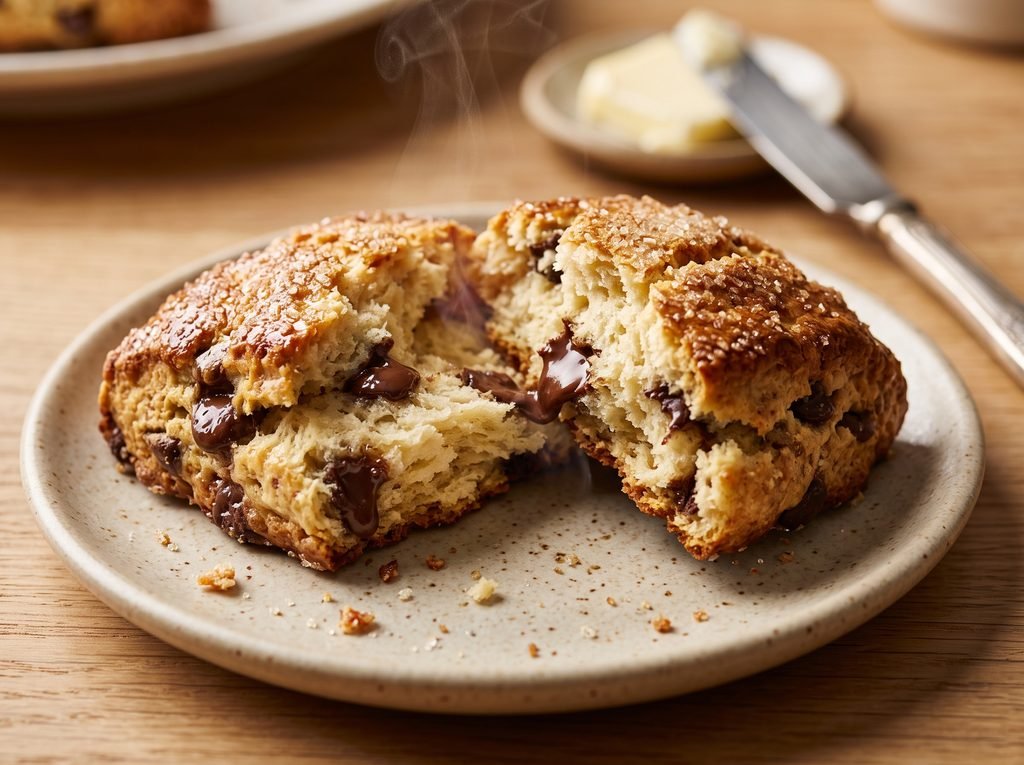
Baking the perfect batch of chocolate chip scones at home does not require years of pastry training; it simply requires a bit of patience, very cold butter, and a gentle touch. By following this method—grating the butter, employing a quick lamination fold, and giving the dough a final chill—you will consistently produce scones that boast buttery, sky-high layers and a wonderfully tender crumb. Once you pull that first golden-brown, chocolate-studded batch out of the oven and split one open while it’s still steaming, you will never look at bakery scones the same way again. Grab your apron, preheat your oven, and enjoy the ultimate weekend baking project!