
The Ultimate Halloween Brownies: Fudgy, Dark, and Spooky
When the October winds start to howl and the leaves turn vibrant shades of orange and red, the desire to turn on the oven and bake something decadent becomes nearly irresistible. While the autumn season is famous for pumpkin-spiced treats, apple pies, and cinnamon-scented pastries, there is a fundamental truth that every dessert lover knows: chocolate is always in season. In fact, as the nights grow longer and the Halloween aesthetic takes over, rich, dark chocolate becomes the absolute perfect canvas for spooky seasonal baking.
If you are planning a Halloween party, putting together treat boxes for your neighbors, or simply looking for a rich, satisfying baking project for a chilly weekend, you cannot go wrong with a classic brownie. But we are not talking about a dry, crumbly, boxed mix. We are talking about the ultimate, from-scratch, intensely fudgy Halloween brownies.
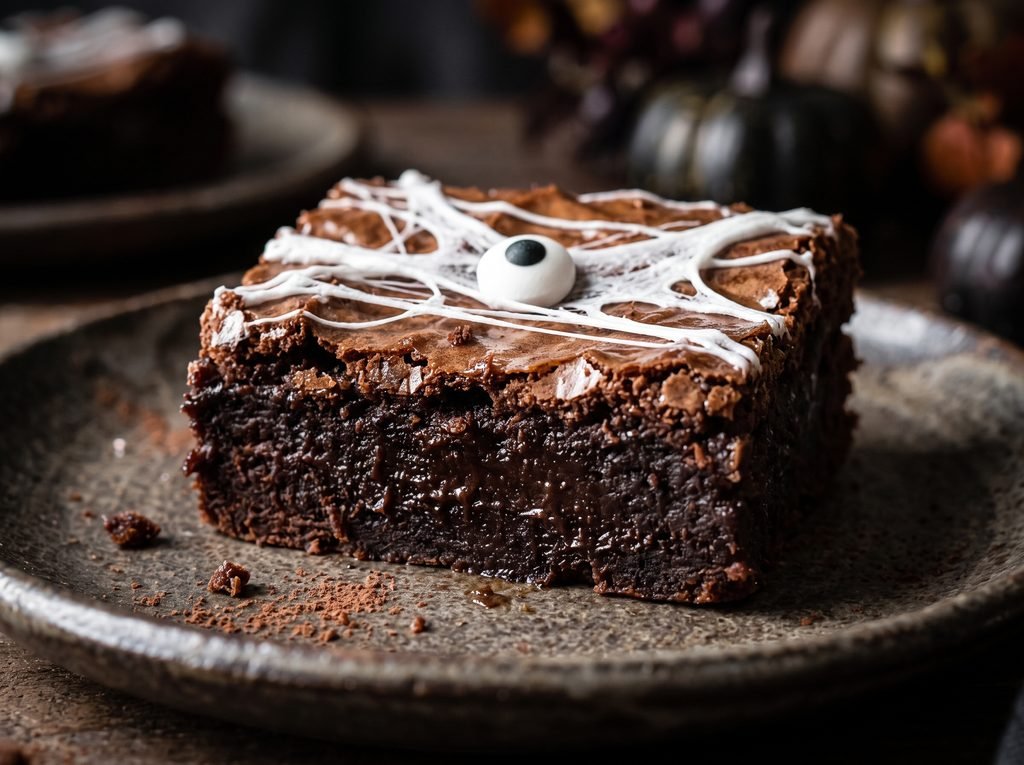
There is a distinct magic to a perfectly baked brownie. It sits precisely at the intersection of a dense chocolate fudge truffle and a soft, tender cake. The best brownies boast a deeply dark chocolate interior, chewy edges, and that highly coveted, paper-thin, crinkly, shiny top crust. By utilizing a specific blend of melted dark chocolate, Dutch-process cocoa powder, and a few clever decorating techniques, we are going to transform a timeless bakery staple into a show-stopping, spectacular Halloween centerpiece. Get your mixing bowls ready; this is the only brownie recipe you will need this October.
What Are Halloween Brownies?
At their foundation, Halloween brownies are thick, intensely chocolatey, fudgy squares that have been dressed up to celebrate the spooky season. Unlike lighter desserts or intricately piped cupcakes, brownies offer a sturdy, dark, and flat surface that acts as the ultimate backdrop for festive decorations.
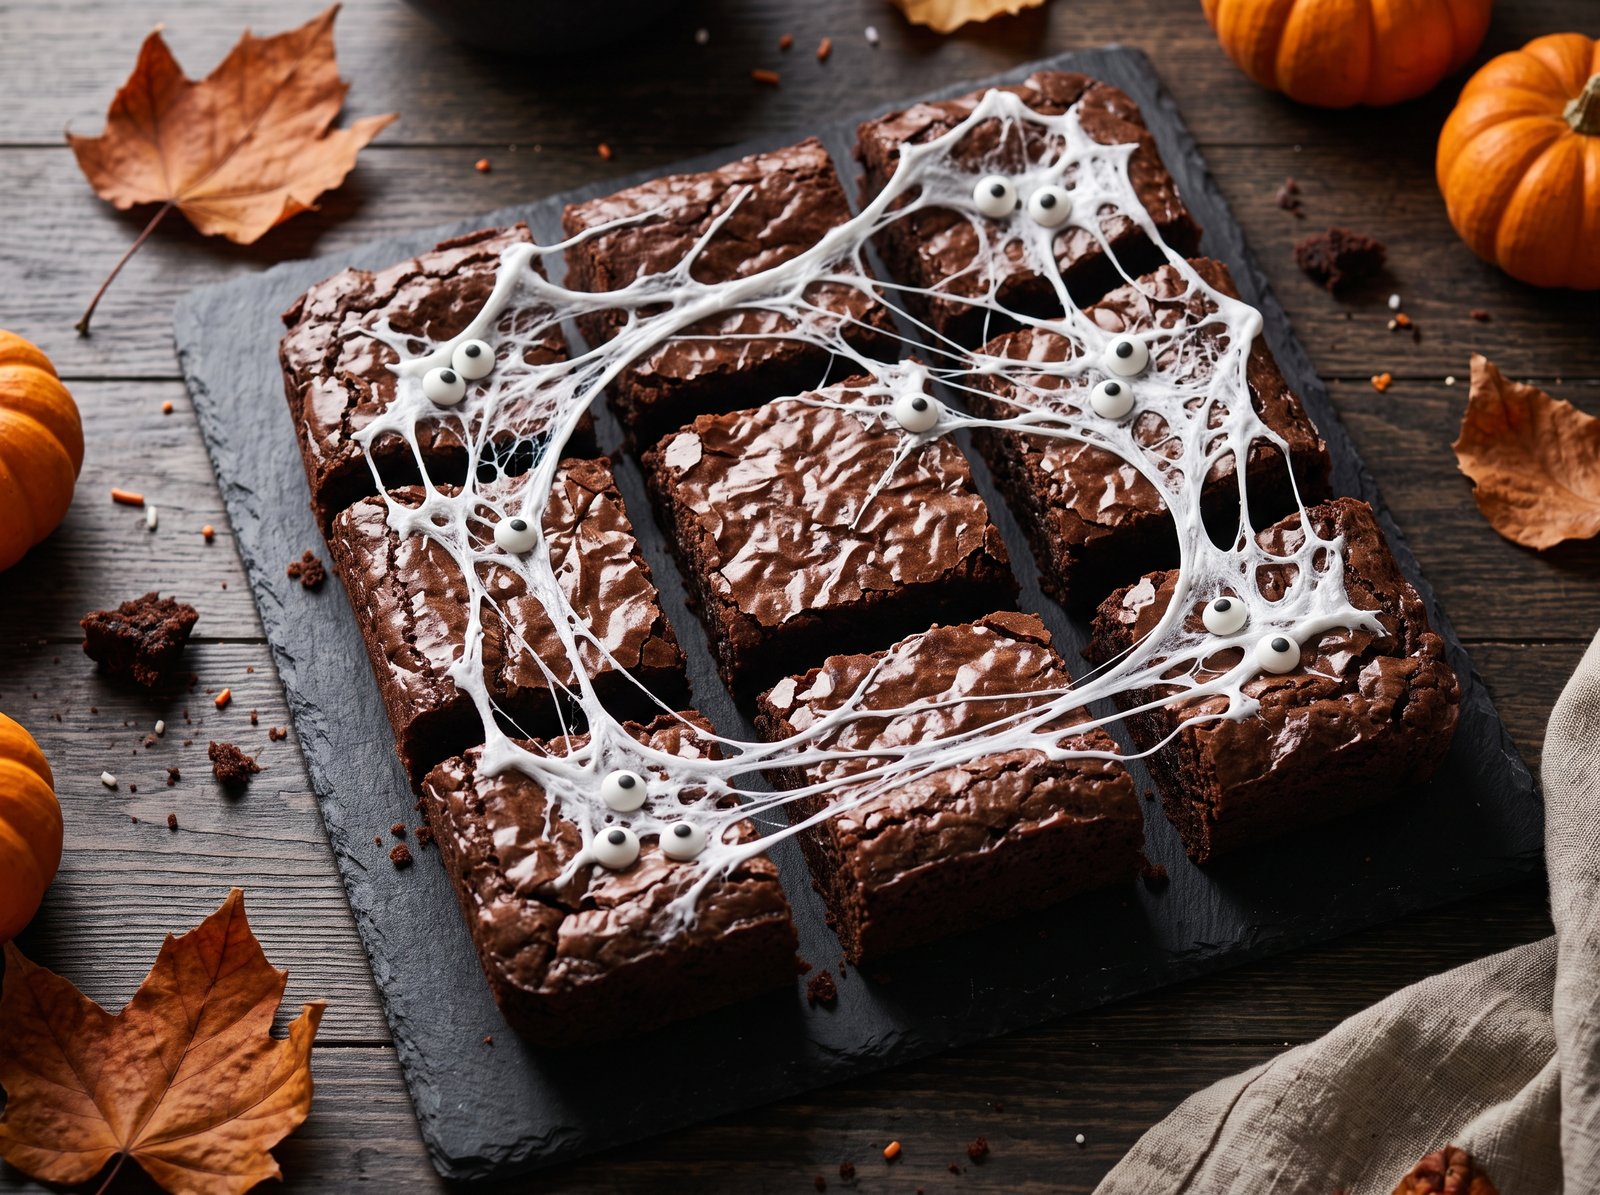
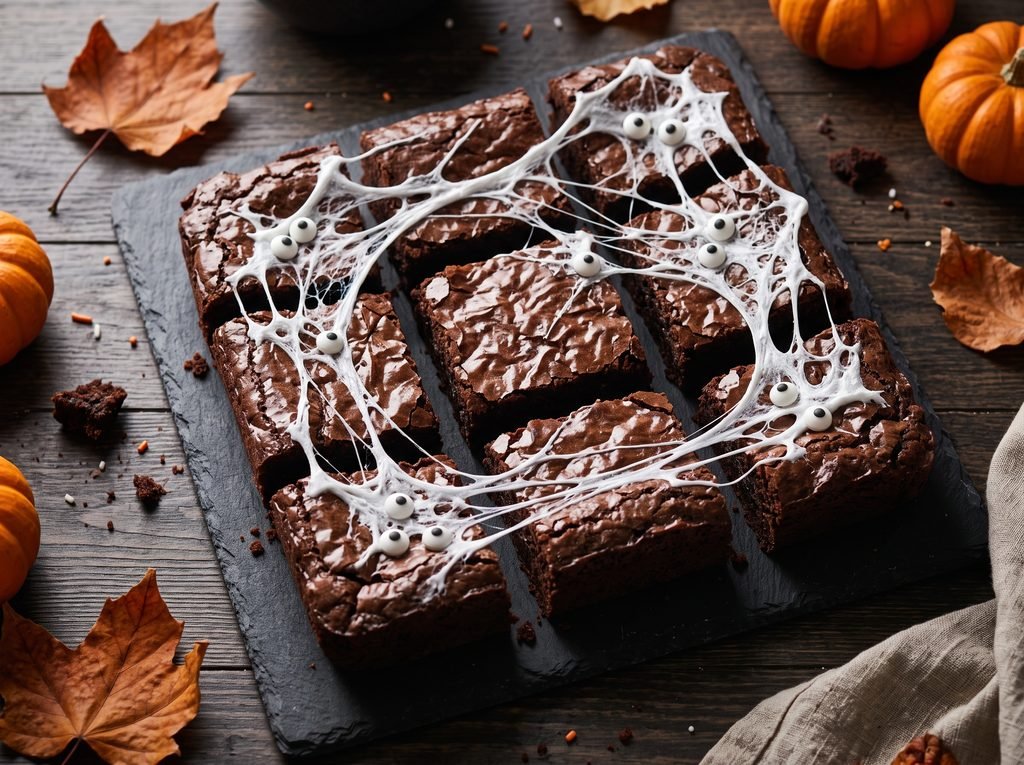
Because the batter for this recipe results in a nearly midnight-black, rich dessert, the vibrant colors of Halloween—neon green, bright orange, stark white, and vibrant purple—pop beautifully against it. Halloween brownies can take many forms depending on how you choose to decorate them. They can be adorned with stretchy, realistic marshmallow cobwebs, topped with white chocolate “mummy” drizzles, swirling with spooky cream cheese “ghosts,” or simply loaded to the brim with chopped-up leftover Halloween candy.
While the decorations are what make them distinctly “Halloween,” the soul of the dessert is the brownie itself. A true gourmet brownie leans heavily into the “fudgy” category rather than the “cakey” category. It relies on a higher ratio of fat (butter and chocolate) to flour, ensuring a dense, melt-in-your-mouth texture that satisfies even the most intense chocolate cravings.
Why You’ll Love This Recipe
Finding the perfect from-scratch brownie recipe can sometimes feel like searching for a needle in a haystack. Some are too sweet, some are too cakey, and some completely lack that beautiful shiny crust. Here is why this specific recipe will become your permanent, trusted go-to for holiday baking:
- The Ultimate Fudgy Texture: By using both melted high-quality chocolate bars and Dutch-process cocoa powder, this recipe delivers a double hit of chocolate that creates an incredibly dense, truffle-like center.
- The Guaranteed Crackly Top: You will learn the bakery secret to achieving that tissue-paper-thin, shiny crust every single time. It all comes down to how you handle the eggs and sugar.
- A Forgiving, Sturdy Canvas: Because these brownies are thick and dense, they will not crumble or fall apart when you load them up with heavy decorations, gooey marshmallows, or handfuls of candy.
- Incredible Make-Ahead Potential: Brownies are one of the rare baked goods that actually taste better on the second or third day. The flavors meld, and the fudge texture becomes even more pronounced, making them the ultimate stress-free party prep dessert.
- No Mixer Needed: While a hand mixer makes one step a bit easier, this entire recipe can be made in a single large bowl with a sturdy whisk and a spatula, keeping cleanup to an absolute minimum.
Recipe Details
- Prep Time: 20 minutes
- Cook Time: 30 minutes
- Cooling Time: 2 hours (crucial for clean slicing)
- Decorating Time: 15 minutes
- Total Time: 3 hours 5 minutes
- Servings: 16 to 24 squares (depending on how large you slice them)
Ingredients
To achieve a bakery-quality brownie, the quality of your ingredients matters immensely. Because there are so few ingredients in a brownie, each one plays a vital role in the final texture and flavor. Bring your eggs to room temperature before beginning for the best results.
For the Fudgy Brownie Base:
- 1 cup (2 sticks / 8 ounces) unsalted butter: Using unsalted butter allows you to control the exact sodium level. The butter will be melted, so there is no need to wait for it to soften.
- 8 ounces high-quality dark chocolate baking bars: Finely chopped. Aim for a cocoa percentage between 60% and 70%. Do not use chocolate chips. Chocolate chips contain stabilizers designed to help them keep their shape in the oven, which prevents them from melting smoothly into the batter.
- 1 1/2 cups granulated sugar: White sugar is absolutely essential for creating the shiny, crackly meringue crust on top of the brownies.
- 1/2 cup light brown sugar: Packed tightly. The molasses in the brown sugar adds moisture, chewiness, and a deeper depth of flavor.
- 4 large eggs: Must be at room temperature. Cold eggs will shock the melted chocolate and butter, causing the batter to seize and become greasy.
- 1 tablespoon pure vanilla extract: A generous amount of vanilla enhances the rich chocolate notes perfectly.
- 1 cup all-purpose flour: Spooned and leveled. Using too much flour is the quickest way to accidentally create a dry, cakey brownie.
- 1/2 cup Dutch-process cocoa powder: Sifted to remove lumps. Dutch-process cocoa has been treated to reduce acidity, resulting in a darker color and a smoother, earthier chocolate flavor than standard natural cocoa powder.
- 1 teaspoon espresso powder: Optional, but highly recommended. You will not taste the coffee at all; espresso powder simply acts as a flavor amplifier, making the chocolate taste darker and richer.
- 1 teaspoon kosher salt: Crucial for cutting through the dense sweetness and balancing the entire flavor profile.
For the Halloween Spiderweb Decoration:
- 1 1/2 cups white mini marshmallows: The secret ingredient for creating realistic, edible, stretchy cobwebs.
- Candy monster eyeballs: Assorted sizes. These can be found in the baking aisle of most craft stores or major supermarkets during the fall season.
How to Make Halloween Brownies
Baking the perfect brownie is an exercise in restraint. The most important rule to remember as you read through these instructions is to avoid overmixing the batter once the flour is added.
Step 1: Prepare Your Pan and Oven
Preheat your oven to 350°F (175°C). Prepare a 9×13-inch light-colored metal baking pan. Do not just grease it; line the pan with a large sheet of parchment paper, leaving an overhang on two sides. This creates a “sling” that will allow you to lift the entire slab of brownies out of the pan for perfectly clean slicing later. Lightly spray the parchment with non-stick cooking spray.
Step 2: Melt the Butter and Chocolate
In a medium microwave-safe bowl, combine the chopped dark chocolate bars and the unsalted butter. Microwave in 30-second bursts, stirring thoroughly with a rubber spatula after each interval. It should take about 1 1/2 to 2 minutes total. Once it is completely smooth and glossy, set it aside to cool slightly. (Alternatively, you can melt them together in a heat-proof bowl set over a saucepan of simmering water on the stove).
Step 3: Whip the Eggs and Sugars (The Secret Step!)
In a very large mixing bowl, combine the room-temperature eggs, granulated sugar, and light brown sugar. Using a hand mixer on medium-high speed, or a sturdy whisk and a lot of arm power, beat the eggs and sugars together for a full 3 to 4 minutes. The mixture should become pale, thick, and significantly increased in volume. Do not skip this step. Whipping air into the eggs and fully dissolving the sugar crystals is the exact scientific secret to achieving that shiny, tissue-paper-thin crust on top of your baked brownies.
Step 4: Combine the Wet Ingredients
Turn your mixer to the lowest speed (or switch to a whisk). Slowly pour the slightly cooled melted chocolate and butter mixture into the whipped eggs and sugar. Add the pure vanilla extract. Mix gently just until the gorgeous chocolate color is completely uniform and no streaks of egg remain.
Step 5: Fold in the Dry Ingredients
Place a fine-mesh sieve over your large bowl. Pour the all-purpose flour, Dutch-process cocoa powder, espresso powder, and kosher salt into the sieve and sift them directly over the wet chocolate batter. Remove the sieve. Switch to a rubber spatula. Gently fold the dry ingredients into the wet ingredients by scraping the bottom of the bowl and lifting the batter over itself. Stop mixing the exact second you no longer see any dry pockets of flour. Overmixing develops the gluten in the flour, which will make your brownies tough rather than tender.
Step 6: Bake the Brownies
Pour the thick brownie batter into your prepared, parchment-lined baking pan. Use an offset spatula or the back of a spoon to spread it evenly into the corners and smooth the top. Bake on the center rack of your preheated oven for 28 to 33 minutes.
Step 7: The Toothpick Test
Testing brownies for doneness is different from testing a cake. If you insert a toothpick into the center and it comes out completely clean, the brownies are overbaked and will be dry. You want to pull them out of the oven when a toothpick inserted into the center comes out with thick, moist, fudgy crumbs attached, but no wet, runny batter.
Step 8: Cool Completely
Place the baking pan on a wire cooling rack. Allow the brownies to cool completely in the pan to room temperature. This will take at least 2 hours. If you try to cut them while they are still warm, they will fall apart and turn into a crumbly mess. The chocolate needs time to set up and establish that dense fudge texture.
Step 9: Create the Spiderwebs
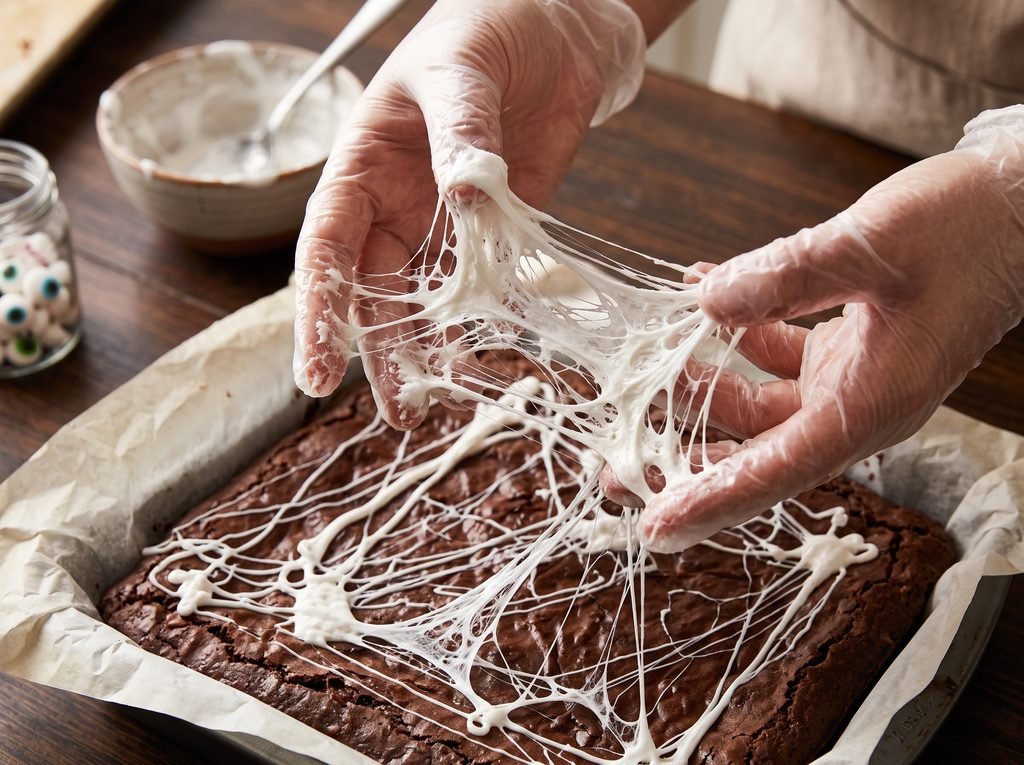
Once the brownies are completely cool, it is time to decorate. Place the mini marshmallows into a microwave-safe bowl. Microwave them for 30 to 45 seconds, just until they puff up significantly and melt. Stir them vigorously with a spoon. Let the marshmallow fluff cool for about 2 minutes so you do not burn your hands.
Pinch a piece of the sticky, melted marshmallow between your thumb and forefinger (you can wear food-safe gloves if you prefer). Pull your fingers apart to stretch the marshmallow into thin, wispy, stringy webs. Drape these stretched webs randomly over the surface of the uncut brownie slab in the pan. Stretch the webs in multiple directions to create a realistic, messy cobweb effect.
Step 10: Add the Eyes and Slice
Immediately press the candy monster eyeballs in random clusters into the sticky marshmallow webs so they adhere. Once the webs have set (about 10 minutes), use the parchment paper overhang to carefully lift the entire brownie slab out of the pan and onto a large cutting board. Using a large, sharp chef’s knife, slice the slab into even squares.
Helpful Tips for the Best Results
Baking from scratch is incredibly rewarding, but it does require attention to detail. Follow these professional tips to ensure your brownies are perfect on the first try:
- The Type of Pan Matters: Always bake brownies in a light-colored, shiny metal pan. Metal conducts heat evenly and quickly. If you use a dark-coated metal pan, the edges of your brownies may burn before the center is cooked. If you use a glass or ceramic pan, it takes much longer for the heat to penetrate, resulting in hard, overbaked edges and a raw center.
- The Pan Bang Method: If you prefer incredibly dense, heavy brownies without a lot of height, use the “pan bang” method. Halfway through the baking time, open the oven, carefully lift the baking pan about three inches off the oven rack, and drop it flat. This knocks the excess air out of the batter, collapsing the rise and creating an ultra-fudgy texture.
- How to Cut Clean Slices: Fudgy brownies are notoriously difficult to cut neatly because the dense chocolate sticks to the knife. For bakery-perfect, razor-sharp edges, chill your completely cooled brownie slab in the refrigerator for one hour before cutting. Run a large, sharp chef’s knife under very hot water, wipe it completely dry with a towel, and make your first firm slice. Wipe the blade clean, heat it with water again, dry it, and make your next slice. The hot blade melts cleanly through the fudge.
Variations and Substitutions
The marshmallow spiderweb technique is visually stunning, but the beauty of this dark brownie base is that it can accommodate dozens of different Halloween themes. If you want to switch things up, try these amazing variations:
The Cream Cheese Ghost Swirl
If you love cheesecake brownies, this variation is both delicious and spooky. Before baking the brownies, create a quick cheesecake batter: beat 8 ounces of softened cream cheese, 1/4 cup of sugar, 1 egg, and 1/2 teaspoon of vanilla until smooth. Once you pour the dark brownie batter into the pan, drop spoonfuls of the white cheesecake batter randomly across the top. Take a toothpick or a butter knife and drag it through the bottom of the white dollops, pulling the white batter downward into a “tail” shape to look like ghosts. Bake as directed. Once cool, press two mini chocolate chips into the top of each “ghost” for eyes!
The “Monster Mash” Leftover Candy Brownie
This is the ultimate post-Halloween recipe. Skip the marshmallow webs entirely. When your brownies come out of the oven, immediately press handfuls of chopped-up leftover candy directly into the hot top crust. Chopped Snickers, Reese’s Peanut Butter Cups, Twix, M&Ms, and pretzels are fantastic additions. The residual heat from the brownies will slightly melt the bottoms of the candy, anchoring them to the crust as everything cools.
The White Chocolate Mummy Drizzle
For a cleaner, more elegant look, bake and cool the brownies as directed. Melt 1/2 cup of high-quality white chocolate chips and transfer the melted chocolate to a small zip-top bag. Snip a tiny corner off the bag. Pipe straight, overlapping horizontal and diagonal lines back and forth across the entire slab of brownies to mimic mummy wraps. Leave a small gap in the “wraps” on each square and attach two candy eyeballs.
Dietary Substitutions
- Gluten-Free: You can easily make this recipe gluten-free. Swap the all-purpose flour for an equal amount of a high-quality 1-to-1 gluten-free baking blend that contains xanthan gum. Because GF flours absorb moisture differently, check the brownies 3 minutes earlier than the stated baking time.
- Dairy-Free: Substitute the butter for a high-quality vegan butter stick (do not use spreadable tub margarine) and ensure your dark chocolate bars are certified dairy-free or vegan.
What to Serve With It
Brownies are incredibly rich, intensely sweet, and deeply chocolatey. Because they coat the palate, they pair best with accompaniments that offer a contrast in temperature, texture, or flavor.
- Classic Vanilla Bean Ice Cream: The ultimate pairing. A warm, fudgy brownie topped with a scoop of freezing cold, creamy vanilla ice cream creates a contrast that is hard to beat.
- Ice-Cold Milk or Hot Coffee: You absolutely need a beverage to wash down this level of rich chocolate. A tall glass of ice-cold whole milk is the nostalgic choice for kids, while adults will appreciate a mug of dark roast coffee to highlight the espresso powder in the batter.
- Salty Party Snacks: If you are serving these at a Halloween party, be sure to have salty snacks on the same table. Bowls of heavily salted popcorn, roasted pumpkin seeds, or pretzels give your guests a savory break from the heavy dessert.
Storage and Reheating
Unlike cakes or cookies that go stale rather quickly, the high fat content in these fudgy brownies means they have an exceptionally long shelf life, making them the perfect make-ahead treat.
Room Temperature Storage: Once sliced, place the brownies in an airtight container with a piece of parchment paper between the layers to prevent sticking. They will stay incredibly moist and fresh on the kitchen counter for up to 4 days.
Refrigerator Storage: Many people actually prefer their brownies cold! Storing them in an airtight container in the refrigerator transforms the texture into a dense, chewy chocolate truffle. They will last up to 7 days in the fridge.
Freezing Instructions: Brownies freeze remarkably well. To freeze a batch for later, wrap individual, un-decorated squares tightly in plastic wrap, then place them all into a heavy-duty freezer bag. They will keep in the freezer for up to 3 months. Thaw them at room temperature for about two hours before eating. Note: It is best not to freeze the marshmallow spiderwebs, as thawing them can make the sugar weep and become a sticky mess. Freeze the base, and decorate them after thawing!
Reheating: To recreate the fresh-out-of-the-oven experience, place a room-temperature or refrigerated brownie on a microwave-safe plate and heat it for exactly 10 to 12 seconds. It will become perfectly warm and gooey.
Frequently Asked Questions
Why did my Halloween brownies turn out cakey instead of fudgy? A cakey brownie is almost always the result of too much flour or overbaking. Ensure you are spooning your flour into the measuring cup and leveling it off with a knife, rather than scooping the cup directly into the flour bag (which packs the flour in). Also, remember to take the brownies out of the oven when the toothpick still has moist crumbs on it.
I didn’t get a shiny, crackly crust on top. What went wrong? The shiny crust is essentially a very thin layer of meringue that forms on top of the batter. It relies on the sugar being completely dissolved into the eggs. If you skipped Step 3 and did not beat your eggs and sugar vigorously for several minutes, the crust will not form.
Can I use chocolate chips instead of chopped chocolate bars for the batter? It is highly recommended that you stick to baking bars (like Baker’s, Ghirardelli, or Lindt bars). Chocolate chips are manufactured with stabilizers and soy lecithin to help them retain their shape when baked in a cookie. Because of this, they do not melt smoothly into a liquid pool, which can make your brownie batter grainy or thick.
Can I bake this recipe in a 9×9-inch square pan? Yes, but you will need to adjust the baking time. A 9×9 pan has less surface area, meaning your brownies will be extremely thick. You will likely need to bake them for 40 to 45 minutes. Watch the edges closely so they do not burn while you wait for the center to cook through.
Why did my brownies sink in the middle after I took them out of the oven? A slight dip in the center is actually normal for fudgy brownies—it means the center is perfectly dense and gooey! However, a massive sinkhole usually means they were drastically underbaked and the center lacked the structural integrity to hold itself up.
Do I have to use the espresso powder? No, the espresso powder is entirely optional. It simply acts as a flavor enhancer for the cocoa powder. If you leave it out, your brownies will still be incredibly delicious and chocolatey.
Is Dutch-process cocoa powder strictly necessary? For the dark color and specific flavor profile of this recipe, yes. However, in a pinch, you can substitute an equal amount of standard natural cocoa powder. Your brownies will just be slightly lighter in color and have a slightly more acidic chocolate flavor.
Final Thoughts
Baking should be a joyful, creative process, and the Halloween season provides the perfect excuse to let your imagination run wild in the kitchen. Whether you are aiming to impress your friends at an upscale costume party or simply want a fun, messy afternoon activity with your kids, these ultimate fudgy brownies are guaranteed to deliver.
The beauty of this recipe lies in its reliable, deeply chocolatey foundation. Once you master the simple techniques of whipping your eggs and properly temping your oven, you have a foolproof canvas that will never let you down. So, melt that chocolate, stretch those sticky marshmallow webs, and lean into the spooky spirit. Happy Halloween, and enjoy every decadent bite!