
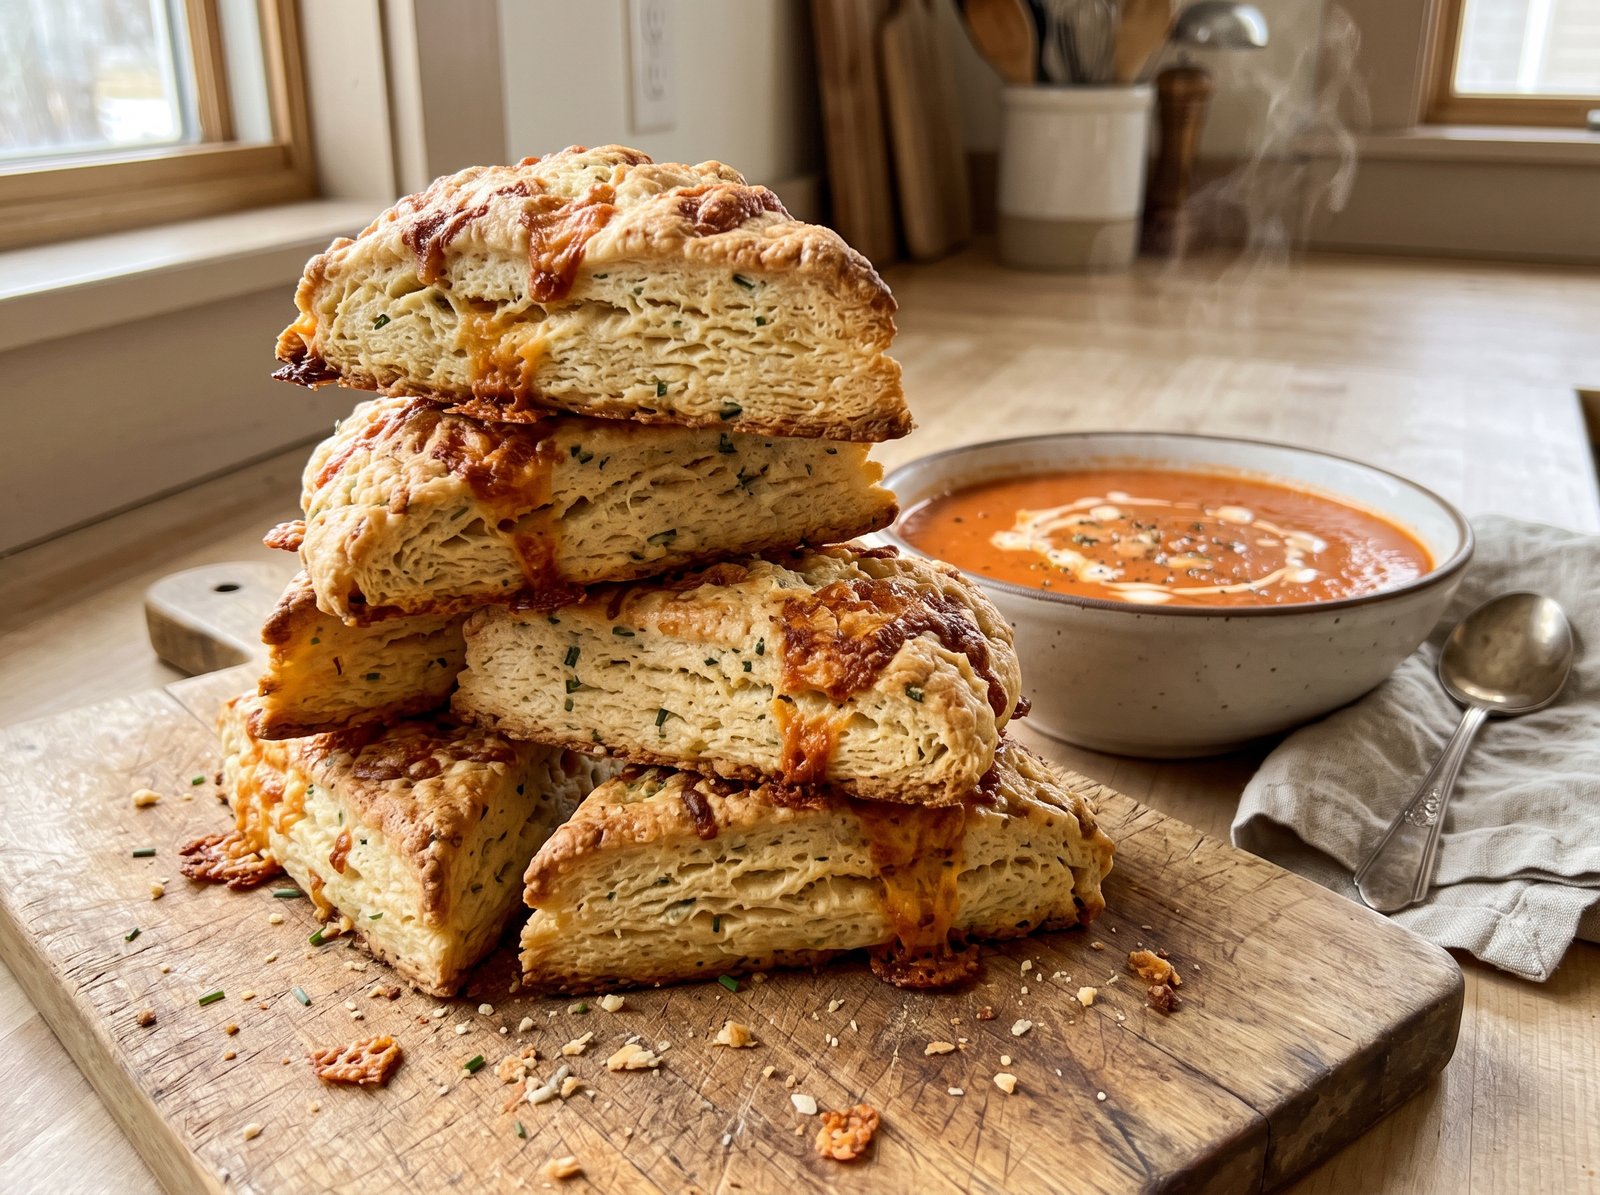
Savory Scones Recipe: The Ultimate Guide to Cheese and Herb Perfection
When we think of scones, our minds almost instinctively wander to sweet flavor profiles—bright lemon blueberry, rich chocolate chip, or classic vanilla bean paired with fruit preserves. However, the world of savory baking offers an entirely different, arguably more comforting experience that is too often overlooked by home bakers. If you have never experienced the magic of a warm, freshly baked savory scone pulled straight from the oven, you are in for a culinary revelation.
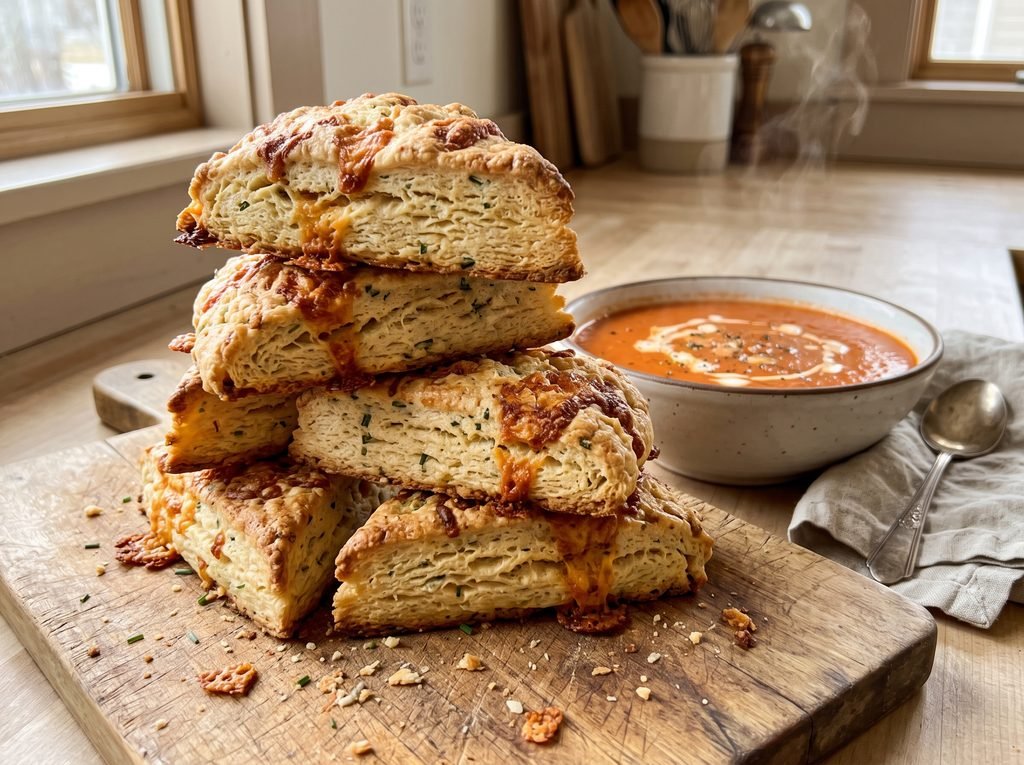
Imagine a pastry that boasts a crisp, deeply golden, slightly craggy exterior with beautifully browned edges of melted cheese. When you break it open, the interior is incredibly tender, soft, and steaming, releasing an intoxicating aroma of roasted garlic, fresh herbs, and sharp cheddar. A great savory scone recipe bridges the gap between a flaky biscuit and a rich, satisfying quick bread. It is hearty enough to serve as a standalone breakfast on a crisp autumn morning, yet elegant enough to accompany a bowl of velvety tomato soup for dinner.
This specific savory scones recipe is designed to be your foolproof master guide. It completely demystifies the pastry-making process, utilizing a few brilliant, accessible techniques that guarantee towering, flaky layers without the need for specialized equipment or hours of frustrating prep work. Whether you are hosting a sophisticated weekend brunch, looking to elevate your meal prep routine, or simply craving a savory alternative to your morning toast, these cheese and herb scones will quickly become a permanent fixture in your baking repertoire.
What Are Savory Scones?
To truly appreciate a spectacular savory scone, it helps to understand its place in the baking world. A traditional scone is a British baked good, originally cooked on a griddle, that falls somewhere between a bread and a pastry. While the British tradition keeps scones relatively plain to serve as a vehicle for clotted cream, the American scone has evolved to be richer, larger, and packed heavily with internal ingredients.
A savory scone takes that Americanized, cream-based dough and flips the flavor profile. Instead of sugar and vanilla, the dough is heavily seasoned with salt, black pepper, garlic, and herbs. Instead of fruit or chocolate, the mix-ins are typically robust cheeses, cooked meats like bacon or ham, and aromatics like chives or scallions.
Scones vs. Biscuits: The Savory Distinction
Because savory scones lack the sugar of their sweet counterparts, they are often confused with traditional American buttermilk biscuits. While they share similar ingredients—flour, fat, leavening, and liquid—the texture and purpose are quite distinct.
Biscuits rely on a very high ratio of fat to flour and are folded multiple times to create distinct, airy, pull-apart sheets. They are designed to be split open and smothered in sausage gravy or used to sandwich fried chicken. Scones, on the other hand, incorporate heavy cream or eggs, resulting in a slightly tighter, richer, and more cake-like crumb. A savory scone is substantial. It is meant to be eaten on its own with a cup of coffee, or served as a flavorful, crumbly side dish that crumbles beautifully into a bowl of chili or stew.
Why You’ll Love This Recipe
Finding a reliable savory baking staple is a game-changer for any home cook. Here is why this formula stands out from the rest:
- No Mixer Required: You do not need a stand mixer, a food processor, or a pastry blender. A simple mixing bowl and a standard metal box grater are the only tools you need to achieve incredibly flaky layers.
- Incredibly Fast: Because this is a “quick bread” that relies on baking powder rather than yeast, there is no proofing or rising time. You can pull this dough together in fifteen minutes flat.
- Highly Customizable: This master dough is a blank canvas. Once you understand the base ratio of flour to fat and liquid, you can swap the cheddar and chives for almost any cheese, herb, or spice combination you have in your refrigerator.
- The Ultimate Freezer Stash: These scones are perfect for meal prep. You can freeze the dough wedges raw and bake them straight from the freezer on busy weekday mornings.
The Secret to Savory Baking: Managing Fat and Moisture
Baking is a science, and adding savory ingredients like cheese and meat introduces variables that you do not encounter in sweet baking. Specifically, you are introducing extra fat and moisture into the dough.
If you simply take a standard sweet scone recipe, remove the sugar, and dump in two cups of cheddar cheese, the scones will likely melt into flat, greasy puddles in the oven. Cheese releases oil as it cooks, which can weigh down the delicate pastry structure.
To counteract this, a great savory scone recipe requires a careful balance. We use a slightly higher amount of baking powder to provide enough lift to carry the heavy mix-ins. Furthermore, we toss the cheese and herbs directly into the dry flour mixture before adding any liquid. Coating the cheese shreds in flour prevents them from clumping together and helps absorb any excess moisture they release during baking, ensuring your scones rise tall and proud.
Finally, the golden rule of all pastry applies here more than ever: keep your ingredients freezing cold. The flakiness in the dough comes from tiny pockets of solid butter. If your butter warms up and melts into the flour before it reaches the oven, you will end up with a dense, heavy brick instead of a flaky pastry.
Recipe Details
- Prep Time: 15 minutes
- Cook Time: 18 to 22 minutes
- Total Time: 37 minutes
- Servings: 8 large scones
Ingredients
This recipe uses straightforward pantry staples, heavily elevated by sharp savory mix-ins. Precision is key for the base dough, while you can be slightly more forgiving with the flavorings.
The Dry Base
- 2 cups All-Purpose Flour: This provides the perfect protein level for a tender crumb. Always spoon your flour into the measuring cup and level it off. Scooping directly from the bag packs the flour down, resulting in dry, crumbly scones. (For absolute precision, weigh out 250 grams).
- 1 tablespoon Baking Powder: A full tablespoon is necessary to lift the heavy cheese and heavy cream. Ensure your baking powder is fresh and not expired.
- 1 tablespoon Granulated Sugar: While this is a savory recipe, a tiny bit of sugar is essential. It does not make the scone sweet; rather, it balances the harshness of the salt, tenderizes the dough, and helps the exterior achieve a beautiful golden-brown color.
- 1 teaspoon Fine Sea Salt: A slightly heavier hand with salt is required since we are not relying on sugar for flavor.
- 1/2 teaspoon Coarse Black Pepper: Freshly cracked black pepper adds a wonderful, subtle heat.
- 1/2 teaspoon Garlic Powder: This infuses the entire dough with a deep, roasted savory note without the moisture of fresh minced garlic.
The Fats and Liquids
- 1/2 cup (1 stick / 4 ounces) Unsalted Butter: The butter must be frozen completely solid. Unsalted butter is crucial here because cheese is naturally very salty; using unsalted butter allows you to control the sodium.
- 3/4 cup Heavy Cream: Heavy whipping cream provides the liquid and the rich fat needed for a moist interior. Keep it in the refrigerator until the very last second. You will need an extra 1 to 2 tablespoons to brush over the scones before baking.
The Savory Mix-Ins
- 1 1/2 cups Sharp Cheddar Cheese: Freshly grated off the block is highly recommended. Pre-shredded bagged cheese is coated in anti-caking powders that prevent it from melting beautifully into the dough.
- 1/4 cup Fresh Chives: Finely chopped fresh chives provide a bright, mild onion flavor that pairs perfectly with cheddar. Scallions (green onions) can also be used.
How to Make Savory Scones
Follow these clear, step-by-step instructions. Remember that a light, gentle touch is your best tool for achieving the perfect texture.
1. Prepare Your Station
Preheat your oven to 400°F (200°C). Line a large, heavy-duty baking sheet with parchment paper or a silicone baking mat. Preparing your pan in advance ensures your cold dough will not have to sit on a warm counter waiting to be transferred.
2. Whisk the Dry Ingredients
In a large, wide mixing bowl, combine the 2 cups of all-purpose flour, 1 tablespoon of baking powder, 1 tablespoon of sugar, 1 teaspoon of sea salt, 1/2 teaspoon of black pepper, and 1/2 teaspoon of garlic powder. Whisk these together vigorously for about thirty seconds to ensure the leavening agents and spices are evenly distributed.
3. Grate the Frozen Butter
Remove your stick of unsalted butter from the freezer. Using the large holes of a standard metal box grater (the same side you used for the cheese), grate the entire stick of butter directly into the bowl of dry ingredients.
4. Toss the Butter
Using your fingertips, gently toss the grated butter ribbons into the flour mixture. Do not squeeze, press, or knead the butter into the flour; you simply want to separate the ribbons so each one is fully coated in flour. The mixture should quickly resemble coarse, dry sand with distinct pieces of fat.
5. Add the Cheese and Herbs
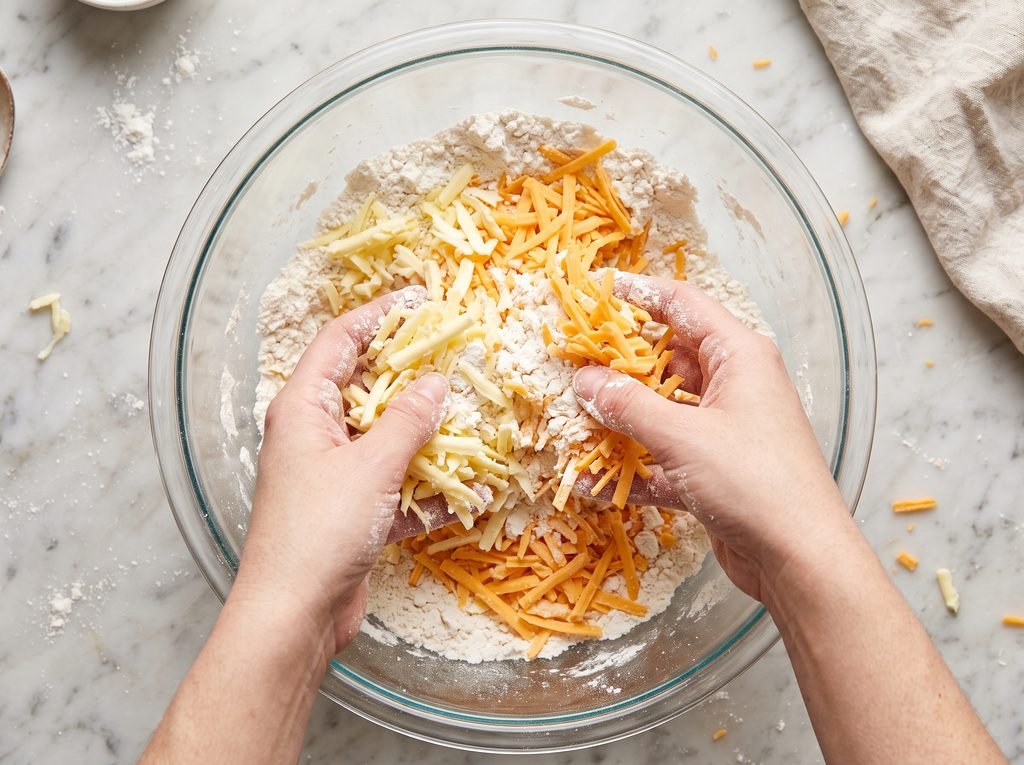
Pour the 1 1/2 cups of grated sharp cheddar cheese and 1/4 cup of chopped chives into the bowl. Toss the mixture gently with your hands until the cheese and herbs are completely coated in the flour mixture. This is a critical step to prevent the cheese from clumping together.
6. Incorporate the Heavy Cream
Make a small well in the center of the dry ingredients. Pour in the 3/4 cup of cold heavy cream.
7. Fold to Create a Shaggy Dough
Using a rubber spatula or a wooden spoon, gently fold the mixture together. Stop mixing the exact moment the liquid is absorbed and a rough, shaggy dough begins to form. There will likely be dry flour and cheese shreds left at the bottom of the bowl—this is exactly what you want. Do not overmix.
8. Turn Out and Shape
Turn the shaggy dough, along with any loose, dry remnants from the bottom of the bowl, out onto a clean, bare countertop. With lightly floured hands, gently press and gather the loose pieces together, folding the dough over itself once or twice just until it forms a cohesive mass.
9. Form the Disc
Gently pat and press the dough down into a flat, even disc. It should be roughly 8 inches in diameter and a full 1-inch thick. If you press the dough too thin, your scones will be flat and hard rather than tall and fluffy.
10. Cut the Wedges
Using a sharp chef’s knife or a metal bench scraper, cut the dough disc in half, then into quarters, and finally into eighths, creating 8 equal triangular wedges. When cutting, press straight down and pull straight up. Do not saw back and forth with the knife; sawing pinches the edges of the dough together and restricts the layers from rising in the oven.
11. Brush and Bake
Transfer the 8 wedges to your prepared baking sheet, leaving about two inches of space between each pastry. Dip a pastry brush into a little extra heavy cream and lightly brush the top surface of each wedge. Avoid letting the cream drip down the cut sides.
12. Bake to Golden Perfection
Place the baking sheet on the middle rack of your preheated 400°F (200°C) oven. Bake for 18 to 22 minutes. The scones are finished when they have puffed up significantly, the cheese on the edges is sizzling and deeply browned, and the tops are a beautiful golden color.
13. Cool and Serve
Remove the baking sheet from the oven and allow the scones to rest on the hot pan for 5 minutes. This brief resting period is crucial as it helps the melted cheese set and gives the pastry structure. Transfer them to a wire cooling rack. Serve warm.
Helpful Tips for the Best Results
Even with a perfect recipe, execution is everything. Keep these professional tips in mind to guarantee a flawless bake:
- The Chilling Trick: If your kitchen is warm, or if your hands run hot and you feel the butter and cheese softened while shaping the dough, place the entire baking sheet of cut, unbaked scones into the refrigerator for 15 to 20 minutes before baking. Re-solidifying the fat guarantees the flakiest texture and prevents spreading.
- Grate Your Own Cheese: Pre-shredded bagged cheese is convenient, but it is coated in potato starch and cellulose to prevent sticking in the bag. These anti-caking agents prevent the cheese from melting properly and can make your dough gritty. Always buy a block of cheese and grate it yourself.
- Do Not Twist the Cutter: If you prefer round scones instead of wedges, pat the dough to a 1-inch thickness and use a floured round biscuit cutter. Press straight down and pull straight up. Twisting the cutter seals the dough edges and halts the rising process.
- The Heavy Cream Wash: Brushing the tops with heavy cream yields a lovely, matte, golden-brown finish. For a glossier, shinier, deeply browned crust, brush the tops with a beaten egg wash instead, and sprinkle with a tiny pinch of flaky sea salt right before baking.
Variations and Substitutions
Because this base dough is incredibly stable, it serves as the ultimate foundation for your culinary creativity. You can fold in up to 1 1/2 cups of total mix-ins.
- Bacon, Cheddar, and Jalapeño: Reduce the cheddar to 1 cup. Add 1/2 cup of crispy, cooked, and finely crumbled bacon, and 2 tablespoons of finely minced fresh jalapeño (seeds removed for less heat).
- Gruyère, Caramelized Onion, and Thyme: Swap the cheddar for 1 1/4 cups of shredded Gruyère cheese. Add 1/4 cup of thoroughly cooled, finely chopped caramelized onions, and 1 tablespoon of fresh thyme leaves.
- Feta, Spinach, and Sun-Dried Tomato: Use 3/4 cup of crumbled feta cheese. Add 1/2 cup of finely chopped fresh baby spinach (ensure it is completely dry) and 1/4 cup of drained, oil-packed sun-dried tomatoes (patted dry and finely chopped).
- Parmesan, Rosemary, and Black Pepper: Swap the cheddar for 1 cup of freshly grated Parmesan cheese. Add 1 tablespoon of finely minced fresh rosemary, and increase the coarse black pepper to a full 1 teaspoon for a cacio e pepe inspired flavor.
- Buttermilk Substitution: If you do not have heavy cream, buttermilk is a fantastic substitute. It provides a wonderful, acidic tang that pairs beautifully with savory flavors. Because buttermilk is lower in fat than heavy cream, your scones will be slightly lighter and less cake-like, leaning slightly more toward a traditional biscuit texture.
What to Serve With It
A warm savory scone is magnificent on its own, but pairing it with the right accompaniments turns it into a memorable meal.
- Soups and Stews: These scones are the ultimate side dish for a hearty bowl of soup. Serve them warm alongside a creamy roasted tomato basil soup, a rich beef stew, or a classic bowl of chili. They are perfect for dipping and soaking up broths.
- Breakfast Sandwiches: Slice a large savory scone in half horizontally, toast it lightly, and use it as the base for the ultimate breakfast sandwich. Fill it with a fried egg, a sausage patty, and a slice of melting cheese.
- The Brunch Charcuterie Board: Surround a pile of warm scones with sliced cured meats (like prosciutto or salami), a selection of mustards, soft cheeses, and fresh grapes.
- Spreads and Butters: Keep it simple by serving them warm with a generous smear of whipped salted butter. For a sweet and savory contrast, try a drizzle of hot honey or a spread of fig jam. Cream cheese blended with fresh herbs is also phenomenal.
Storage and Reheating
Like all baked goods that rely on butter and chemical leavening, scones are at their absolute peak within hours of leaving the oven. However, proper storage ensures your leftovers will remain delicious.
Storing Baked Leftovers
Allow the baked scones to cool completely to room temperature. If you put warm pastries into a container, the escaping steam will create condensation and turn the crusts soggy. Once cool, place them in an airtight container or a zip-top bag lined with a dry paper towel to absorb excess moisture. Because they contain cheese, store them in the refrigerator for up to 4 days.
Freezing Unbaked Dough (The Best Method)
This is the ultimate hack for freshly baked treats on demand. Prepare the recipe all the way through cutting the dough into wedges. Place the unbaked wedges on a parchment-lined plate and freeze for 1 hour until solid. Transfer the frozen wedges to a heavy-duty freezer bag. They will stay fresh for up to 3 months. When you are ready to eat, simply place the frozen wedges on a baking sheet, brush with cream, and bake at 400°F (200°C)—adding 3 to 5 extra minutes to the original bake time. Do not thaw them first.
Reheating Baked Leftovers
To revive a chilled scone and restore its crispy, cheesy exterior, place it in a 350°F (175°C) oven or toaster oven for 6 to 8 minutes until warmed completely through. Avoid the microwave if possible; while it will make the scone hot and melt the internal cheese quickly, it will destroy the flaky crust and render the pastry soft, steamy, and rubbery.
Frequently Asked Questions
Why did my savory scones spread out and become flat? Flat scones are usually the result of the butter and cheese becoming too warm before baking, or using expired baking powder. If the fats melt before the baking powder has time to push the dough upward in the oven, the structure will collapse. Always use frozen butter, and chill your cut dough in the fridge for 15 minutes before baking if your kitchen is warm. Also, make sure you did not pat the dough disc too thin; it must be a full inch thick before cutting.
Can I make the dough the night before? Absolutely. You can mix the dough, cut it into wedges, and arrange them on a baking sheet. Cover the sheet tightly with plastic wrap and store it in the refrigerator overnight. The next morning, uncover the pan, brush with cream, and bake directly from the fridge. The cold overnight rest actually relaxes the gluten and ensures a very tender pastry.
Why are my scones tough and chewy? Toughness is almost always caused by overworking the dough. When flour mixes with heavy cream, gluten begins to form. If you knead the dough like bread, you develop too much gluten. Mix and fold the dough only until it just barely comes together into a shaggy mass.
Can I use pre-cooked meats like ham or sausage? Yes. Cooked meats are wonderful additions. Ensure the meat is completely cooked, drained of excess grease, cooled, and finely chopped before folding it into the dry flour mixture. Avoid adding raw meat to the dough, as it will not cook properly and will release too much moisture.
Are savory scones supposed to be dry? A proper scone should have a crisp, crumbly exterior, but the interior should be soft, moist, and tender. Because this recipe uses a generous amount of heavy cream and cheese, it should not be unpleasantly dry. If your scones are choking-dry, you likely added too much flour (always spoon and level your measuring cups) or baked them for too long.
Can I substitute milk for the heavy cream? You can use whole milk in a pinch, but the texture will change significantly. Heavy cream provides a high fat content that results in a tender, rich, moist crumb. Milk lacks this fat, so your scones will be notably less tender and less rich. If you must use milk, consider adding an extra tablespoon of cold butter to the dry ingredients to compensate for the lost fat.
Why do we add sugar to a savory recipe? Adding just one tablespoon of sugar to two cups of flour does not make the scone taste sweet. Instead, it acts as a seasoning. It balances the sharp saltiness of the cheese and the bite of the garlic powder. Additionally, sugar caramelizes in the heat of the oven, which is essential for achieving that beautiful, crisp, golden-brown crust.

Final Thoughts
The art of savory baking does not have to be intimidating. By understanding the importance of cold ingredients, utilizing the brilliant box-grater technique for your butter, and gently managing your dough, you can master this savory scones recipe on your very first try. The combination of sharp, melting cheddar, aromatic chives, and buttery, flaky layers creates a pastry that is both rustic and deeply elegant. Whether you bake a fresh batch to elevate a simple weeknight soup, or keep a stash of frozen dough ready for a spectacular Sunday morning breakfast sandwich, these savory scones are guaranteed to become a beloved favorite in your home kitchen.