
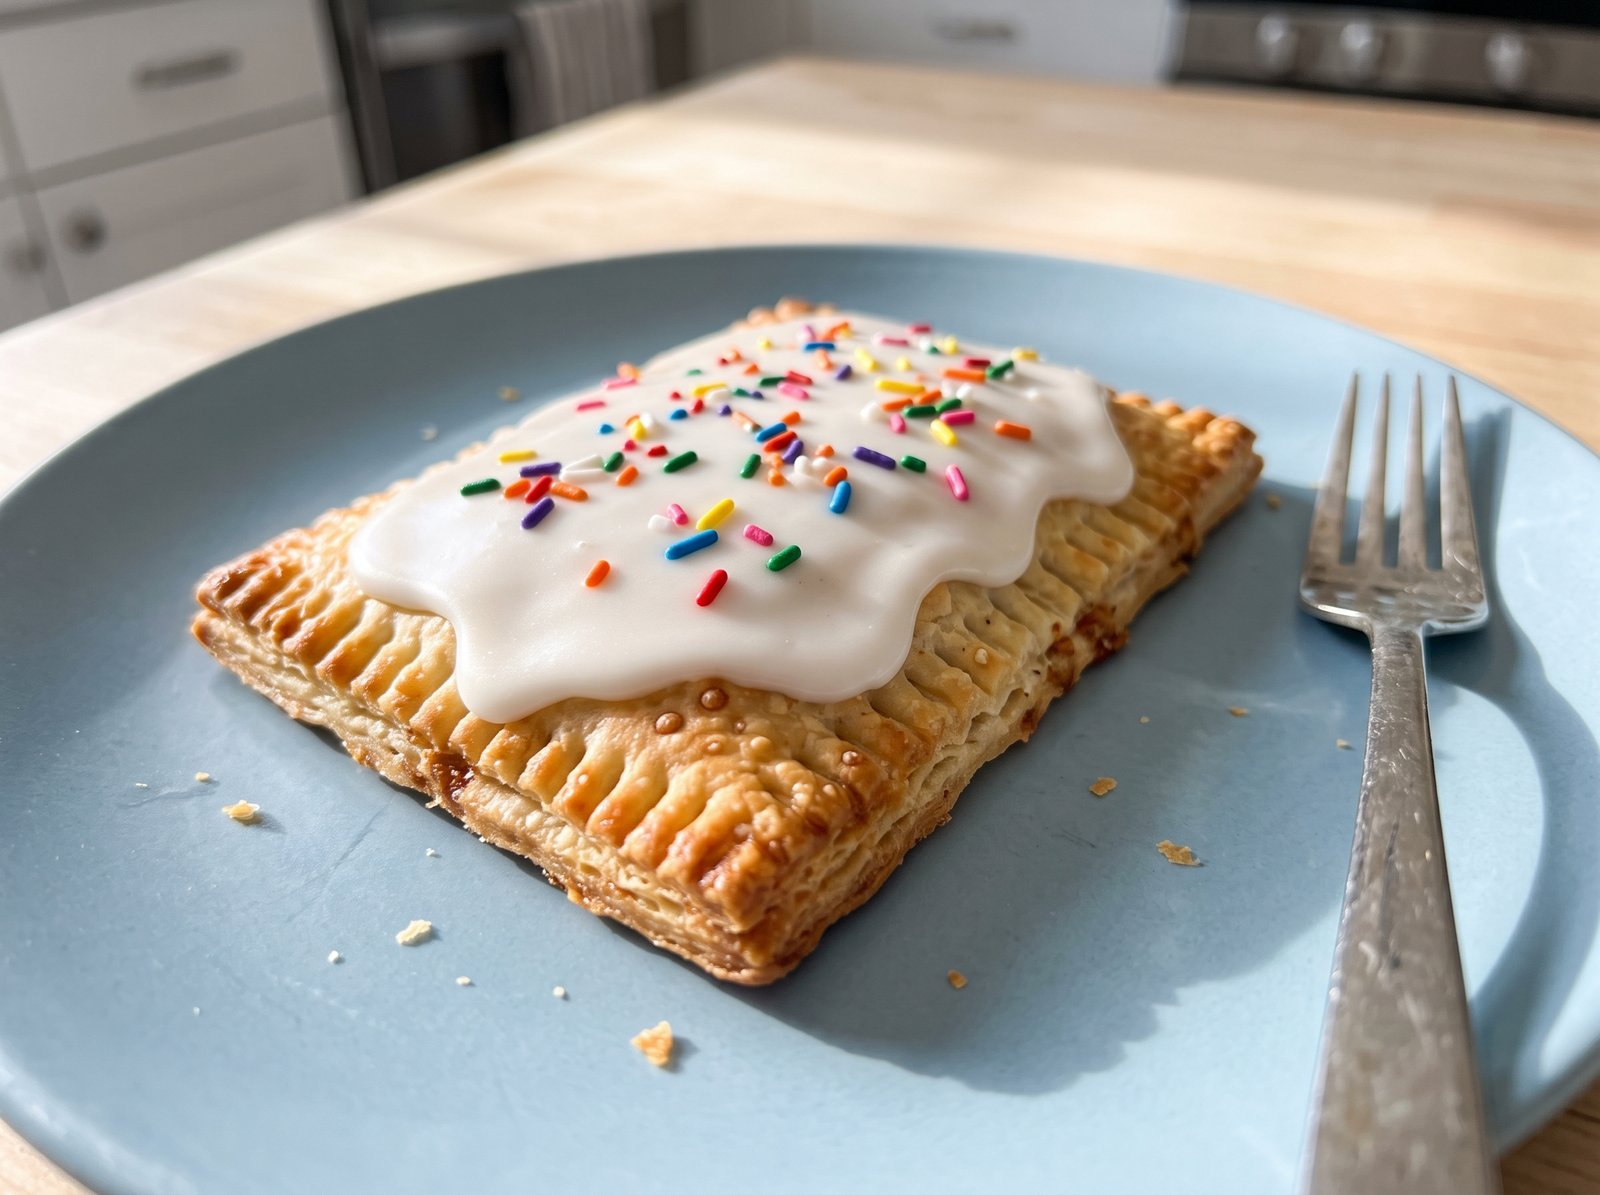
The Ultimate Homemade Pop Tarts Recipe
There is something undeniably magical about the iconic silver foil wrapper of a store-bought toaster pastry. For many of us, it is the ultimate taste of childhood mornings. But as we grow up and our palates mature, revisiting those boxed treats can sometimes be a bit of a letdown. The crust often leans toward dry and cardboard-like, and the filling is overwhelmingly sweet.
What if you could capture all that nostalgic joy but elevate it to a bakery-quality pastry? That is exactly what this homemade pop tarts recipe delivers. By trading the mass-produced dough for an incredibly flaky, all-butter pie crust and swapping artificial fillings for real fruit preserves and rich glazes, you create a breakfast treat that is genuinely spectacular.
These homemade toaster pastries feature a shatteringly crisp exterior that gives way to a warm, gooey center, all topped with a generous layer of sweet vanilla icing and rainbow sprinkles. They are the perfect weekend baking project, an unforgettable holiday breakfast, and a surefire way to bring a smile to anyone’s face.
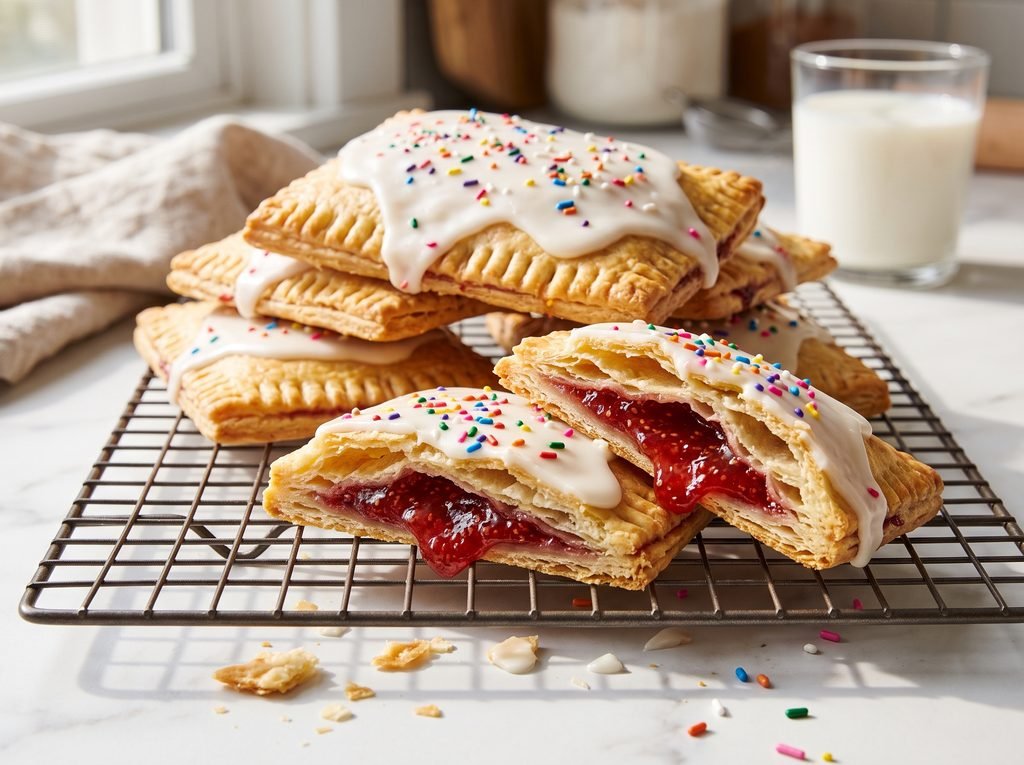
What Are Homemade Pop Tarts?
At their core, homemade pop tarts are simply miniature, rectangular hand pies. While the store-bought versions are extruded by factory machines to ensure a long shelf life, the homemade iteration relies on classic pastry techniques.
A traditional homemade pop tart consists of three main components. First is the pastry dough, which is essentially an all-butter pie crust. Second is the filling, which can range from thickened fruit jams to brown sugar and cinnamon pastes. Finally, there is the icing—a simple confectioner’s sugar glaze that sets up firm, providing that signature snap when you take a bite.
Because they are made from scratch, homemade pop tarts are richer, more flavorful, and infinitely more customizable than anything you can pull out of a cardboard box.
Why You’ll Love This Recipe
You might be wondering if making toaster pastries from scratch is worth the effort. Once you pull a tray of these golden-brown beauties out of the oven, the answer will be an enthusiastic yes. Here is why this recipe will become a staple in your kitchen:
- Unbelievable Flakiness: The all-butter crust puffs up in the oven, creating distinct, buttery layers that practically melt in your mouth.
- Total Control Over Ingredients: Say goodbye to high-fructose corn syrup and artificial preservatives. You know exactly what is going into your food.
- Endless Customization: Once you master the master dough, you can fill these pastries with absolutely anything you crave.
- Fun to Make: Rolling out the dough, cutting the rectangles, and sealing the edges with a fork is a fantastic, tactile baking project. It is incredibly fun to do with kids, too.
- Freezer-Friendly: These pastries freeze beautifully, meaning you can do the work once and enjoy fresh-baked pop tarts on busy weekday mornings for weeks to come.
The Secret to the Best Flaky Pastry Crust
The foundation of a great homemade pop tart is the crust. To achieve that signature flakiness, you must follow the cardinal rule of pastry: keep your ingredients cold.
When cold butter is cut into flour, it forms small, distinct pockets of fat. When those cold pockets of butter hit the heat of a 400°F (200°C) oven, the water inside the butter rapidly turns to steam. That steam pushes upward, separating the flour into delicate, airy layers. If your butter warms up and melts into the flour before baking, you lose that steam-power, resulting in a tough, flat, cookie-like crust.
To ensure success, use ice water (water with literal ice cubes floating in it) and keep your butter in the refrigerator right up until the moment you need it. If your kitchen is particularly warm, do not hesitate to pop your mixing bowl into the fridge for ten minutes midway through the process.
Ingredients You Will Need
This recipe uses simple, accessible ingredients. Here is what you need to gather to make the ultimate strawberry frosted homemade pop tarts.
For the All-Butter Pastry Crust:
- All-Purpose Flour: 2 ½ cups (315g) of standard all-purpose flour provides the perfect structure. Spoon and level your flour or use a kitchen scale for accuracy.
- Granulated Sugar: 1 tablespoon (12g) adds just a touch of sweetness to the dough to encourage browning.
- Salt: 1 teaspoon of fine sea salt or kosher salt is essential for flavor. Without it, the crust will taste incredibly bland.
- Unsalted Butter: 1 cup (2 sticks / 226g) of unsalted butter. It must be very cold and cut into ½-inch cubes.
- Ice Water: ½ cup (120ml) of very cold water. You may not need to use all of it.
For the Strawberry Filling:
- Strawberry Jam or Preserves: ¾ cup (240g) of high-quality strawberry jam. Do not use jelly, as it melts too quickly.
- Cornstarch: 1 tablespoon (8g). This is the secret ingredient! Mixing cornstarch into the jam thickens it as it bakes, preventing it from boiling out of the seams.
For the Egg Wash:
- Egg: 1 large egg.
- Milk: 1 tablespoon of whole milk or heavy cream.
For the Vanilla Icing:
- Powdered Sugar: 1 ½ cups (180g) of sifted confectioner’s sugar.
- Heavy Cream or Milk: 2 to 3 tablespoons. Cream yields a thicker, richer glaze, but milk works perfectly fine.
- Vanilla Extract: ½ teaspoon of pure vanilla extract.
- Sprinkles: Rainbow jimmies or nonpareils for that classic frosted look.
How to Make Homemade Pop Tarts
Making these pastries takes a little bit of time and patience, but the steps are straightforward.
Prep Time: 45 minutes Chill Time: 1 hour Cook Time: 25 minutes Total Time: 2 hours 10 minutes Servings: 8 to 9 pop tarts
Step 1: Make the Pastry Dough
In a large mixing bowl, whisk together the 2 ½ cups of all-purpose flour, 1 tablespoon of sugar, and 1 teaspoon of salt. Toss the cold, cubed butter into the flour mixture. Using a pastry blender, two forks, or your fingertips, cut the butter into the flour until the mixture resembles coarse meal with some larger, pea-sized chunks of butter remaining.
Drizzle 4 tablespoons of the ice water over the mixture. Gently toss it with a rubber spatula or your hands. Add more ice water, one tablespoon at a time, just until the dough holds together when you squeeze a handful of it. Do not overmix.
Step 2: Chill the Dough
Turn the shaggy dough out onto a clean work surface. Divide it equally into two halves. Gently pat each half into a smooth, flat rectangle about 1 inch thick. Wrap each rectangle tightly in plastic wrap and place them in the refrigerator to chill for at least 1 hour. (You can also leave them in the fridge overnight).
Step 3: Prepare the Filling
While the dough is chilling, prepare your filling. In a small bowl, thoroughly whisk the ¾ cup of strawberry jam with the 1 tablespoon of cornstarch until no white powdery lumps remain. Set aside.
Step 4: Roll and Cut the Dough
Preheat your oven to 400°F (200°C) and line two large baking sheets with parchment paper.
Remove one disc of dough from the refrigerator. On a lightly floured surface, roll the dough out into a large rectangle that is about 1/8-inch thick. Using a sharp knife or a pizza cutter, trim the edges to make a neat 9×12-inch rectangle. Cut this large rectangle into nine smaller 3×4-inch rectangles. (Pro tip: cut a 3×4-inch piece of parchment paper to use as a template so all your pastries are perfectly identical).
Transfer these 9 rectangles to one of your prepared baking sheets. These will be the bottoms of your pop tarts.
Repeat the rolling and cutting process with the second disc of dough to create 9 more 3×4-inch rectangles. These will be your tops.
Step 5: Fill and Assemble
Beat the egg and 1 tablespoon of milk together in a small bowl to create an egg wash. Lightly brush the egg wash around the outer edges of the 9 bottom rectangles on your baking sheet.
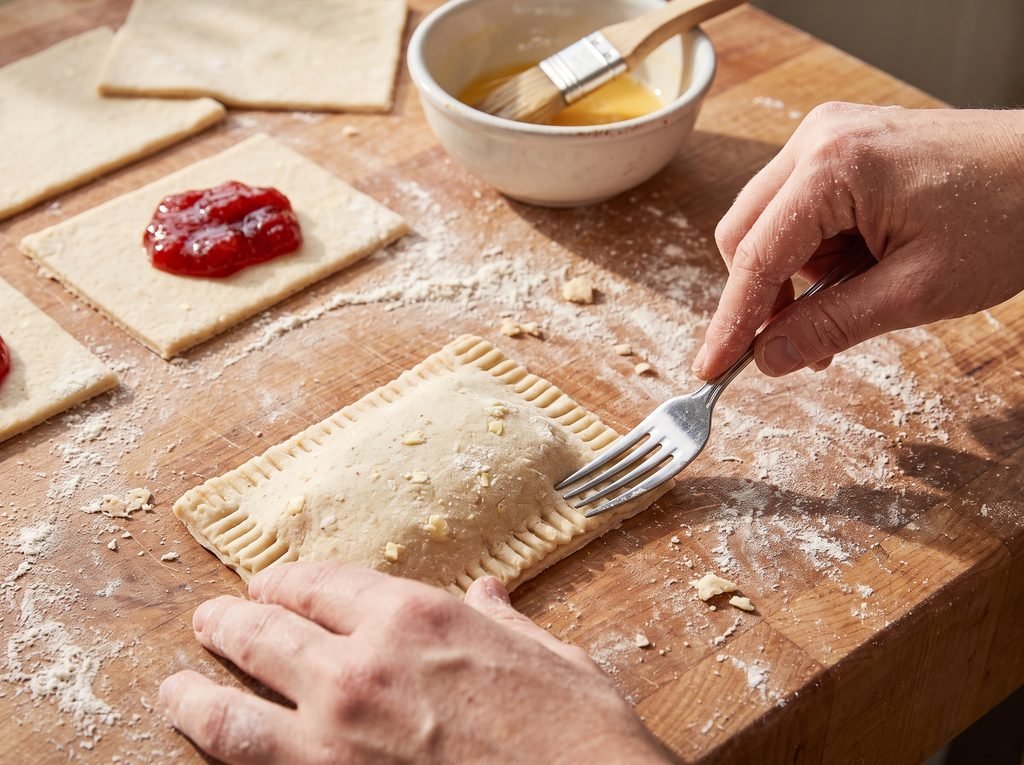
Spoon exactly 1 generous tablespoon of the strawberry jam mixture into the center of each bottom rectangle. Gently spread it out, leaving a ½-inch border of clean, egg-washed dough around the edges.
Carefully place the top rectangles over the filling. Using your fingertips, firmly press the edges down to seal the dough.
Step 6: Crimp and Vent
Dip the tines of a fork in a little bit of flour, then firmly crimp the edges of all the pop tarts to ensure a tight seal. Next, take a toothpick or a wooden skewer and poke 6 to 8 small holes in the top of each pastry. These vent holes allow steam to escape so the pastries do not explode in the oven.
Step 7: Chill Again (Optional but Recommended)
For the absolute best, flakiest results, place the entire baking sheet of assembled pop tarts into the refrigerator or freezer for 15 minutes before baking. This re-chills the butter that may have warmed up while you were working.
Step 8: Bake
Lightly brush the tops of the chilled pop tarts with the remaining egg wash. Bake in the preheated 400°F (200°C) oven for 22 to 26 minutes, or until the pastries are puffed and beautifully golden brown on top and bottom.
Step 9: Cool Completely
Remove the baking sheet from the oven and allow the pastries to sit for 5 minutes before transferring them to a wire cooling rack. You must let the pop tarts cool completely to room temperature before adding the icing. If they are even slightly warm, the icing will immediately melt and run right off the sides.
Step 10: Glaze and Decorate
In a medium bowl, whisk together the 1 ½ cups of powdered sugar, ½ teaspoon of vanilla, and 2 tablespoons of heavy cream or milk. The icing should be quite thick but still spreadable. If it is too stiff, add a tiny drop more milk; if it is too runny, add a bit more powdered sugar.
Spoon about a tablespoon of icing onto the center of each cooled pop tart. Use the back of the spoon or an offset spatula to gently push the icing toward the edges. Immediately scatter rainbow sprinkles over the top before the icing sets. Allow the icing to harden for about 30 minutes before serving.
Helpful Tips for the Best Results
Baking homemade toaster pastries is easy, but a few professional tips will ensure your results look and taste like they came from a high-end bakery.
- Do Not Overfill: It is incredibly tempting to add a mountain of jam to the center of the dough, but restraint is key. More than a tablespoon of filling will inevitably boil over, leak out of the seams, and burn on your baking sheet.
- The Cornstarch Trick: Never skip mixing a binder into your jam. Store-bought jam turns into thin syrup when heated. Cornstarch or a teaspoon of all-purpose flour thickens the fruit as it bakes, keeping it suspended inside the pastry.
- Seal Tightly: Take the time to press the edges together firmly with your fingers before you use the fork to crimp them. A double-seal is your best defense against leaky fillings.
- Trim the Edges: If your crimped edges look messy after you seal them, you can use a sharp knife or pizza cutter to trim a tiny sliver off all four sides of the assembled pop tart. This exposes the layers of dough and gives you exceptionally clean, sharp bakery-style edges.
Variations and Substitutions
The master recipe above features classic strawberry frosting, but you are not limited to fruit. Here are two of the most popular variations you can make using the exact same pie crust.
Brown Sugar Cinnamon Pop Tarts To make the filling for the iconic brown sugar version, whisk together ½ cup (100g) of packed dark brown sugar, 2 teaspoons of ground cinnamon, and 1 tablespoon of all-purpose flour. Stir in 1 tablespoon of melted butter and 1 teaspoon of vanilla extract until it forms a thick paste. Use exactly 1 tablespoon of this paste per pastry. For the icing, mix 1 ½ cups of powdered sugar, 1/2 teaspoon of cinnamon, ½ teaspoon of vanilla, and 2 to 3 tablespoons of milk.
Chocolate Fudge Pop Tarts To adapt the crust into chocolate pastry, replace ¼ cup of the all-purpose flour with ¼ cup of unsweetened Dutch-process cocoa powder and add 2 extra tablespoons of sugar to the dry mix. For the filling, whisk together 1 large egg, ½ cup (100g) of sugar, 2 tablespoons of cocoa powder, 1 tablespoon of melted butter, and ½ teaspoon of vanilla until smooth. Use 1 tablespoon of this fudge filling per pastry. Glaze with a simple chocolate icing made from powdered sugar, cocoa powder, and milk.
Blueberry Lemon Use high-quality blueberry preserves mixed with cornstarch for the filling. For the glaze, replace the milk and vanilla with freshly squeezed lemon juice and a pinch of lemon zest. The tartness of the lemon beautifully offsets the sweet blueberry filling.
What to Serve With It
Because homemade pop tarts are so rich and deeply flavored, they truly shine when served alongside complementary morning beverages and sides.
- Ice-Cold Milk: You simply cannot beat the classic pairing of a warm, fruity pastry and a tall glass of cold whole milk or oat milk.
- Coffee: The slight bitterness of a black coffee or a smooth cold brew perfectly cuts through the sweetness of the vanilla icing.
- Fresh Fruit: If you are serving these as part of a larger brunch spread, a bowl of fresh, tart berries or sliced melon balances the heavy, buttery pastry dough.
- Bacon or Sausage: For a complete sweet-and-savory breakfast experience, pair your sweet pastries with crispy, salty breakfast meats.
Storage and Reheating
Homemade baked goods lack the chemical preservatives of boxed foods, so they require proper storage to maintain their freshness.
Room Temperature: Store fully baked, iced pop tarts in an airtight container at room temperature for up to 3 days. Place a sheet of parchment paper or wax paper between layers so the icing does not stick to the pastry above it.
Freezing Unbaked Pop Tarts (Highly Recommended): The best way to enjoy these is fresh from the oven. Assemble the pop tarts completely, crimp the edges, and poke the vent holes, but do not egg wash them. Place the unbaked pastries on a baking sheet and freeze until solid (about 2 hours). Transfer them to a heavy-duty freezer bag for up to 3 months. When you are ready to eat, place them on a baking sheet, brush with egg wash, and bake directly from frozen. Just add 3 to 5 extra minutes to the baking time.
Reheating: Caution: Do not put frosted homemade pop tarts in a standard vertical pop-up toaster. The butter in the homemade crust and the royal icing can melt into the heating elements and cause a fire hazard. To reheat a frosted pop tart, place it in a toaster oven or a regular oven set to 300°F (150°C) for 5 to 7 minutes until warmed through. Alternatively, microwave it for about 10 to 15 seconds.
Frequently Asked Questions
Can I use store-bought pie crust for this recipe? Yes, you absolutely can! If you are short on time, refrigerated store-bought pie dough is a convenient shortcut. Simply unroll the dough, cut it into rectangles, and proceed with the filling and baking instructions. However, making the crust from scratch will yield a significantly flakier and more flavorful result.
Why did my pop tarts leak in the oven? Leaking usually happens for one of three reasons: you added too much filling, you forgot to mix a thickener (like cornstarch or flour) into the jam, or the edges were not sealed tightly enough. Always leave a clean border, press firmly, and crimp well.
Can I put homemade pop tarts in the toaster? If they are unfrosted, yes, you can carefully warm them in a wide-slot pop-up toaster on a low setting. If they have icing on them, do not use a vertical toaster, as the icing will melt, burn, and potentially start a fire. Use a toaster oven instead.
Can I use fresh fruit instead of jam? It is not recommended. Fresh fruit releases a massive amount of water as it cooks, which will quickly turn your pastry dough into a soggy, wet mess. Stick to thick jams, preserves, or cooked fruit compotes that have been heavily reduced and thickened.
How thick should I roll the pastry dough? Aim for about 1/8 of an inch thick. If the dough is too thick, the pastry will be heavy and bread-like. If it is too thin, it will not be able to support the weight of the filling and will likely tear or leak.
Do I have to use an egg wash? The egg wash serves two purposes: it acts as a “glue” to hold the top and bottom crusts together, and it gives the finished pastry a beautiful golden sheen. If you have an egg allergy, you can use a little bit of heavy cream or milk to seal the edges and brush the tops.
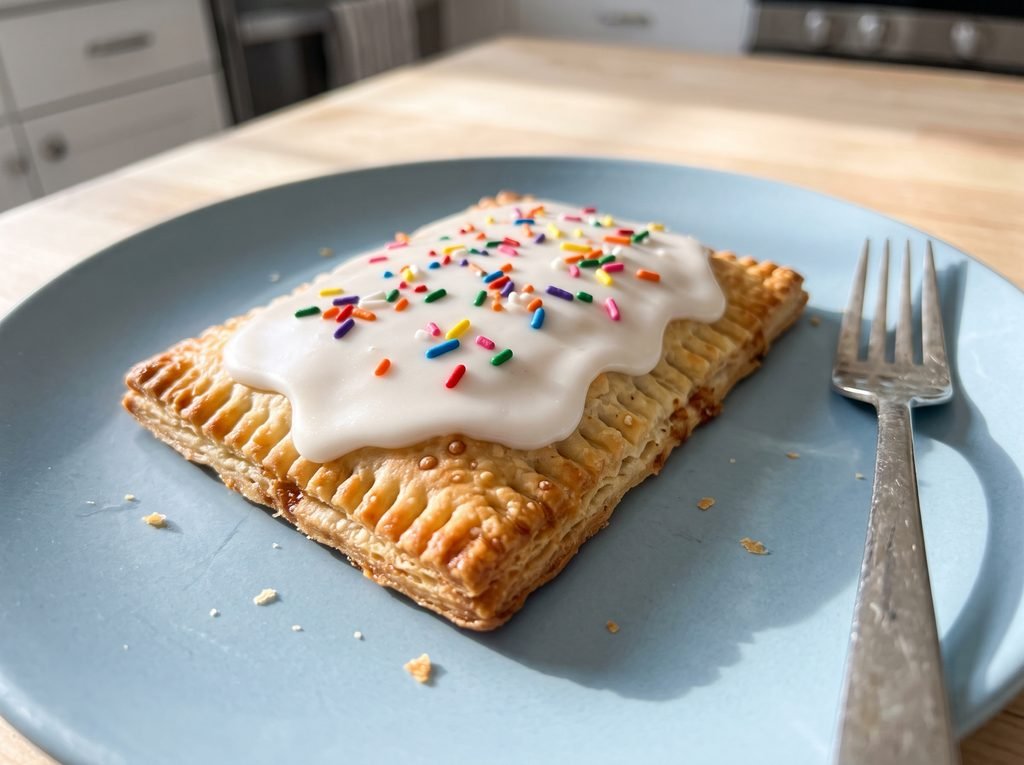
Final Thoughts
Taking the time to bake homemade pop tarts is an incredibly rewarding experience. There is a specific kind of joy in taking a beloved, mass-produced childhood snack and transforming it into a genuine culinary delight. With their impossibly flaky, all-butter crusts, vibrant fruit fillings, and sweet vanilla icing, these hand pies are guaranteed to impress.
Whether you opt for the classic frosted strawberry, venture into brown sugar cinnamon territory, or invent your own unique filling combinations, this master recipe provides the perfect canvas. Gather your ingredients, chill your butter, and get ready to enjoy the best toaster pastry you have ever tasted.