
How to Cook Perfect Steaks in the Oven: The Ultimate Guide
Cooking a restaurant-quality steak at home does not require an expensive outdoor grill or a culinary degree. In fact, if you have ever tried to pan-fry a thick steak on the stovetop only to end up with a charred exterior, a raw center, and a kitchen full of blinding smoke, the oven is about to become your best friend. Cooking steaks in the oven is the absolute most reliable, foolproof method for achieving edge-to-edge perfection, a gloriously brown crust, and a tender, melt-in-your-mouth texture.
For decades, the standard advice for cooking steak indoors was to sear it in a blazing hot pan and then throw the pan into the oven to finish cooking. While that method works well for very thin cuts, modern culinary science has given us something far superior: the reverse sear. By cooking the steak slowly in the oven first, and then finishing it with a lightning-fast sear on the stove, you eliminate the guesswork.
This method gently raises the internal temperature of the beef, preventing the grey, overcooked band of meat that often forms just under the crust. It also dries out the surface of the steak, guaranteeing a spectacular, crusty sear when it finally hits the hot pan. Whether you are celebrating a special anniversary, hosting a holiday dinner, or simply treating yourself to a phenomenal Friday night meal, learning how to cook steaks in the oven will completely change the way you approach beef.
Why You’ll Love This Cooking Method
- Edge-to-Edge Perfection: Traditional high-heat cooking creates a temperature gradient, resulting in a steak that is well-done on the outside and rare in the very middle. The low-heat oven method cooks the meat evenly throughout, so your medium-rare steak is actually medium-rare from edge to edge.
- Foolproof Temperature Control: Because the oven cooks the steak so gently and slowly, the internal temperature rises gradually. You have a much wider window to pull the steak out at the exact right moment, making it nearly impossible to accidentally overcook your expensive meat.
- A Superior Crust: Moisture is the enemy of a good crust. When a steak sits in the dry heat of an oven, the surface moisture evaporates completely. When you finally sear it in a skillet, it browns instantly and beautifully.
- Less Smoke and Stress: Searing a raw, cold steak takes several minutes per side, often setting off smoke detectors and leaving your kitchen coated in grease. Because the oven-baked steak is already fully cooked and completely dry on the outside, the final sear takes less than 60 seconds per side.
- Tenderizes the Meat: The slow, gentle heat acts almost like a dry-aging process, activating natural enzymes in the beef that break down tough muscle fibers, resulting in a remarkably tender bite.
Choosing the Perfect Steak for the Oven
The oven method—specifically the reverse sear—works best with thick cuts of meat. You want a steak that is at least 1.5 inches (3.8 cm) thick, and ideally closer to 2 inches (5 cm). If a steak is too thin, it will cook too quickly in the oven and overcook the moment it touches the hot searing pan.
When visiting your local butcher or grocery store meat counter, look for these premium cuts:
- Ribeye: This is the king of steaks. Ribeyes contain a high amount of intramuscular fat (marbling), which melts during the cooking process to baste the meat from the inside out. The oven method renders this fat beautifully, resulting in a rich, buttery, and incredibly flavorful steak.
- New York Strip: A fantastic balance of tenderness and bold, beefy flavor. It has a tighter texture than a ribeye and a distinct fat cap running along one edge. It is slightly leaner but performs beautifully in the oven.
- Filet Mignon (Tenderloin): The most tender cut of beef available, but also the leanest. Because it lacks fat, a filet can dry out quickly if mishandled. The gentle heat of the oven ensures this expensive, delicate cut remains incredibly juicy.
- Top Sirloin: A great budget-friendly option. It is less tender than the premium cuts but offers a fantastic, robust beef flavor. Look for center-cut sirloins that are sliced nice and thick.
The Magic of Dry Brining
If you want a steak that tastes like it came from a high-end steakhouse, you must dry brine it. Dry brining is simply the process of aggressively salting your raw steak and letting it rest in the refrigerator, uncovered, for several hours before cooking.
When you first apply salt to the raw beef, it draws moisture out to the surface. If you cook the steak immediately, this surface moisture will steam the meat in the pan, preventing a good crust. However, if you let the salted steak sit for at least 45 minutes (and up to 24 hours), a magical process called osmosis occurs. The salty liquid is reabsorbed deep into the muscle fibers, seasoning the steak all the way through, not just on the surface. Furthermore, the circulating air in the refrigerator dries out the exterior, setting you up for the ultimate sear.
The Essential Equipment
To perfectly execute steaks in the oven, you need a few basic kitchen tools.
- A Wire Cooling Rack and Baking Sheet: Elevating the steak on a wire rack allows the warm oven air to circulate completely around the meat, ensuring it cooks evenly on both the top and bottom.
- A Digital Meat Thermometer: This is non-negotiable. Cooking by time alone is a guessing game because ovens vary, steak thicknesses vary, and starting temperatures vary. An instant-read meat thermometer is the only way to guarantee perfection.
- A Cast-Iron Skillet: Cast iron retains heat better than any other material. When you transfer your oven-baked steak to the stovetop for the final sear, a heavy cast-iron skillet provides the intense, even heat necessary to build a dark crust in seconds.
Recipe: The Ultimate Oven-Baked Steak (Reverse Sear Method)
This master recipe uses the reverse sear technique. We will slowly roast the beef at a low temperature until it is just shy of your desired doneness, then finish it in a blazing hot pan with a fragrant butter baste.
Prep Time: 10 minutes (plus resting time)
Cook Time: 45 minutes
Total Time: 55 minutes
Servings: 2
Ingredients
For the Steak:
- 2 thick-cut steaks (Ribeye, New York Strip, or Filet Mignon): At least 1.5 to 2 inches (3.8 to 5 cm) thick, about 1 pound (450g) each.
- 1 tablespoon kosher salt: Use a coarse kosher salt, not fine table salt. Table salt is too dense and will make your meat overly salty.
- 1 teaspoon freshly cracked black pepper: Do not use pre-ground pepper powder; the texture and sharp bite of freshly cracked peppercorns are essential for a steak crust.
- 1 tablespoon high-smoke-point cooking oil: Avocado oil, grapeseed oil, or canola oil. Do not use extra-virgin olive oil, as it will burn and turn bitter at high searing temperatures.
For the Butter Baste (Optional but highly recommended):
- 3 tablespoons unsalted butter.
- 3 cloves fresh garlic: Smashed, skins left on.
- 2 sprigs fresh rosemary or thyme.
Step-by-Step Instructions
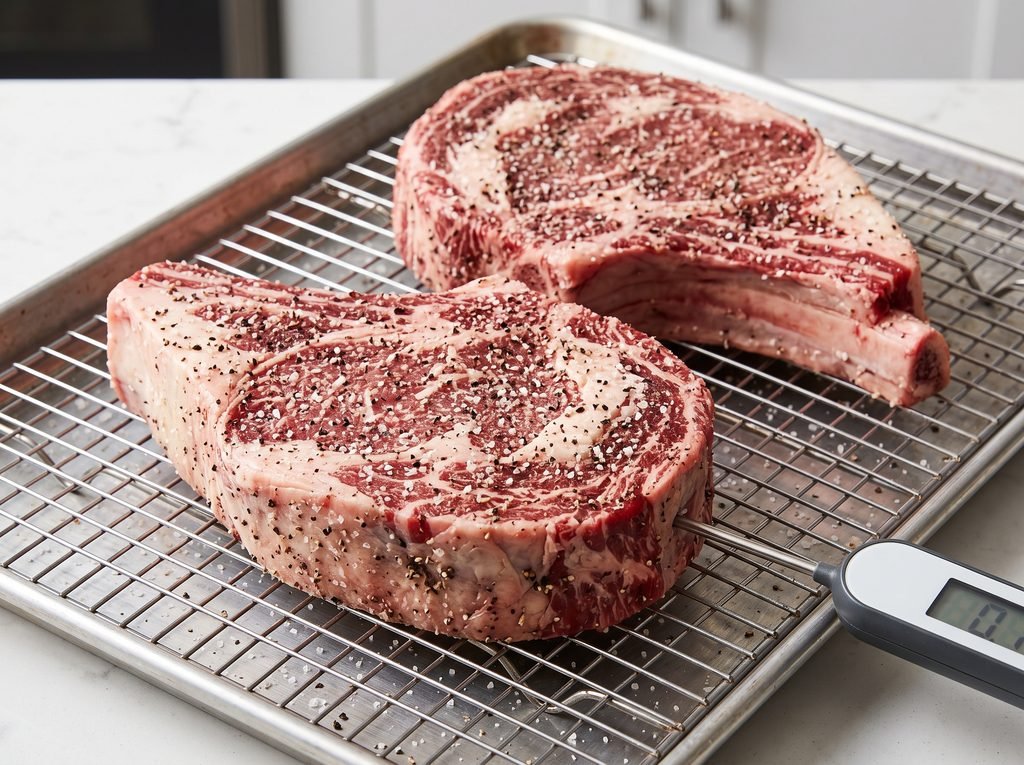
1. Dry Brine the Steaks Remove your steaks from their packaging and pat them completely dry with paper towels. Sprinkle the kosher salt generously over all sides of the meat, including the edges. Place the steaks on a wire rack set inside a rimmed baking sheet. Place the baking sheet in the refrigerator, uncovered, for at least 45 minutes, but ideally 12 to 24 hours.
2. Prepare the Oven When you are ready to cook, preheat your oven to 250°F (120°C). If your oven runs hot, you can even drop this to 225°F (107°C). Remove the steaks from the refrigerator. Season them generously with the freshly cracked black pepper. (You do not need to let the steaks come to room temperature; the low oven will warm them gently).
3. Bake the Steaks Place the baking sheet with the wire rack and steaks directly into the center of the preheated oven. Bake until the internal temperature reaches exactly 10 to 15 degrees Fahrenheit below your final target temperature (see the temperature guide below). For a perfect medium-rare, this will take roughly 40 to 45 minutes, but start checking the temperature with your meat thermometer at the 30-minute mark.
4. Rest the Meat Once the steaks reach their target oven temperature (e.g., 115°F/46°C for medium-rare), remove the baking sheet from the oven. Let the steaks rest on the wire rack for 10 minutes. Do not skip this step. Resting allows the juices to redistribute and cools the surface of the meat slightly so it does not overcook during the final sear.
5. Preheat the Skillet While the steaks are resting, place a heavy cast-iron skillet over high heat on your stovetop. Turn on your exhaust fan. Let the pan heat up for a full 3 to 5 minutes until it is smoking hot. Add the tablespoon of high-smoke-point oil to the pan.
6. The Final Sear Carefully place the steaks into the hot oil. You should hear an aggressive sizzle immediately. Sear for exactly 45 to 60 seconds. Flip the steaks and sear the other side for another 45 seconds. Using a pair of tongs, hold the steaks on their sides to render and crisp the fat cap along the edges for about 30 seconds.
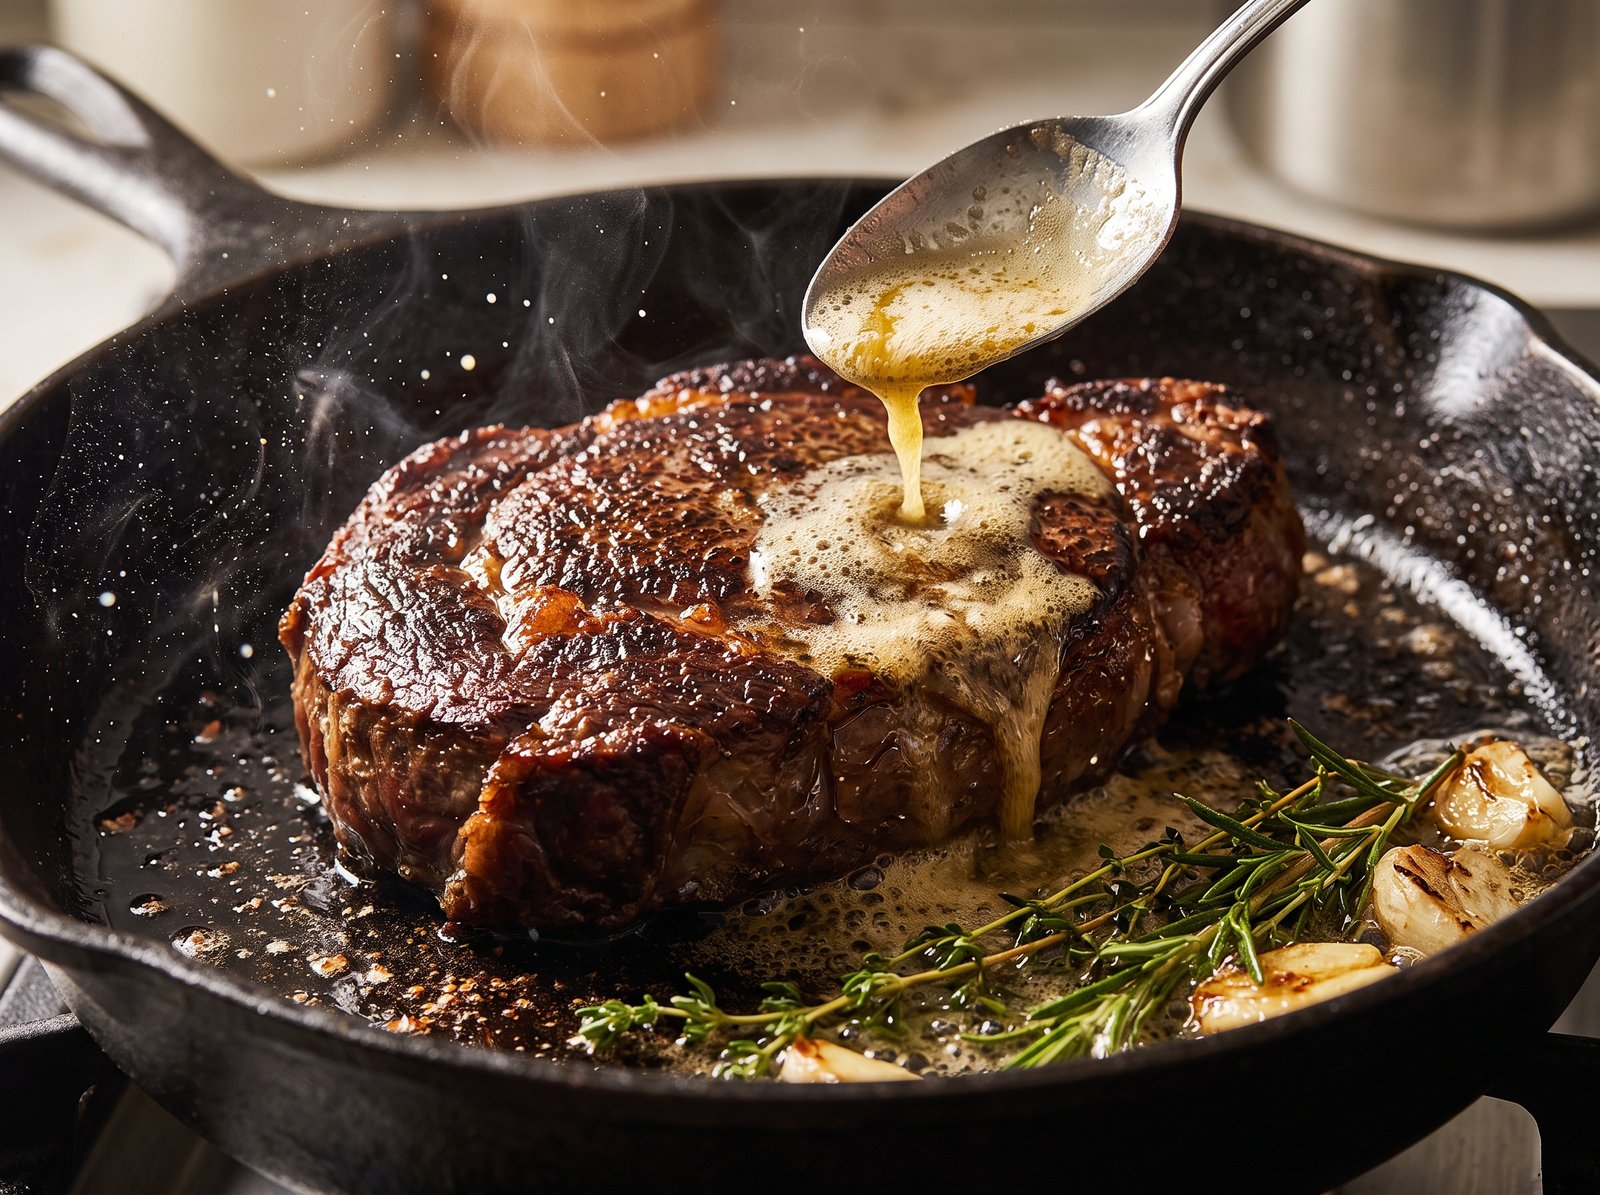
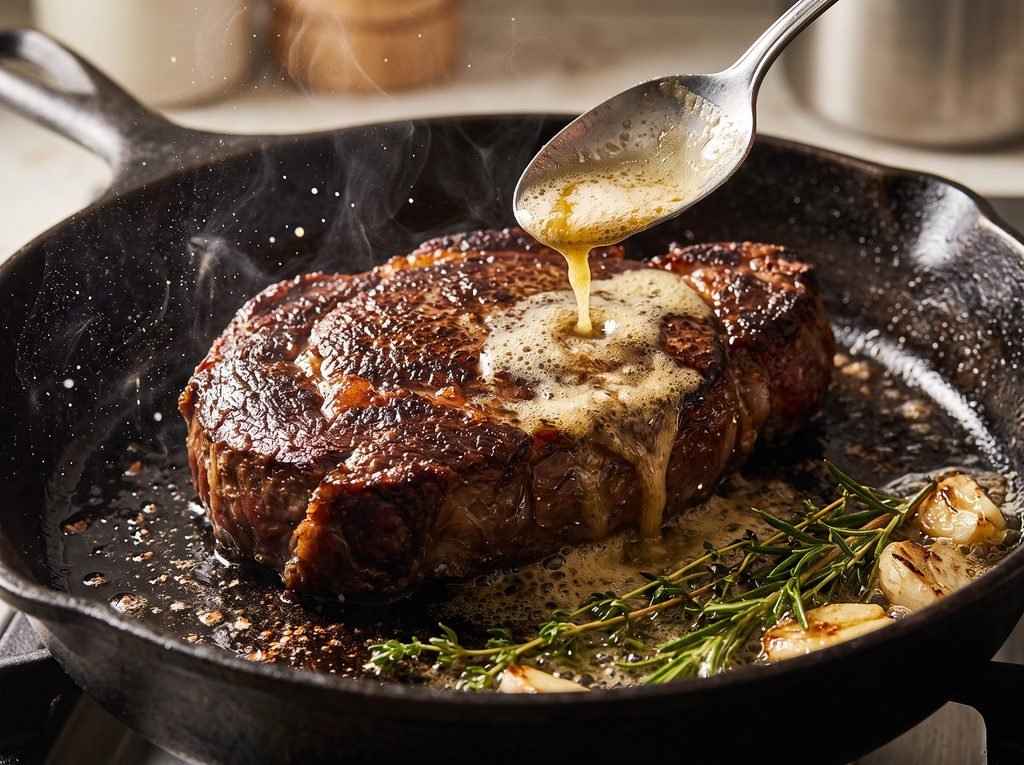
7. Butter Baste (Arroser Technique) Reduce the stovetop heat to medium-low. Immediately add the butter, smashed garlic cloves, and fresh herb sprigs to the skillet. As the butter melts and foams, tilt the pan slightly toward you. Use a large spoon to rapidly scoop up the foaming, aromatic butter and baste it repeatedly over the top of the steaks for 30 to 45 seconds.
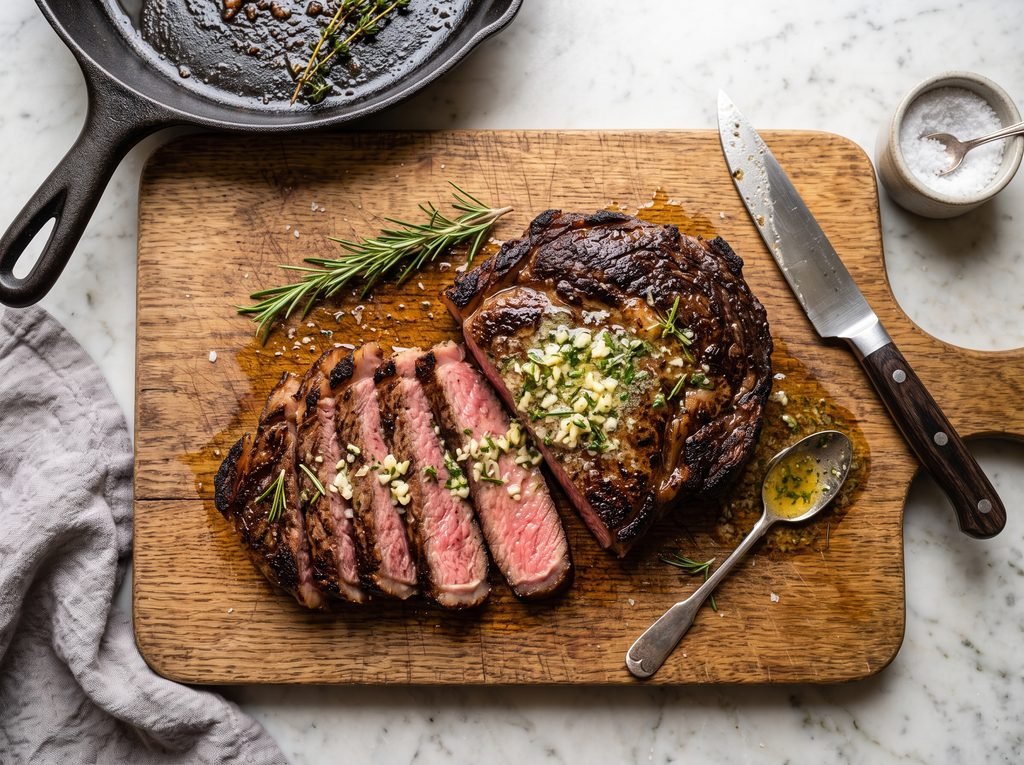
8. Slice and Serve Remove the steaks from the skillet immediately and transfer them to a clean cutting board. Because you already rested the meat after the oven stage, they only need a minute or two to cool down from the sear. Slice the steaks against the grain into thick strips. Pour a spoonful of the browned pan butter over the sliced meat, and serve immediately.
Temperature Guide for Steaks
Because you are searing the meat after it comes out of the oven, the internal temperature will rise significantly in the hot skillet. You must pull the steak out of the oven before it reaches your desired doneness. Use this precise guide:
- Rare (Final Temp: 120°F – 125°F / 49°C – 52°C): Pull from the oven at 105°F (40°C). The center will be cool and bright red.
- Medium-Rare (Final Temp: 130°F – 135°F / 54°C – 57°C): Pull from the oven at 115°F (46°C). The center will be warm and reddish-pink. This is the chef-recommended temperature for premium steaks.
- Medium (Final Temp: 140°F – 145°F / 60°C – 63°C): Pull from the oven at 125°F (52°C). The center will be hot and light pink.
- Medium-Well (Final Temp: 150°F – 155°F / 65°C – 68°C): Pull from the oven at 135°F (57°C). The meat will have just a slight hint of pale pink in the very center.
- Well-Done (Final Temp: 160°F+ / 71°C+): Pull from the oven at 145°F (63°C). The meat will be browned throughout with no pink.
Helpful Tips for the Best Results
- Use the Right Thermometer Technique: When checking the temperature, insert the probe of your digital thermometer into the absolute thickest part of the steak, entering from the side, not from the top. Make sure the tip is not touching a bone or a large pocket of fat, which will give you an inaccurate reading.
- Pat the Steaks Dry Again: Even though the oven will dry out the surface of the meat, it never hurts to take one final paper towel and dab the surface of the steak just before it goes into the hot skillet. The drier the surface, the better the crust.
- Slice Against the Grain: When you are ready to eat, look at the direction the muscle fibers are running. Always slice perpendicular to these lines (against the grain). This physically shortens the muscle fibers, making every bite significantly more tender to chew.
- Ventilation is Key: Even though this method produces far less smoke than pan-frying a raw steak from start to finish, searing meat in a smoking-hot cast-iron pan will still create some smoke. Open a window and turn your oven hood fan on high before you add the oil to the pan.
Variations and Substitutions
Once you have mastered the basic oven-baked steak, you can elevate your dinner party by adding composed butters, crusts, or classic sauces.
- Garlic Herb Compound Butter: Instead of basting the steak in the pan, skip the herbs in the skillet. Simply sear the steak in oil, remove it to a cutting board, and immediately top it with a thick slice of homemade compound butter (softened butter mixed with minced garlic, parsley, chives, and a pinch of salt). The butter will melt luxuriously over the hot beef.
- Blue Cheese Crust: During the last two minutes of the oven-baking phase, carefully remove the steaks, top them with a heavy layer of crumbled high-quality blue cheese and a sprinkle of panko breadcrumbs. Return them to the oven (or briefly place them under the broiler) until the cheese is melted and bubbly. Note: Skip the stovetop sear if you use this method, or sear one side only before adding the cheese.
- Classic Peppercorn Sauce (Au Poivre): After you finish searing the steaks and remove them from the skillet, pour off the excess fat. Deglaze the hot pan with a splash of cognac or beef broth, scraping up all the browned bits. Add a splash of heavy cream and a tablespoon of crushed green or black peppercorns. Simmer for two minutes until it forms a rich, thick sauce to pour over the sliced beef.
What to Serve With It
A premium steak deserves side dishes that complement its rich, savory flavor without overpowering it. Stick to classic steakhouse accompaniments for a balanced, sophisticated meal.
- Potatoes: You cannot go wrong with starches. Serve your oven-baked steak with a massive, salt-crusted baked potato loaded with sour cream and chives. Alternatively, creamy, buttery mashed potatoes or crispy duck-fat roasted potatoes are fantastic for soaking up the beef juices.
- Roasted Asparagus or Brussels Sprouts: Toss fresh asparagus spears or halved Brussels sprouts in olive oil, salt, and pepper, and roast them in a 400°F (200°C) oven until tender and slightly charred. The slight bitterness of the greens cuts beautifully through the rich fat of the beef.
- A Crisp Wedge Salad: For a refreshing starter or side, serve a cold wedge of iceberg lettuce topped with creamy blue cheese dressing, crispy crumbled bacon, cherry tomatoes, and thinly sliced red onions.
- Sautéed Mushrooms: Cook thick slices of cremini or button mushrooms in butter, garlic, and a splash of soy sauce until they are deeply browned and tender. They provide a wonderful earthy, umami complement to the meat.
Storage and Reheating Instructions
Steak is notoriously difficult to store and reheat without completely ruining the texture and cooking it to well-done. However, with the right technique, you can enjoy fantastic leftovers.
How to Store: Allow any leftover steak to cool to room temperature. If it is already sliced, keep the slices together to prevent the interior from drying out. Place the meat in an airtight glass or plastic container and store it in the refrigerator for up to 3 to 4 days. Do not freeze cooked steak, as the freezing and thawing process will severely damage the delicate cellular structure of the meat, resulting in a mushy texture.
How to Reheat Safely: The microwave is the absolute worst enemy of leftover steak; it will instantly turn premium beef into tough, grey rubber. Instead, use your oven.
- Preheat your oven to 250°F (120°C).
- Place the leftover steak on a wire rack over a baking sheet.
- Warm it in the oven for about 20 to 30 minutes, checking the internal temperature with your meat thermometer until it reaches 110°F (43°C).
- Remove it from the oven and give it a lightning-fast sear (about 15 seconds per side) in a hot skillet just to re-crisp the exterior.
Alternative Leftover Idea: If you do not want to risk reheating the beef, cold steak is absolutely delicious. Slice the cold, leftover steak incredibly thin and serve it over a bed of peppery arugula with a sharp balsamic vinaigrette, or pile it high on a crusty baguette with horseradish mayonnaise for a phenomenal gourmet sandwich.
Frequently Asked Questions
Can I use a glass baking dish instead of a wire rack? You can, but it is not recommended. If you place a steak flat in a glass baking dish or directly on a foil-lined pan, the bottom of the meat will sit in its own juices. This will steam the underside of the steak, resulting in a grey, mushy bottom rather than a dry surface ready for searing. A wire cooling rack ensures air circulates around the entire piece of meat.
Do I absolutely have to sear the steak on the stove afterward? Technically, no. The steak is fully cooked and perfectly safe to eat right out of the low-temperature oven. However, it will look unappetizing. It will be pale, grey, and lack the complex, savory flavors that come from caramelization. The 60-second sear on the stovetop is what transforms it from boiled-looking meat into a steakhouse masterpiece.
What if my steak is thin (less than an inch thick)? If your steak is thin, do not use the reverse sear low-oven method. It will overcook. Instead, use the traditional pan-to-oven method: Preheat your oven to 400°F (200°C). Sear the thin steak in a blazing hot cast-iron skillet on the stove for 2 minutes per side to develop a crust. If the center is not yet to your liking, immediately transfer the entire hot skillet into the oven for 2 to 4 minutes to finish cooking through.
Can I cook frozen steaks in the oven? While it is technically possible to reverse-sear a frozen steak, you will achieve much better results if you thaw the meat first. Thaw frozen steaks safely in the refrigerator overnight. If you are in a rush, place the vacuum-sealed steaks in a bowl of cold running water for an hour. Never thaw steaks in the microwave or in warm water, as this begins to cook the exterior and breeds bacteria.
Why is my steak tough even though I cooked it medium-rare? Toughness usually comes down to three factors: the quality of the cut, the resting time, or how it was sliced. Sirloin and round steaks are naturally tougher than ribeyes or filets and require more chewing. If you did not let the steak rest for 10 minutes after cooking, the muscle fibers remained tightly clenched, squeezing out the juices when you cut into it. Finally, if you sliced the steak parallel to the grain instead of against it, the muscle fibers remain long and stringy, making the meat difficult to chew.
Should I let my raw steak sit at room temperature before putting it in the oven? This is one of the most common myths in cooking. Leaving a steak on the counter for 30 minutes does almost nothing to raise its internal core temperature; it just warms the exterior slightly. Because we are putting the steak into a very low 250°F (120°C) oven, you can absolutely put it in cold directly from the refrigerator. The gentle oven heat will bring it up to temperature perfectly evenly.
Final Thoughts
Cooking the perfect steak at home can feel intimidating, especially when working with expensive cuts of beef. The fear of ruining a beautiful ribeye or filet mignon keeps many home cooks firmly planted in front of the grill, or worse, saves steak exclusively for expensive restaurant outings. But by harnessing the gentle, controlled heat of the oven, you strip away the stress, the smoke, and the guesswork.
The reverse sear method is a triumph of home cooking. It honors the quality of the ingredients, demands very little active hands-on time, and yields a juicy, tender, edge-to-edge masterpiece that rivals anything you could order at a premium steakhouse. Grab a thick cut of beef from your local butcher, generously apply your kosher salt, and let your oven do the heavy lifting. You are about to cook the best steak of your life.