
How to Build the Ultimate Spooky Halloween Fruit Platter
When October rolls around, the cultural focus instantly shifts to sugar, candy bars, and decadent baked goods. Between classroom parties, neighborhood trick-or-treating, and cozy horror movie nights, the sheer volume of candy floating around can quickly feel overwhelming. That is exactly why bringing a colorful, fresh Halloween fruit platter to your next fall gathering is the ultimate hosting move. It provides a much-needed, refreshing break from the heavy sweets while still leaning completely into the fun, festive, and spooky spirit of the holiday.
A beautifully arranged fruit board does not have to be boring, nor does it require advanced culinary skills. With a few simple paring knife tricks, some strategically placed candy eyes, and a festive dip in the center, everyday produce transforms into a wildly entertaining and delicious centerpiece. You can easily turn bananas into screaming ghosts, peeled citrus into miniature pumpkins, and crisp green apples into terrifying monster mouths. It is an engaging, creative kitchen project that is incredibly forgiving and guarantees a chorus of “oohs” and “aahs” from kids and adults alike.
Whether you are hosting a lively kids’ costume party, attending a neighborhood potluck, or just looking for a wholesome afternoon snack before a night of trick-or-treating, this spooky fruit platter is guaranteed to be a massive hit. It is fresh, hydrating, visually stunning, and delightfully creepy.
What Is a Halloween Fruit Platter?
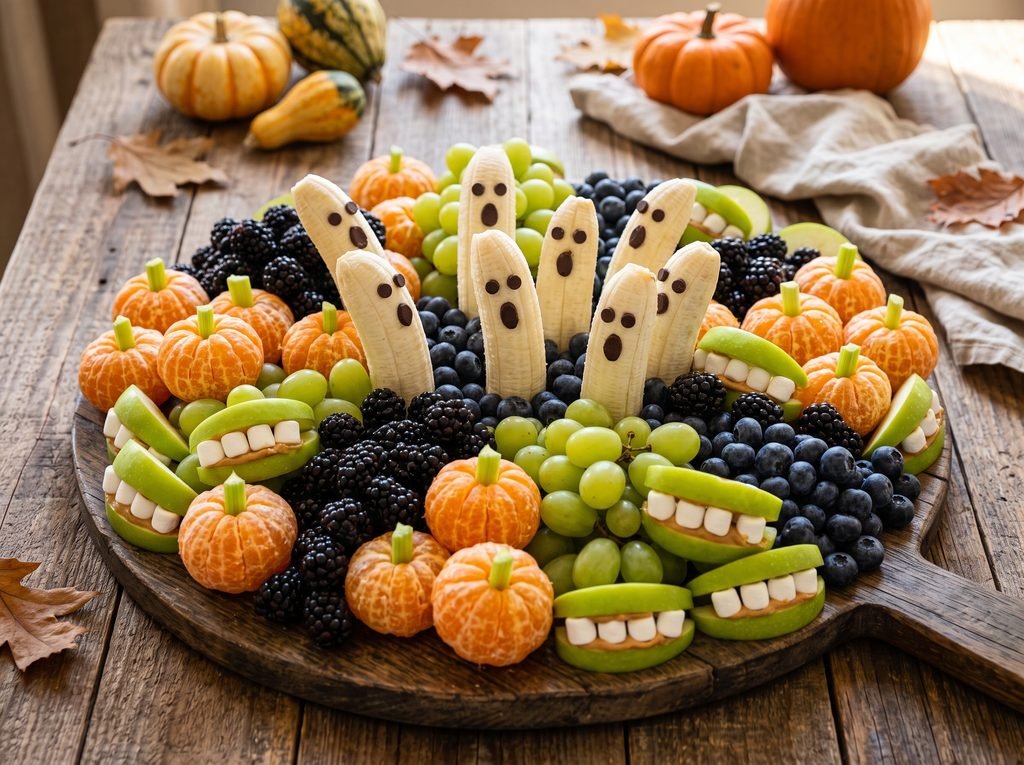
At its core, a Halloween fruit platter is a thematic snack board or charcuterie-style spread composed entirely of fresh fruits, arranged and decorated to fit a spooky, festive autumn aesthetic. Instead of just haphazardly tossing grapes and melon slices onto a basic plate, this concept relies on color coordination, clever carving techniques, and playful edible decorations to create a holiday-specific culinary experience.
The color palette of a great Halloween board typically revolves around traditional holiday hues. You will use deep blacks, dark purples, and moody reds (think blackberries, Concord grapes, and pomegranate arils), bright pops of orange (cantaloupe, clementines, and mango), and vibrant, monster-like greens (kiwi, honeydew, and Granny Smith apples).
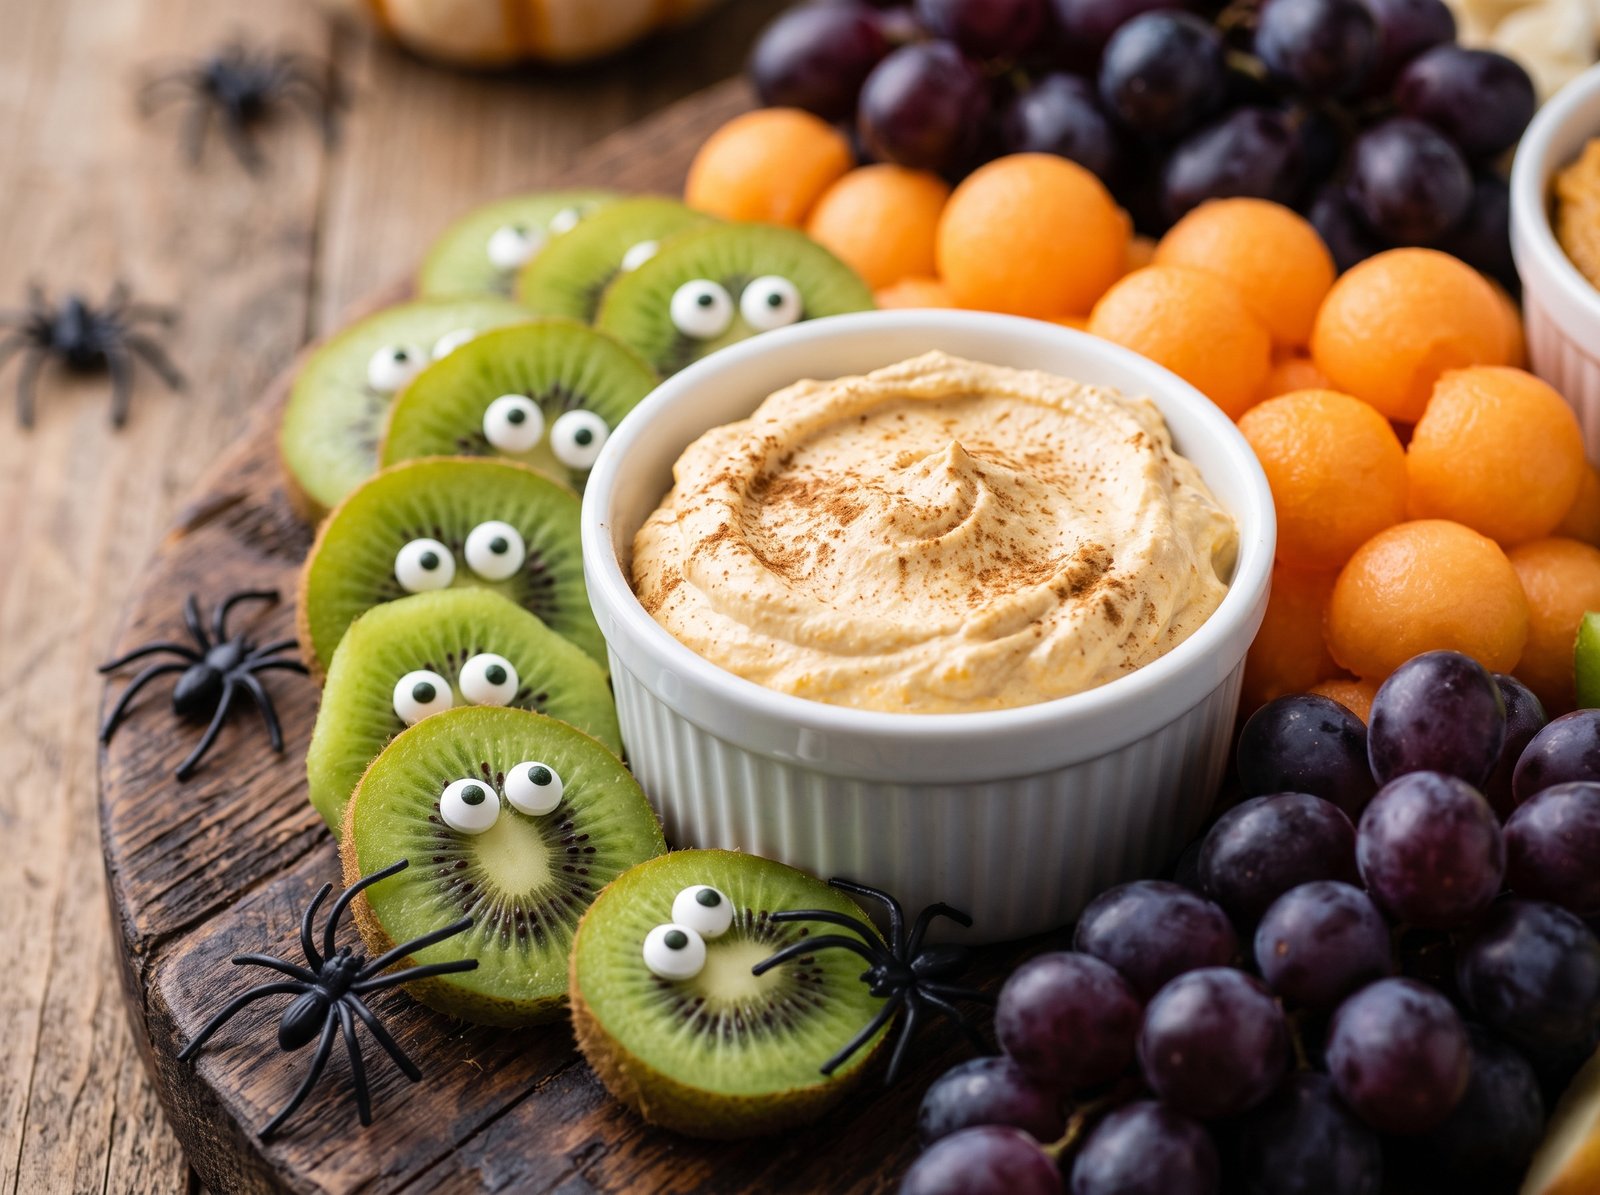
Beyond the striking color scheme, the board comes alive through fruit “characters” crafted using simple, edible decorations. A Halloween fruit platter usually features a mix of plain, loose fruit serving as the background or “rivers” on the board, while the spooky fruit characters act as the focal points. Accompanied by a sweet seasonal dip—like a fluffy pumpkin pie cream cheese or a spooky spiderweb chocolate hummus—the platter becomes an interactive appetizer or dessert that feels indulgent but remains entirely fruit-based.
Why You’ll Love This Spooky Snack Board
There are countless reasons to add a festive fruit board to your October menu. Whether you are a busy parent or a dedicated party host, here are the top reasons this concept is a guaranteed winner:
- A Welcome Break from Processed Sugar: Halloween is synonymous with processed candy, artificial dyes, and heavy chocolate. This platter offers natural sweetness, hydrating produce, and essential vitamins, making you feel great about what you are serving to your family and guests.
- Endlessly Customizable: You are not locked into a rigid, unforgiving recipe. If strawberries are out of season or too expensive at your local grocery store, you can seamlessly swap them for raspberries or dark cherries.
- Kid-Friendly Activity: Assembling this board is essentially an edible arts and crafts session. Kids absolutely love helping press chocolate chips into bananas to make ghost faces or pushing candy eyes onto fruit skewers. It is a great way to get them involved in the kitchen.
- Allergy-Friendly and Inclusive: Traditional Halloween treats often contain nuts, dairy, egg, or gluten, which can make school parties a minefield for kids with food allergies. A fresh fruit platter is naturally gluten-free, vegetarian, and vegan. By choosing your dips and edible glues carefully, it becomes a safe, inclusive centerpiece for guests with dietary restrictions.
- Visually Stunning: A well-built, overflowing board looks like an expensive, professionally catered masterpiece, even though it only requires a few dollars’ worth of fresh produce and some basic assembly techniques.
Ingredients and Supplies
To build the ultimate Halloween fruit platter, you want to focus on color, texture, and flavor variety. You will need enough fruit to fill a standard 12×18 inch wooden board or rimmed baking sheet. Here is exactly what you need to create a show-stopping display.
The Orange Fruits
Orange is the visual anchor of any Halloween spread.
- Clementines or Mandarin Oranges: 4 to 6 whole fruits, peeled. These will become our miniature pumpkins.
- Cantaloupe: 1 small melon, scooped into perfect spheres with a melon baller or sliced into bite-sized chunks.
- Persimmons, Mangoes, or Peaches: 1 to 2 cups, sliced into wedges (depending on seasonal availability in your area).
The Black and Purple Fruits
These dark fruits add a moody, spooky contrast to the bright orange elements.
- Blackberries: 1 dry pint (16 ounces). Their bumpy, uneven texture makes them look slightly creepy, almost like tiny brains.
- Black or Dark Purple Grapes: 1 large bunch (about 1 pound). Look for deep purple, black, or even “Moon Drop” grapes which have a spooky, elongated shape.
- Blueberries: 1 dry pint (16 ounces). These are excellent for filling in the small gaps and holes on the board.
The Green Fruits
Green adds a vibrant, “monster-like” pop of color and a tart flavor profile.
- Green Apples: 2 large Granny Smith apples, sliced into thick wedges. These are firm and tart, perfect for making monster mouths.
- Kiwi: 3 to 4 whole kiwis, peeled and sliced into thick rounds.
- Honeydew Melon: 1 small melon, cut into cubes or scooped with a melon baller.
- Green Grapes: 1 small bunch (about 1/2 pound) to provide visual contrast against the dark grapes.
The White Fruits (The Ghosts)
- Bananas: 3 large, firm but ripe bananas. These will be transformed into upright, screaming ghosts.
Edible Decorations and Details
- Mini Chocolate Chips: 2 tablespoons. Used for the eyes of the banana ghosts.
- Standard Chocolate Chips: 1 tablespoon. Used for the howling mouths of the banana ghosts.
- Candy Eyes: 1 small package (usually containing about 50 eyes). You can easily find these in the baking and cake-decorating aisle of most grocery stores.
- Celery: 1 single crisp stalk. Cut into tiny slivers to act as the “stems” for your clementine pumpkins.
- Mini Marshmallows: 1/4 cup. Used for the jagged teeth in the apple monster mouths.
- Peanut Butter or Sunflower Seed Butter: 2 to 3 tablespoons. Used as the edible “glue” to hold the monster mouths together.
Essential Tools
- A large wooden charcuterie board, slate platter, or rimmed baking sheet (at least 12×18 inches).
- A sharp paring knife for detailed fruit carving.
- A melon baller (optional, but highly recommended for a polished look).
- Small decorative bowls or ramekins for holding dips, toothpicks, or smaller berries.
How to Make the Spooky Fruit Characters
The true magic of this board lies in the whimsical fruit characters. It is highly recommended to prepare these elements first, right before you start assembling your main platter, so you have them ready to place.
1. Clementine Pumpkins
These are incredibly simple to make, require zero carving, and look absolutely adorable. Peel your clementines or mandarin oranges completely, doing your best to pull the white pith off while keeping the fruit whole and intact. Wash and dry your single celery stalk. Slice the celery into thin, short matchsticks—about 1 inch long. Gently press one piece of celery down into the natural top center hole of the peeled clementine. Instantly, it looks exactly like a plump, bright orange miniature pumpkin.
2. Screaming Banana Ghosts
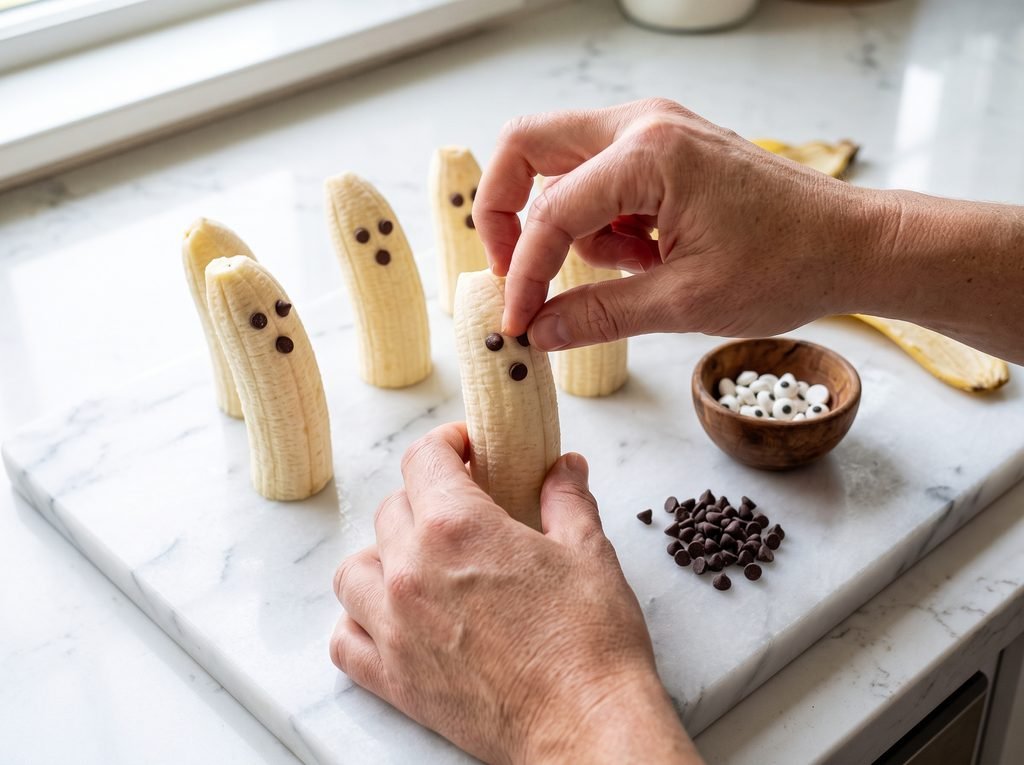
Because bananas brown quickly when exposed to air, you must wait to make these until right before you plan to serve the board. Peel the bananas and slice them in half crosswise. The flat cut end will allow the ghosts to stand perfectly upright on your tray, while the naturally tapered top serves as the ghost’s head. Take two mini chocolate chips and press them point-side-in near the top for the eyes. Take one standard-sized chocolate chip (or a larger baking chunk) and press it in just below the eyes to create a surprised, howling mouth.
3. Apple Monster Mouths
Wash and core the Granny Smith apples, then cut them into thick, even wedges. Take one wedge and use your paring knife to carefully cut out a smaller, shallower wedge from the skin side, creating a “mouth” gap. Smear a thin, even layer of peanut butter (or sunflower seed butter for nut-free zones) inside the gap. Press 4 to 6 mini marshmallows into the top of the peanut butter to look like crooked, jagged teeth. For extra fun, you can slice a strawberry very thin and lay it over the bottom teeth to add a hanging “tongue.”
4. Creepy Kiwi Frankensteins
Peel the kiwi with a paring knife, but intentionally leave a small, jagged patch of the fuzzy brown skin at the very top to look like Frankenstein’s hair. Slice the bottom off so the kiwi can stand flat on the board. Gently press two candy eyes onto the front of the green kiwi flesh (the natural moisture of the fruit will hold them in place). You can use a toothpick to carve a small, straight “scar” or mouth into the green fruit just below the eyes.
Step-by-Step Instructions for Assembling the Platter
Once your characters are prepped and your remaining loose fruit is washed, dried, and sliced, it is time to build the board. Constructing a fruit platter uses the same visual rules as a high-end cheese board.
Step 1: Anchor the Board with Bowls If you are serving a dip (highly recommended—see serving suggestions below), place your dip bowl on the board first. Typically, placing it slightly off-center works best for visual flow. If you have a small bowl of messy items, like pomegranate seeds or extra candy eyeballs, place those on the board now as well. These bowls act as the anchor points that you will build the fruit around.
Step 2: Place the Spooky Characters Decide where your main attractions will go. Group your Clementine Pumpkins together in one section, perhaps nestled near the dip bowl. Stand your Banana Ghosts up in another area, ideally near the back or center so they don’t block smaller items. Arrange your Apple Monster Mouths near the front edge so their marshmallow teeth are highly visible to guests. Spacing these themed characters out ensures that the viewer’s eye travels all around the board.
Step 3: Create Color Rivers Take your loose fruits—blackberries, green grapes, and cantaloupe chunks—and arrange them in sweeping “rivers” or curved clusters around the bowls and characters. Keep contrasting colors next to each other to make the board pop. For example, a pile of bright orange cantaloupe looks striking and vibrant right next to a cluster of dark purple blackberries. Avoid putting green grapes right next to green kiwi.
Step 4: Fill the Gaps Once the large items and main fruit clusters are down, you will have small patches of empty space showing the wooden bottom of the board. Use smaller fruits like blueberries, raspberries, or loose singular grapes to fill in these gaps. A beautiful, professional-looking fruit tray should look completely abundant, with no empty board visible.
Step 5: Add the Final Flourishes Take a handful of plastic decorative spiders (washed thoroughly with soap and water) or edible gummy worms and scatter them across the fruit. Tuck a gummy worm so it looks like it is crawling out of an apple slice or a pile of “brain” blackberries. Add a few extra candy eyes randomly onto the dark fruit clusters so it looks like the shadows are staring back at the guests.
Helpful Tips for the Best Results
- Dry Your Fruit Thoroughly: This is the most important step for a successful board. After washing your berries and grapes, dry them completely with paper towels or a clean kitchen towel before placing them on the board. Wet fruit will make the board soggy, cause colors to bleed, and instantly ruin any candy eyes or marshmallow teeth it touches.
- Preventing Apple Browning: Apples oxidize and turn brown quickly when exposed to air. To keep them crisp and white, submerge the freshly cut apple slices in a mixture of 1 cup cold water and 1 tablespoon fresh lemon juice (or a splash of pineapple juice) for 3 to 5 minutes. Drain them and pat them completely dry with a paper towel before adding the peanut butter.
- Timing the Bananas: Bananas are the most fragile item on the board. Wait to peel and cut the bananas until just 10 to 15 minutes before the party starts or your guests arrive.
- Use Firm Produce: Overripe, bruising fruit will turn mushy when sitting out on a platter at room temperature. Choose bananas that are yellow but still slightly green at the stem. Pick firm kiwis, crisp apples, and plump berries.
- Serve Cold: Fresh fruit tastes crisper, sweeter, and more refreshing when it is well chilled. Keep all your ingredients in the refrigerator right up until you are ready to start assembling.
- Vary the Cuts and Shapes: Visual interest comes from different textures and shapes. Leave some berries whole, cut melons into spheres with a melon baller, slice apples into sharp wedges, and cut kiwis into geometric rounds.
Variations and Substitutions
The true beauty of a Halloween fruit platter is its sheer versatility. You can easily tailor it to fit specific party themes, flavor preferences, or whatever ingredients happen to be on sale at the grocery store.
- The Gothic Adult Board: If you are hosting a sophisticated, adults-only Halloween cocktail party, ditch the cute banana ghosts and focus entirely on a dark, moody aesthetic. Use only dark, rich fruits: blackberries, black mission figs cut in half to reveal their textured centers, dark red cherries, blood orange slices, pomegranate arils, and black grapes. Add sprigs of fresh rosemary or sage for a dark forest feel, and serve with a rich dark chocolate fondue.
- The Tropical Halloween Board: If you live in a warmer climate or just want to switch things up, skip the apples and lean into tropical flavors. Carve a small, hollowed-out pineapple to look like a jack-o’-lantern and place it right in the center of the tray. Surround it with mango slices, papaya, dragon fruit (which naturally looks exotic and slightly alien with its white flesh and black seeds), and kiwi.
- Nut-Free and Allergy-Safe: If you are bringing this platter to a school classroom or a public potluck, skip the peanut butter in the apple monster mouths entirely. Use sunflower seed butter, softened cream cheese, or even thick strawberry jam to act as the edible glue for the marshmallow teeth. Ensure your candy eyes and chocolate chips are explicitly labeled as manufactured in a nut-free facility.
What to Serve With It
While fresh, ripe fruit is wonderful on its own, adding a festive dip elevates the tray from a simple healthy snack to a proper, indulgent dessert experience. Here are three fantastic dips to serve alongside your Halloween fruit platter:
1. Fluffy Pumpkin Pie Dip
This creamy, sweet dip tastes exactly like a slice of pumpkin pie but only takes two minutes to whisk together.
- Ingredients: 1 block (8 ounces) softened cream cheese, 1 cup powdered sugar, 1 cup canned pumpkin puree (ensure it is pure pumpkin, not pie filling), 1 teaspoon vanilla extract, 1 teaspoon pumpkin pie spice.
- Instructions: In a medium bowl, beat the softened cream cheese and powdered sugar with an electric mixer until completely smooth. Add the pumpkin puree, vanilla, and spice, beating until light and fluffy. Serve chilled in a bowl at the center of your board. It pairs wonderfully with the green apples.
2. Spooky Spiderweb Chocolate Hummus
Dessert hummus is surprisingly delicious, rich, and pairs beautifully with strawberries, bananas, and mandarin oranges.
- Instructions: Buy a tub of high-quality store-bought chocolate hummus (or make your own). Spread it smoothly into a shallow, dark bowl. Take a few tablespoons of vanilla Greek yogurt or sour cream and place it in a small ziplock bag. Snip a tiny corner off the bag and pipe a spiderweb pattern (concentric circles, then drag a toothpick from the center outward) over the top of the chocolate hummus.
3. “Bloody” Berry Jam Dip
For a gross-out factor that kids absolutely love, this simple trick is highly effective.
- Instructions: Warm up 1/2 cup of seedless raspberry or strawberry jam in the microwave for about 15 seconds until it becomes slightly runny. Drizzle it heavily over a block of cream cheese, or serve it in a small bowl as a standalone dip for the banana ghosts and green apples. Its vibrant red color looks remarkably like edible fake blood.
Storage and Reheating
Fresh fruit trays are highly perishable and do best when assembled right before serving. Because this is a raw, fresh platter, there is no reheating involved. However, you can do plenty of prep work in advance and manage your leftovers effectively.
Make-Ahead Instructions: You can wash, dry, and sort all your berries and grapes up to two days in advance. Store them in airtight containers lined with dry paper towels in the refrigerator to absorb any excess moisture. You can also make your clementine pumpkins up to 24 hours in advance and keep them chilled. Do not cut your apples, bananas, or kiwis until the day of the event. Any cream cheese or hummus dips can be made 3 days in advance and kept in the fridge.
Storing Leftovers: If you have leftover fruit after the party concludes, dismantle the board immediately. Discard the banana ghosts and any fruit that has been directly covered in candy eyes, peanut butter, or marshmallows, as the sugars will melt and turn the fruit gummy in the fridge. Transfer the remaining plain, clean berries, grapes, and melon to an airtight container. Keep in the refrigerator at or below 40°F for up to 3 days.
Freezing Leftovers: If you have way too much leftover fruit to eat in a few days, do not let it go to waste! Toss the extra strawberries, blackberries, mango, and melon onto a parchment-lined baking sheet and freeze until solid (about 2 hours). Transfer the frozen fruit to a heavy-duty freezer-safe bag. They make fantastic, ice-cold additions to morning smoothies for the next three to four months.
Frequently Asked Questions
How far in advance can I make a Halloween fruit platter? You should aim to assemble the final board no more than 1 to 2 hours before your party starts. Bananas and apples oxidize quickly, and candy eyes will begin to melt or bleed their black colors if they sit on damp fruit for too long. You can prep and wash the whole berries a day ahead, but final assembly should happen the day of.
How do I keep my apples from turning brown on the tray? The most effective way is to submerge the freshly cut apple slices in a solution of 1 cup cold water and 1 tablespoon fresh lemon juice for 3 to 5 minutes. Drain them and pat them completely dry with a paper towel. The ascorbic acid in the lemon juice stops the enzymatic oxidation process.
What are the best fruits to buy on a tight budget? If you are making a large tray for a big crowd and need to keep grocery costs down, heavily rely on bananas, apples, and clementines. These are generally the cheapest, most abundant fruits available in October. Grapes and whole cantaloupes are also great, inexpensive bulk fillers. Use pricier items, like blackberries, raspberries, or kiwis, sparingly as visual accents rather than the main event.
Where do I find edible candy eyes? Candy eyes are readily available year-round in the baking and cake-decorating aisle of most major American grocery stores, usually located near the sprinkles and birthday candles. During October, you can also often find them in the seasonal Halloween aisle. Alternatively, they are easily ordered online in bulk.
Can I make this platter dairy-free or vegan? Absolutely! The fresh fruit itself is naturally completely vegan. Just be mindful of the chocolate chips you buy (opt for high-quality dark chocolate or specific dairy-free baking chips) and the marshmallows (look for gelatin-free vegan marshmallows, which are available at specialty stores or online). If making a dip, simply use a dairy-free cream cheese alternative or stick to the chocolate hummus.
How much fruit do I need to buy per person? A good rule of thumb for party planning is to estimate about 1/2 cup to 3/4 cup of cut fruit per guest, assuming there are other heavy appetizers and desserts available at the event. If the fruit tray is the primary snack being served, plan for about 1 to 1.5 cups of fruit per person.
My banana ghosts always get mushy on the board. What am I doing wrong? You are likely using bananas that are slightly too ripe, or you are cutting them too early in the day. Choose bananas that are uniformly yellow with just a hint of green at the tips. They should be very firm to the touch. Slice them at the very last possible second before guests arrive to keep them structured and pristine.
Final Thoughts
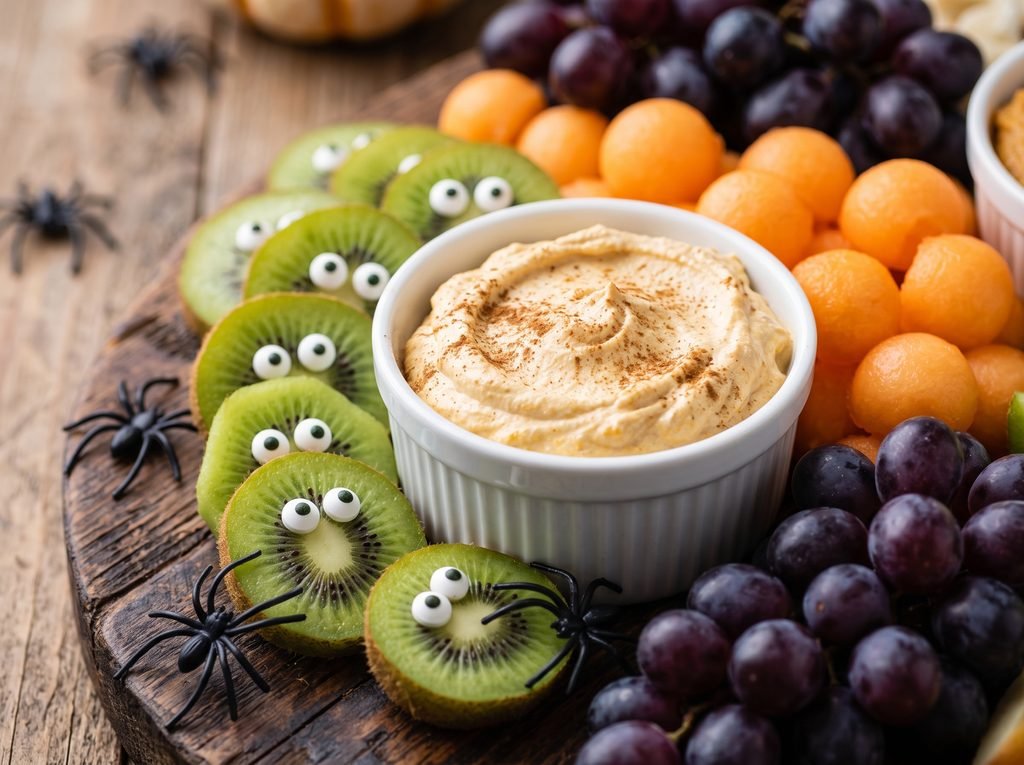
Creating a beautiful, festive Halloween fruit platter is one of the easiest, most visually impactful ways to celebrate the spooky season. It cuts right through the overwhelming sweetness of endless candy bars and heavy baked goods, offering a vibrant, interactive, and healthy alternative that guests of all ages will truly appreciate. Whether you lean into the goofy, kid-friendly banana ghosts or craft an elegant, dark berry platter with a sophisticated pumpkin pie dip, the creative possibilities are virtually endless.
The best part about this type of holiday entertaining is that it requires absolutely no baking, no complex culinary skills, and minimal cleanup. Just grab your favorite seasonal produce, enlist the kids or a friend to help add some silly candy eyes, and have fun building a centerpiece that is as deliciously fresh as it is frightening.